
My Epic Fail (And Finally Success) with Mummy Brownies
Okay, so I messed this up three times before getting it right. THREE TIMES. But hey, everyone keeps asking for this recipe after I finally nailed it at last week’s Halloween party, so here goes nothing.
Look, I’m gonna be honest with you—I’m not some fancy baker. I’m just a mom who wanted to make something cute for Halloween that wouldn’t have my kids bouncing off the walls with sugar overload. Well, okay, maybe a little sugar overload. It’s Halloween, right?
Table of Contents
How This Whole Mummy Brownie Thing Started
So I was scrolling through Pinterest at like 11 PM (don’t judge), and I saw these adorable mummy brownies. My first thought was “I can totally do this.” My second thought, after attempt number one turned into what looked like abstract art made of chocolate and frosting, was “Why do I do this to myself?”
The thing is, everyone makes these look so easy online. Just drizzle some white chocolate, add candy eyes, boom—you’ve got mummies. Reality check: it’s not that simple. At least not for me.
The Great Mummy Brownie Disasters of 2024
Attempt #1: Used regular white chocolate chips melted in the microwave. Disaster. Complete disaster. The chocolate seized up and turned into this weird, chunky mess that looked more like cottage cheese than mummy bandages.
Attempt #2: Tried using white frosting instead. Better, but I made it too thick and it just sat there like a blob. My 8-year-old looked at them and said, “Mom, these look like marshmallows with eyes.” Ouch.
Attempt #3: Finally figured out the secret (spoiler alert: it’s all about the consistency and technique).
Now, here’s the thing… I think the reason most people struggle with these mummy brownies is they overthink it. I know I did. You don’t need perfect bandage lines or symmetrical wrapping. Real mummies are messy, right? So embrace the chaos.
What You’ll Actually Need

For the Brownies:
- 1 box of your favorite brownie mix (I always use Duncan Hines because it never lets me down)
- Whatever the box calls for (usually eggs, oil, and water)
- OR if you’re feeling fancy, make them from scratch (recipe below, but honestly, box mix works fine)
For the “Bandages”:
- 12 oz white chocolate chips or white melting wafers (trust me, melting wafers work better)
- 2-3 tablespoons coconut oil or shortening
- Candy eyes (buy way more than you think you need—they’ll disappear)
From-Scratch Brownie Option (because I’m nice like that):
- 1/2 cup butter
- 2 oz unsweetened chocolate
- 1 cup sugar
- 2 eggs
- 1/2 cup flour
- 1/4 teaspoon salt
- 1 teaspoon vanilla
Actually, you know what? Just use the box mix. Life’s too short, and these are for Halloween, not a baking competition.
The Magic (Finally) Happens

Step 1: Make the Brownies
Preheat your oven to whatever the box says (usually 350°F). Line a 9×13 pan with parchment paper—and don’t skip this step because I learned the hard way that these suckers stick like crazy.
Mix up your brownies according to the box directions. I add an extra egg because I like them a little more cake-like, but that’s totally optional. Pour into your pan and bake until a toothpick comes out with just a few moist crumbs. Don’t overbake—dry brownies make sad mummies.
Let them cool COMPLETELY. Like, wait at least an hour. I know it’s torture, but warm brownies and melted chocolate don’t play nice together.
Step 2: Cut Into Rectangles
Cut your brownies into rectangles about 2×3 inches. They don’t have to be perfect—mummies come in all shapes and sizes, right?
Here’s where I got creative after my failures: I actually trimmed the edges to make them more coffin-shaped. Totally not necessary, but it makes them look more… mummy-ish? Plus, you get to eat the scraps. Win-win.
Step 3: The Bandage Magic
This is where I almost gave up three times, but I finally cracked the code.
Melt your white chocolate with the coconut oil in 30-second intervals in the microwave, stirring between each interval. The coconut oil is KEY—it makes the chocolate smooth and pipeable. Without it, you get chunky disaster chocolate (see attempt #1).
The consistency should be like thick honey. If it’s too thick, add more oil. Too thin? Let it cool for a minute.
Transfer the melted chocolate to a squeeze bottle or a ziplock bag with the corner snipped off. And here’s the secret I wish someone had told me earlier: don’t try to make perfect parallel lines.
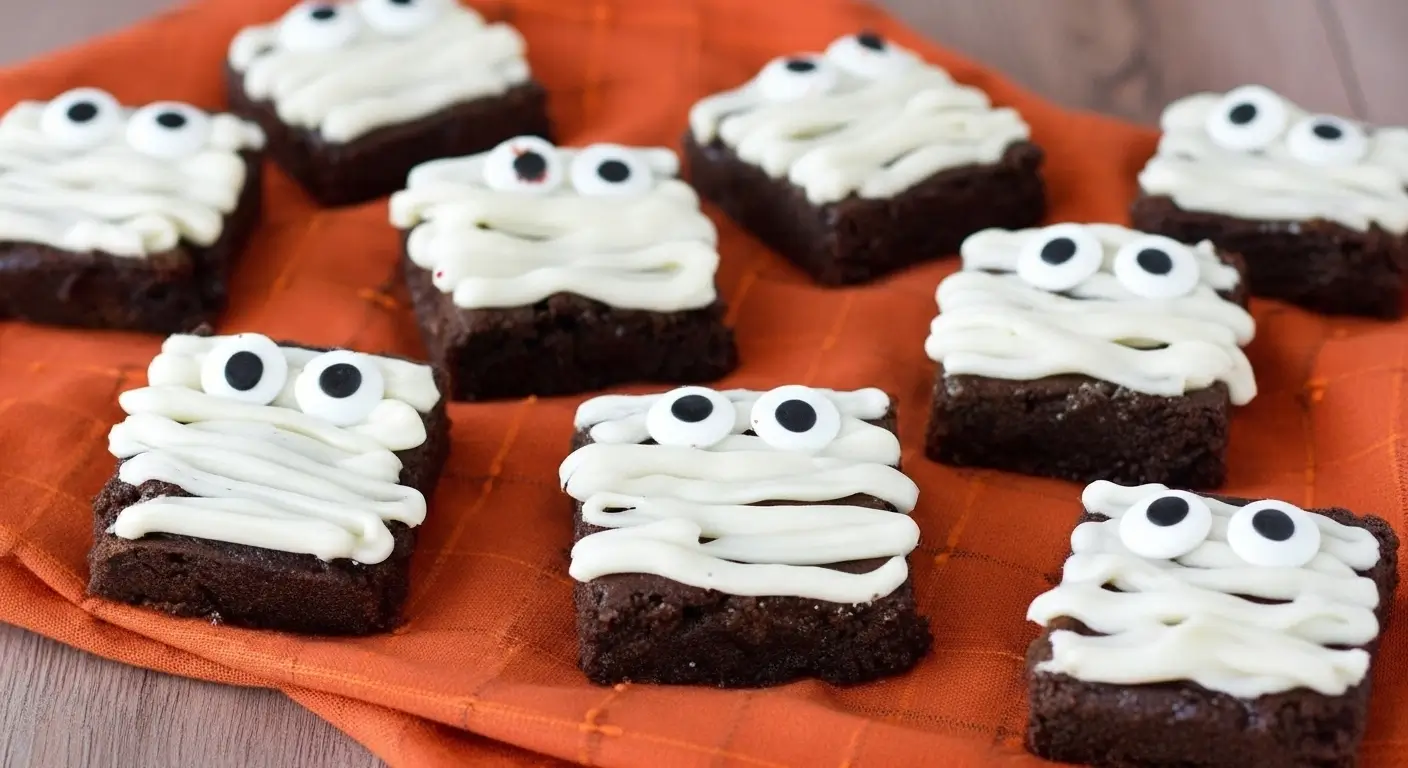
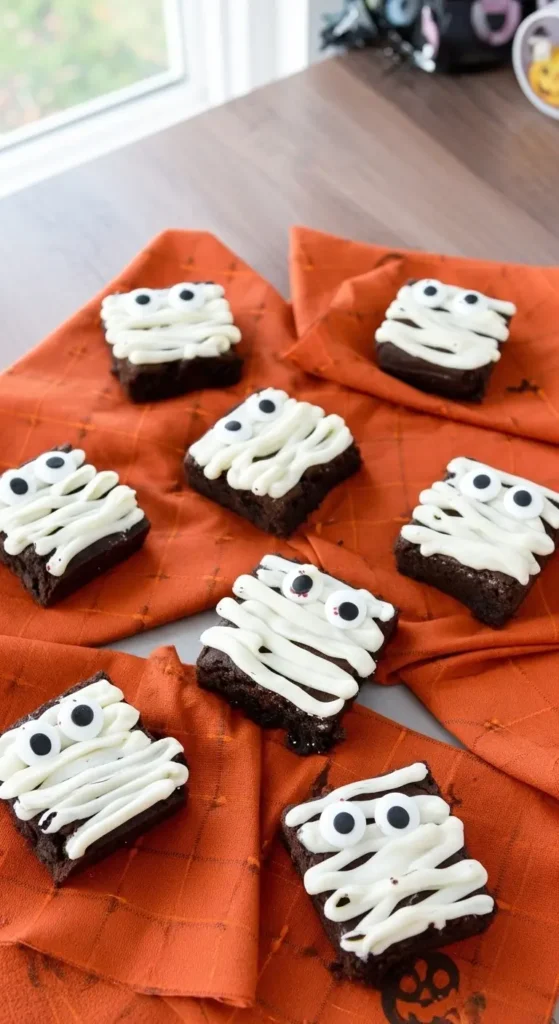
Start at one end of your brownie and drizzle back and forth in a random, messy pattern. Leave gaps—that’s what makes them look like bandages, not frosting decoration. The key is to make it look wrapped, not piped.
Step 4: The Eyes Have It
While the chocolate is still wet (work fast here), place two candy eyes on each brownie. Don’t overthink the placement—wonky eyes actually make them look more character-filled.
Pro tip: Buy the candy eyes in bulk. My kids kept “testing” them, and I ran out halfway through decorating. Had to make an emergency grocery store run at 8 PM. Fun times.
The Things Nobody Tells You
Timing is everything. The white chocolate starts to set pretty quickly, so work on 3-4 brownies at a time. Don’t try to assembly-line the whole batch because you’ll end up with chocolate that’s too firm to stick the eyes properly.
Room temperature matters. If your kitchen is hot (like mine was during that October heat wave), the chocolate will take forever to set. If it’s cold, it’ll set too fast. Room temp is your friend.
Less is more. I used to go crazy with the bandages, trying to cover every inch. But the best-looking ones have some brownie showing through—it looks more authentic.
Real Talk: What Went Wrong and What Actually Works
Look, I’m not gonna sugarcoat this (pun intended). These take patience. My first batch looked like someone sneezed white chocolate on brownies. My second batch was better but still looked homemade in a “bless her heart” kind of way.
But you know what? My kids didn’t care. My neighbors didn’t care. Everyone just thought they were adorable and asked for the recipe. Sometimes good enough is good enough.
The trick I finally figured out is to embrace the imperfection. Real mummy wrappings aren’t neat and tidy. They’re loose, overlapping, and a little chaotic. Once I stopped trying to make them look like the Pinterest photos and started making them look like actual mummy bandages, everything clicked.
Storage and Make-Ahead Tips
These actually keep pretty well. I store them in an airtight container for up to a week. The white chocolate stays nice and firm, and the brownies stay moist.
You can make the brownies a day ahead and decorate them the day you need them. Just don’t store them in the fridge—the condensation when you bring them back to room temperature makes the chocolate look weird.
Variations That Actually Work
Mini mummy brownies: Use a mini muffin tin and bake brownie bites. Same decorating technique, but they’re perfect for parties where people want smaller portions. (Who are these people? I don’t understand them, but they exist.)
Different “bandage” colors: I tried green food coloring in the white chocolate once to make “moldy” mummies. Kids loved it. Adults were… less enthusiastic.
Add some spice: A tiny pinch of cinnamon in the brownie batter gives them a subtle warm flavor that’s perfect for fall. Not enough to taste, just enough to make people go “hmm, what is that?”
The Real Secret Nobody Talks About
Want to know the truth? The secret to great mummy brownies isn’t perfect technique or fancy ingredients. It’s confidence. Once I stopped worrying about them looking exactly like the pictures and started having fun with it, they turned out way better.
My kids now request these every year. Not because they’re Pinterest-perfect, but because they’re ours. They remember me getting chocolate all over the kitchen counter and cursing under my breath when the eyes wouldn’t stick right. They remember helping me position the wonky candy eyes and declaring each brownie “the best one yet.”
Final Thoughts (And Why I’m Sharing This Recipe)
These mummy brownies aren’t the fanciest dessert you’ll ever make. They’re not going to win any baking contests. But they’re fun, they’re festive, and they taste amazing. Plus, they give you a great story about perseverance in the face of chocolate-related adversity.
If I can make these without completely losing my mind (okay, I lost it a little bit during attempt #2), anyone can. Just remember: embrace the chaos, work with room-temperature everything, and buy extra candy eyes.
Now I’m craving brownies again. Thanks a lot, brain.
Happy Halloween baking! (And may your white chocolate cooperate better than mine did)
P.S. – Seriously, let me know how yours turn out! I’m always curious to see other people’s mummy creations. And if you come up with any genius tips I missed, please share them because I’m still learning too.

I’ve always found peace in the kitchen—it’s where I go to unwind, experiment, and reconnect. I started this blog because I wanted to share that feeling with others. My cooking journey started in a tiny apartment kitchen, with a second-hand skillet and a lot of trial and error.
Since then, I’ve learned that the best meals aren’t the most complicated—they’re the ones made with love (and maybe a little butter). Whether you’re a beginner or a kitchen pro, I hope you’ll feel right at home here.