

Air Fryer Buffalo Cauliflower Recipe That Actually Works (Trust Me, I’ve Failed Before)
Okay, so I messed this up at least four times before getting it right. And I’m gonna be honest – the first attempt was basically soggy orange mush that even my dog wouldn’t touch. But here’s the thing… once I figured out the secret (spoiler: it’s all about the coating technique), this became our family’s go-to healthy dinner side that even my picky 8-year-old devours.
Look, I’m not usually one to jump on food trends, but when my neighbor Sarah mentioned she’d been making buffalo cauliflower in her air fryer, I got curious. Plus, I had this massive head of cauliflower sitting in my fridge giving me the guilt trip every time I opened the door. You know the feeling, right?
Table of Contents
Why This Air Fryer Buffalo Cauliflower Recipe Actually Works
Here’s what I learned after multiple kitchen disasters: most recipes online are just wrong about the technique. They tell you to toss everything together and hope for the best. But the real secret? You gotta double-coat this stuff, and the timing is everything.
My first few attempts were either burnt on the outside and raw inside, or perfectly cooked but with zero crunch. Disaster. Complete disaster. But then I remembered something my mom always said about coating chicken – “if it’s worth doing, it’s worth doing twice.”
Turns out, she was onto something.
What Makes This Buffalo Cauliflower Recipe Different
I think… no, I know this works better when you treat the cauliflower like it’s precious. None of that “dump and pray” method. We’re talking about a proper two-step coating process that creates this amazing crispy exterior while keeping the inside tender.
And before you ask – yes, this is way healthier than traditional buffalo wings. My husband actually prefers these now, which is saying something because that man would eat buffalo sauce on cardboard if I let him.
Ingredients for Air Fryer Buffalo Cauliflower Recipe
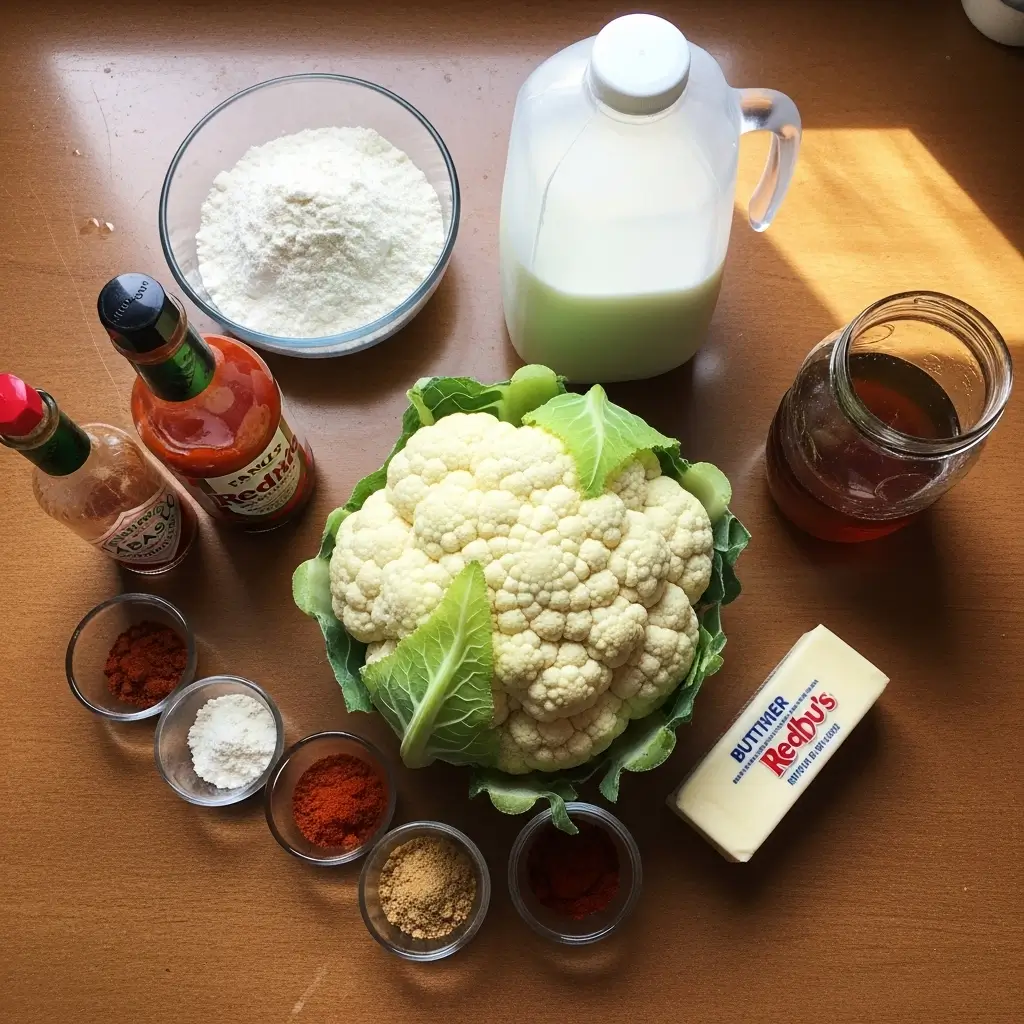
Shopping tip: Don’t buy pre-cut cauliflower florets. Just don’t. They’re expensive and usually not fresh. Get a whole head and cut it yourself – takes like 3 minutes, and you’ll save money.
For the cauliflower:
- 1 large head cauliflower (about 2-2.5 lbs)
- 1/2 cup all-purpose flour
- 1/2 cup water
- 1/2 cup unsweetened almond milk (or regular milk, whatever you have)
- 1 teaspoon garlic powder
- 1 teaspoon onion powder
- 1/2 teaspoon paprika
- 1/2 teaspoon salt
- 1/4 teaspoon black pepper
For the buffalo sauce coating:
- 1/3 cup Frank’s RedHot sauce (trust me, don’t substitute)
- 2 tablespoons melted butter
- 1 tablespoon honey (cuts the heat just enough)
- 1/2 teaspoon garlic powder
For serving (totally optional but recommended):
- Ranch or blue cheese dressing
- Celery sticks
- Extra buffalo sauce for the brave souls
Actually, you know what? I always double the buffalo sauce recipe because we go through it like crazy. My kids dip everything in it now – carrots, crackers, probably their fingers when I’m not looking.
How to Make Air Fryer Buffalo Cauliflower Recipe

Step 1: Prep Your Cauliflower (Don’t Skip This!)
Cut your cauliflower into bite-sized florets. And I mean bite-sized – not chunks that require a steak knife to eat. I learned this the hard way when my mother-in-law visited and spent five minutes trying to politely tackle a massive floret with her fork.
Rinse them and pat completely dry. Seriously, completely. Water is the enemy of crispiness, and we’ve come too far to mess this up now.
Step 2: Make the Batter (This is Where Magic Happens)
In a large bowl, whisk together flour, water, almond milk, and all the seasonings. It should look like pancake batter – not too thick, not too thin. If it’s too thick, add a splash more liquid. Too thin? More flour.
The key is—oh wait, I forgot to mention—you need to preheat your air fryer to 375°F first. I always forget this step and then stand there tapping my foot like an impatient toddler.
Step 3: First Coating Round
Dip each cauliflower floret in the batter, making sure it’s completely coated. Let excess drip off, then place in your air fryer basket. Don’t overcrowd! I know it’s tempting, but overcrowding leads to uneven cooking and we’re not doing that again.
Cook for 12 minutes at 375°F, flipping halfway through. They’ll look pale and honestly not that exciting yet. That’s normal.
Step 4: Buffalo Sauce Time (The Best Part)
While the cauliflower is doing its first round, mix your buffalo sauce ingredients in a bowl. Taste it. Adjust if needed. I usually end up adding a bit more honey because I’m a weakling when it comes to heat.
Step 5: Second Coating (Trust the Process)
Here’s where the magic happens. Take those partially cooked florets and toss them in the buffalo sauce mixture. Every piece should be gloriously orange and dripping with goodness.
Back into the air fryer they go for another 8-10 minutes at 375°F. This time, they’ll come out golden, crispy, and smelling like heaven.

Pro Tips from Someone Who’s Made Every Mistake Possible
Don’t use a whisk for the buffalo sauce. Trust me. Spoon works better and won’t create weird foam bubbles that nobody wants.
If you burn the bottom (been there), just scrape it off and keep going. It happens to the best of us.
Make extra. Seriously. I thought one head of cauliflower would feed our family of four with leftovers. Wrong. It disappeared in about 10 minutes, and everyone was asking when I’d make it again.
Timing tip: Set timer for the recommended time, then inevitably forget and panic when you smell something. It’s basically a rite of passage at this point.
Air Fryer Buffalo Cauliflower Recipe Variations
Look, I’m all for following recipes exactly the first time, but once you’ve got this down, feel free to experiment. I’ve tried:
- BBQ sauce instead of buffalo (kids loved it)
- Adding parmesan cheese to the batter (fancy!)
- Using Greek yogurt instead of milk when I ran out (worked fine, maybe even better?)
- Extra garlic because I’m obsessed with garlic and use way more than any recipe calls for
Speaking of garlic, did you know it still makes me cry even when I wear sunglasses while chopping? Weird, right?
What to Serve with Buffalo Cauliflower
This pairs perfectly with basically anything, but here are some favorites from our dinner rotation:
- Grilled chicken (for the meat-eaters in the family)
- A simple green salad (to pretend we’re being healthy)
- Sweet potato fries (because why not double down on the air fryer?)
- Rice or quinoa if you want to make it more filling
My neighbor swears by serving it over nachos, which honestly sounds amazing but also like something that would put me in a food coma.
Storage and Reheating (If You Have Leftovers)
Ha! Leftovers. That’s a good one. But on the rare occasion there are some left, store them in the fridge for up to 3 days. Reheat in the air fryer for 3-4 minutes to get that crispiness back.
Don’t microwave them unless you enjoy soggy disappointment.
Why Kids (Surprisingly) Love This Air Fryer Buffalo Cauliflower Recipe
I was shocked when my kids asked for seconds. Then thirds. Turns out, the combination of crispy coating and mild buffalo flavor (thanks to that honey!) hits the sweet spot between adventurous and familiar.
My 8-year-old refuses to eat anything green, but somehow loves this orange-coated vegetable. Kids are weird, but I’m not questioning it.
The Honest Truth About This Recipe
It’s not fancy, and it definitely doesn’t look like those perfect food blog photos with the perfect lighting and strategically placed props. But it’s good – really good – and that’s what matters.
This is one of those recipes that makes you feel like you’ve got your life together, even when you’re eating it while standing in the kitchen because you forgot to set the table. Again.
Final Thoughts on Air Fryer Buffalo Cauliflower
Everyone keeps asking for this recipe, so I guess I did something right. It’s become our go-to for game day, family dinners, or just when I want something that tastes indulgent but won’t make me feel guilty afterward.
And hey, if I can make this without burning down my kitchen (which has happened… not with this recipe, thankfully), anyone can.
Seriously, try this and tell me what you think. Let me know how yours turns out, and if you come up with any brilliant variations, share them! I’m always looking for new ways to trick my family into eating vegetables.
Happy cooking! (And may your smoke alarms stay quiet) 🔥
Air Fryer Buffalo Cauliflower Recipe
Learn how to make crispy Air Fryer Buffalo Cauliflower Recipe that actually works! This healthy, easy dinner side dish will fool your family into loving vegetables with a perfect crispy coating and spicy buffalo flavor.
Ingredients
- 1 large head cauliflower (about 2-2.5 lbs)
- 1/2 cup all-purpose flour
- 1/2 cup water
- 1/2 cup unsweetened almond milk
- 1 teaspoon garlic powder
- 1 teaspoon onion powder
- 1/2 teaspoon paprika
- 1/2 teaspoon salt
- 1/4 teaspoon black pepper
- 1/3 cup Frank's RedHot sauce
- 2 tablespoons melted butter
- 1 tablespoon honey
- 1/2 teaspoon garlic powder (for sauce)
Instructions
-
Step 1Cut cauliflower into bite-sized florets. Rinse and pat completely dry. Preheat air fryer to 375°F.
-
Step 2In a large bowl, whisk together flour, water, almond milk, garlic powder, onion powder, paprika, salt, and black pepper until smooth like pancake batter.
-
Step 3Dip each cauliflower floret in batter, coating completely. Let excess drip off and place in air fryer basket without overcrowding.
-
Step 4Air fry for 12 minutes at 375°F, flipping halfway through.
-
Step 5While cauliflower cooks, mix Frank's RedHot sauce, melted butter, honey, and garlic powder in a bowl.
-
Step 6Remove partially cooked cauliflower and toss in buffalo sauce mixture until all pieces are coated.
-
Step 7Return sauced cauliflower to air fryer and cook for 8-10 minutes at 375°F until golden and crispy.
-
Step 8Serve immediately while hot and crispy with ranch or blue cheese dressing and celery sticks if desired.

I’ve always found peace in the kitchen—it’s where I go to unwind, experiment, and reconnect. I started this blog because I wanted to share that feeling with others. My cooking journey started in a tiny apartment kitchen, with a second-hand skillet and a lot of trial and error.
Since then, I’ve learned that the best meals aren’t the most complicated—they’re the ones made with love (and maybe a little butter). Whether you’re a beginner or a kitchen pro, I hope you’ll feel right at home here.