
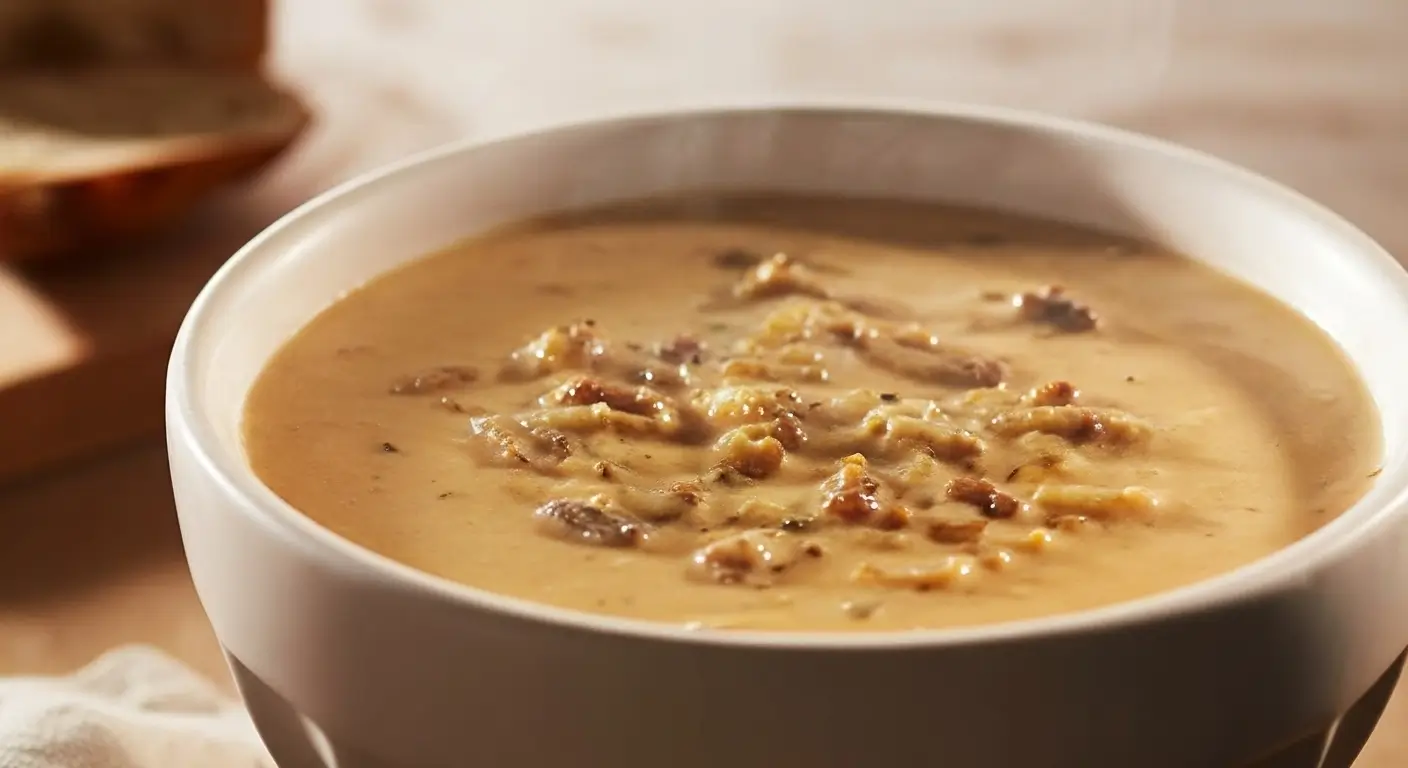
The Caramelized Onion and Mushroom Soup That Finally Worked (After 4 Epic Fails)
Okay, so here’s the thing. Everyone keeps asking me for this caramelized onion and mushroom soup recipe, and I’ve been putting it off because honestly? I messed this up SO many times before getting it right. Like, we’re talking burnt onions, watery broth, and one particularly memorable disaster where I somehow managed to make it taste like cardboard. Fun times.
But last week, my neighbor Janet tried it and literally asked if I was secretly a chef. Which made me laugh because just the day before, I’d burned toast. Anyway, she convinced me to finally write this down before I forget the magic combination that actually works.
Table of Contents
How This Whole Thing Started (Spoiler: It Was Desperation)
I think I got the idea from my mom… or maybe it was one of those Pinterest deep-dives at 2 AM? Honestly can’t remember. What I DO remember is being completely broke after Christmas and having nothing in my fridge except some sad onions, random mushrooms, and that carton of vegetable broth I bought with good intentions three weeks earlier.
The first attempt? Disaster. Complete disaster.
I thought I was being smart, trying to rush the caramelization process. Twenty minutes later, I had what looked like onion charcoal floating in brown water. My 8-year-old took one look and said, “Mom, that smells like burnt sadness.” Kids. They really know how to keep you humble.
But you know what? Sometimes the best recipes come from desperation and stubbornness. And trust me, I was both.
What You’ll Actually Need (And Some Shopping Reality)
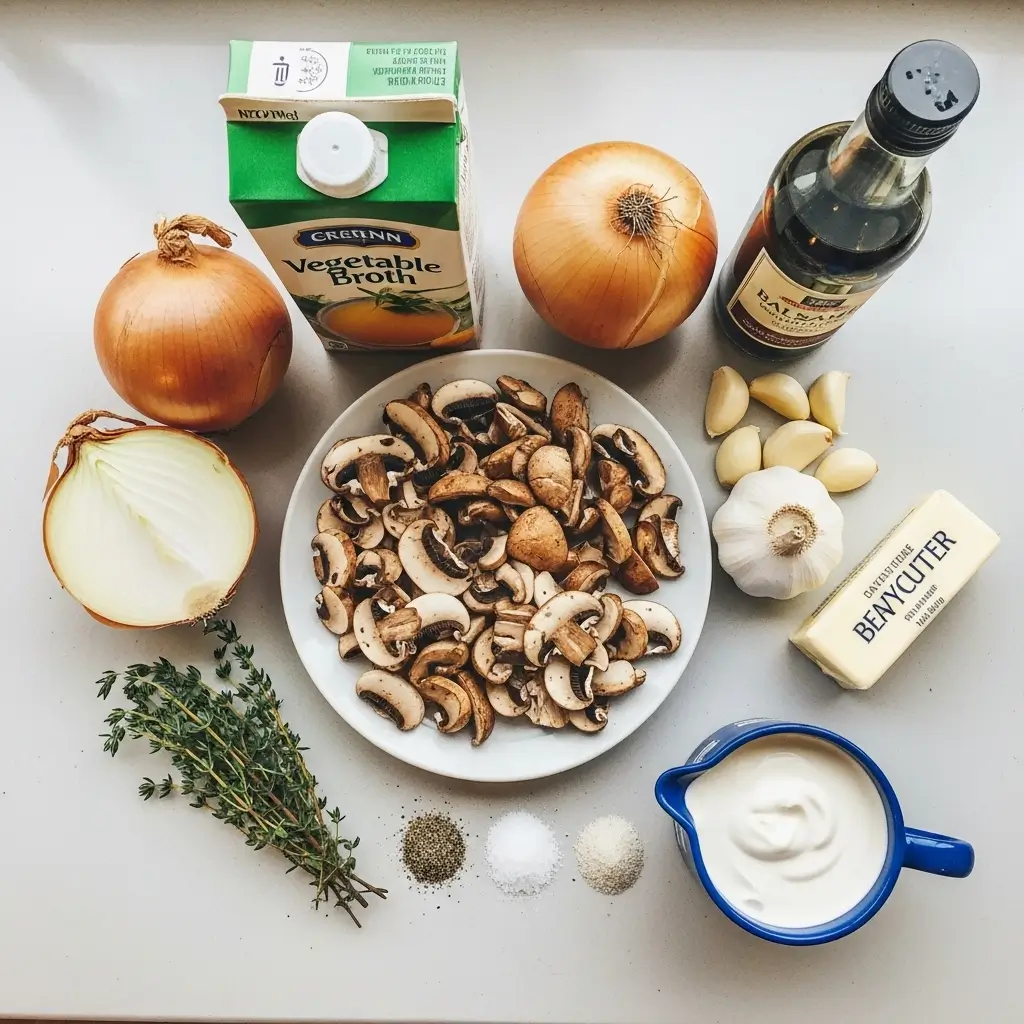
Look, I’m gonna be honest with you about the ingredients. Some recipe blogs act like you can just magically find perfect everything at any grocery store. Real life doesn’t work that way.
The Onion Situation:
- 4 large yellow onions (good luck finding decent ones this time of year, but work with what you’ve got)
- Don’t even think about using those pre-chopped onions from the bag. Just don’t. They’re weird and watery and will make your soup taste like regret
Mushroom Drama:
- 1 pound mixed mushrooms (I use whatever’s on sale – usually baby bellas, some shiitakes if I’m feeling fancy, maybe some regular button mushrooms)
- Sometimes I throw in those fancy oyster mushrooms if they don’t look too scary
The Foundation:
- 6 cups vegetable broth (or chicken broth if you’re not vegetarian like my sister)
- I always use the good stuff in the carton, not the bouillon cubes. Learned that lesson the hard way
Fat and Flavor:
- 3 tablespoons butter (real butter, not that fake stuff)
- 2 tablespoons olive oil
- 4 cloves garlic, minced (I’m obsessed with garlic, so I actually use like 6 cloves)
The Magic Makers:
- 2 tablespoons balsamic vinegar (this is the secret weapon, I swear)
- 1 tablespoon brown sugar (trust me on this one)
- 1 teaspoon fresh thyme (or 1/2 teaspoon dried if fresh herbs aren’t happening in your life right now)
- Salt and pepper to taste
- 1/2 cup heavy cream (optional, but like, why would you skip it?)
Random But Important:
- 1/4 cup dry white wine (or just use more broth if you don’t have wine. I once used the remnants of a bottle of Chardonnay that had been open for a week. Worked fine)
The Process (AKA How Not to Burn Everything)
Step 1: The Great Onion Prep
First things first – slice those onions. And I mean SLICE them, not dice them. We want long, thin strips that’ll get all jammy and caramelized. This is where I put on my lucky apron (the one with the coffee stain that I can never get out) and maybe open a window because onions make me cry even through sunglasses. Weird, right?
Pro tip I learned from failure: Have everything else prepped before you start the onions. Because once you start caramelizing, you can’t really stop to chop mushrooms without risking burnt onion disaster.
Step 2: The Mushroom Situation
Clean and slice your mushrooms. Don’t wash them under running water like I used to do – they get all soggy and weird. Just brush off any dirt with a paper towel. My neighbor Sarah swears by using a soft brush, but honestly, paper towels work fine.
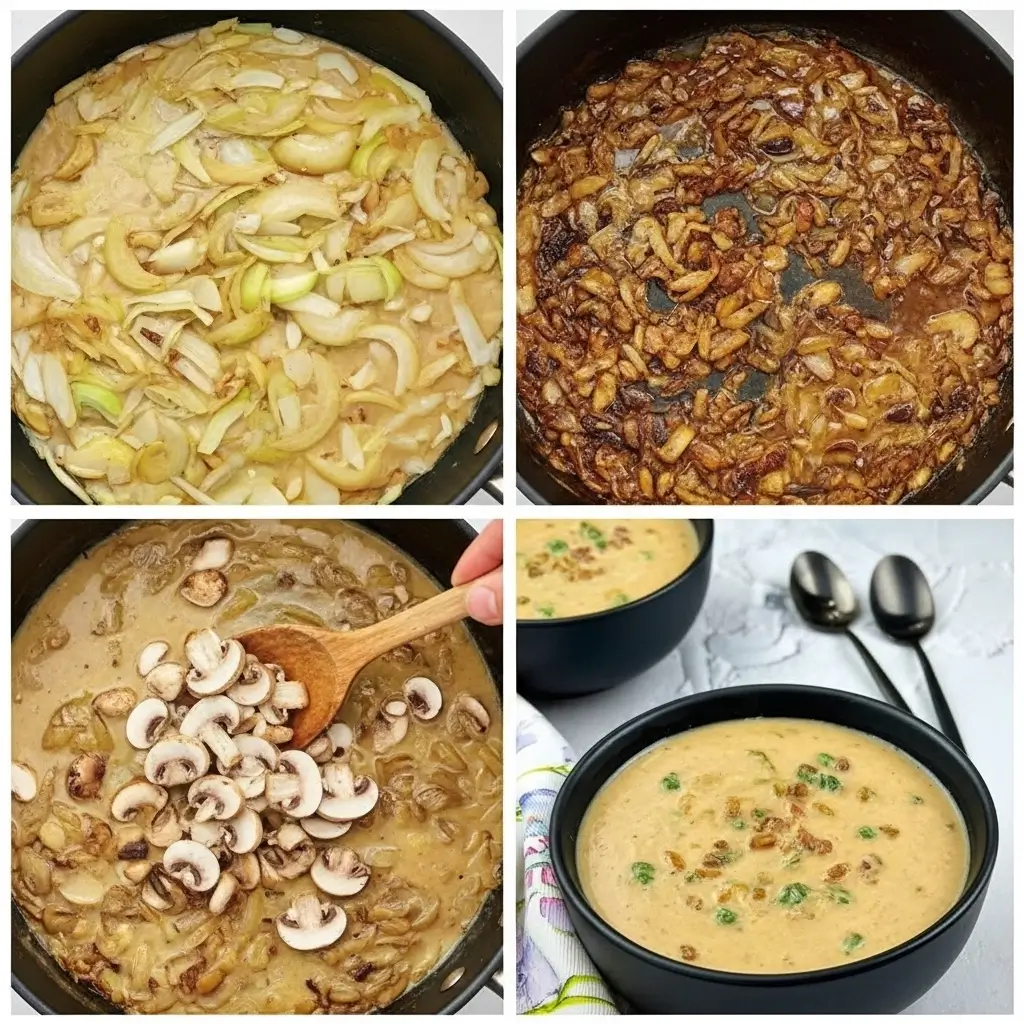
Step 3: The Caramelization Magic (Don’t Rush This Part)
Here’s where patience becomes your best friend. Heat that butter and olive oil in a large pot over medium-low heat. MEDIUM-LOW. I cannot stress this enough. I know it seems like it’s taking forever, but rushing this is how you end up with burnt onion water instead of soup.
Add all those sliced onions to the pot. They’ll look like way too much at first. That’s normal. Sprinkle with a little salt – this helps them release their moisture.
Now comes the hard part: waiting. Stir occasionally and let them do their thing. It takes about 30-40 minutes for proper caramelization. I usually set a timer for 10 minutes, then inevitably forget and panic at 15, but somehow it always works out.
The onions will go through stages: first they’ll look raw and white, then they’ll start to soften and turn translucent, then they’ll slowly start turning golden, and finally they’ll reach that beautiful deep caramel color. It’s like watching a very slow, delicious transformation.
Step 4: Mushroom Time
Once your onions are properly caramelized (and you’ve resisted the urge to rush them), push them to one side of the pot and add the mushrooms to the empty space. Let them cook for about 5-7 minutes until they release their moisture and start browning.
Mix the mushrooms with the onions and add the minced garlic. Cook for another 2 minutes until everything smells amazing and your kitchen feels like a fancy restaurant.
Step 5: The Flavor Builders
This is where the magic happens. Add that balsamic vinegar and brown sugar. It’ll sizzle and smell incredible. Stir everything together and let it cook for another 2-3 minutes.
If you’re using wine, add it now and let it cook off for a minute or two. Then add the broth and thyme.
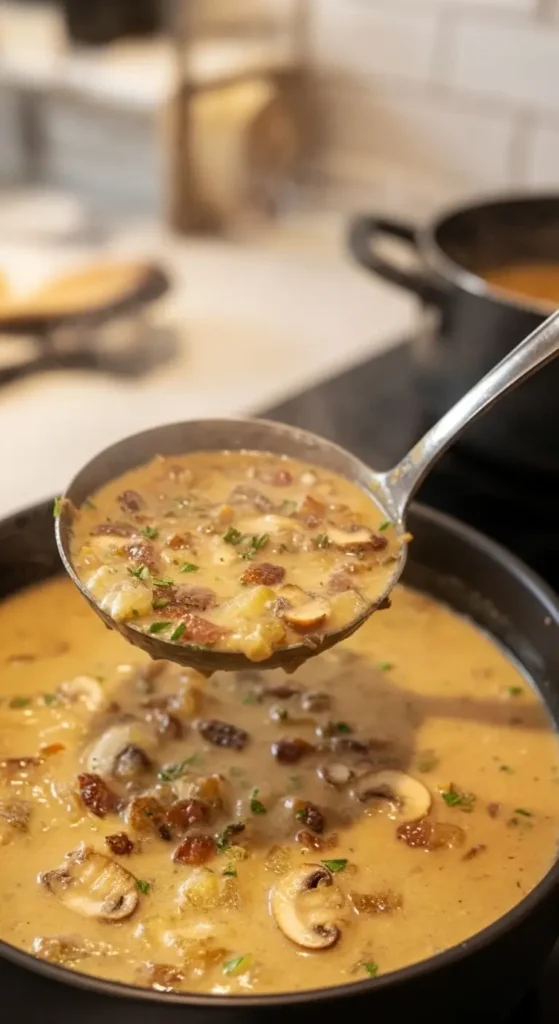
Step 6: The Simmer and Wait
Bring everything to a boil, then reduce heat and let it simmer for about 20 minutes. This is when you can finally relax a little and maybe clean up the onion massacre on your cutting board.
Taste and season with salt and pepper. And I mean really taste it – don’t just guess. I always under-salt the first time and wonder why it tastes bland.
Step 7: The Cream Decision
Here’s where you can choose your own adventure. If you want it creamy, stir in that heavy cream and let it heat through. If you want to keep it lighter, skip the cream. Both ways are good, but honestly, the cream makes it feel more like a hug in a bowl.
The Things I Learned the Hard Way
Temperature control is everything. I used to crank up the heat thinking it would save time. Spoiler alert: it doesn’t. It just burns things and makes you sad.
Good broth matters. I tried making this with those bouillon cubes once and it tasted like salty sadness. Spend the extra two dollars on decent broth. Your taste buds will thank you.
The balsamic vinegar is not optional. I know it seems random, but it adds this depth of flavor that makes people ask “what’s your secret ingredient?” This is it.
Make extra. This soup is somehow even better the next day. The flavors just keep getting better. I always make a double batch now.
Serving Suggestions from Real Life
I usually serve this with some crusty bread (store-bought is fine, we’re not running a bakery here) and maybe a simple salad. My kids eat it with goldfish crackers floating on top, which sounds horrifying but they’re happy, so whatever.
It’s also really good with a grilled cheese sandwich for the ultimate comfort food combo. And if you’re feeling fancy, sprinkle some fresh herbs on top before serving.
When Things Go Wrong (Because They Will)
Burnt the bottom? Been there. Just scrape off what you can and keep going. Don’t stir the burnt bits back in, but the soup can still be saved.
Too watery? Let it simmer longer with the lid off. Or mix a tablespoon of cornstarch with cold water and stir it in.
Too thick? Add more broth. Easy fix.
Tastes bland? More salt. Seriously. It’s almost always not enough salt.
The Real Talk Section
This isn’t the fanciest soup in the world. It’s not going to win any culinary awards. But it’s good, it’s comforting, and it makes your house smell amazing while you’re making it.
The caramelized onion and mushroom soup has become my go-to when people are sick, sad, or it’s just one of those days. My mom always said food is love, and this feels like exactly that.
Is it fancy? No. Is it delicious? Absolutely. Will people ask for the recipe? They already are, which is why I’m finally writing this down.
Final Thoughts (And a Small Confession)
I’ve made this soup probably twenty times since I finally got it right, and it’s slightly different every time. Sometimes I use different mushrooms, sometimes I add a splash of sherry instead of wine, sometimes I forget the thyme entirely and it’s still good.
That’s the thing about cooking – it doesn’t have to be perfect to be perfect, if that makes sense.
So try this recipe, mess it up, make it your own. Let me know how yours turns out! Seriously, I’m curious if anyone else has discovered any secret tricks that make it even better.
Happy cooking! (And may your smoke alarms stay quiet and your onions caramelize perfectly.)
If this recipe added a fresh twist to your table, why stop here? I’ve got a whole collection of vibrant sides that are just as easy and delicious. Take a peek at more of my favorite side dishes Here
Makes about 6 servings. Prep time: 20 minutes. Cooking time: 1 hour (mostly just waiting around). Total time: 1 hour 20 minutes.

I’ve always found peace in the kitchen—it’s where I go to unwind, experiment, and reconnect. I started this blog because I wanted to share that feeling with others. My cooking journey started in a tiny apartment kitchen, with a second-hand skillet and a lot of trial and error.
Since then, I’ve learned that the best meals aren’t the most complicated—they’re the ones made with love (and maybe a little butter). Whether you’re a beginner or a kitchen pro, I hope you’ll feel right at home here.