
Fruity Pebbles Cheesecake Tacos: The Dessert That Made My Kids Think I’m Magic
Last month, my daughter came home from a sleepover absolutely raving about something called “cheesecake tacos” that her friend’s mom had made. She was practically bouncing off the walls describing these colorful, crunchy shells filled with creamy cheesecake and topped with cereal. I’ll be honest – my first thought was “that sounds like pure chaos.” But then I saw the look in her eyes, and I knew I had to figure out how to make them.
Three kitchen experiments later (and yes, I definitely had some epic fails along the way), I’ve perfected these Fruity Pebbles cheesecake tacos that are now the most requested dessert in our house. They’re basically everything a kid dreams about – crunchy, colorful, sweet, and completely over-the-top in the best possible way.
Table of Contents
Why You’ll Love This Recipe
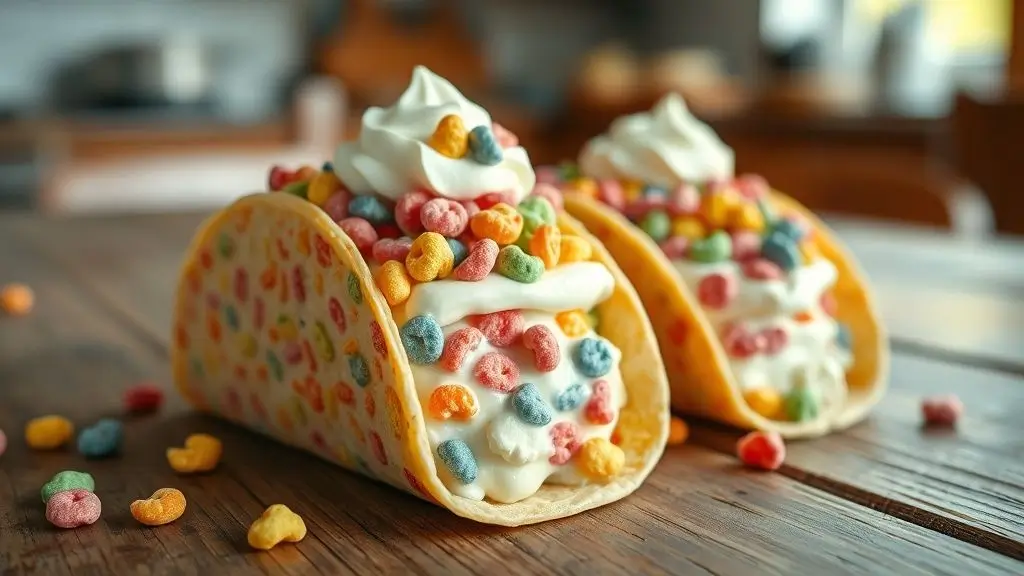
These cheesecake tacos are the perfect collision of nostalgic breakfast cereal and elegant dessert. The taco shells are made from melted white chocolate mixed with crushed Fruity Pebbles, creating this incredible crunch that gives way to silky smooth no-bake cheesecake filling. It’s like eating a rainbow – literally.
What I love most about this recipe is how it brings out the kid in everyone. I’ve served these at adult dinner parties, and suddenly everyone’s giggling and taking photos. There’s something about eating dessert out of a colorful cereal taco shell that just makes people happy.
They’re also surprisingly easy once you get the hang of the technique. No baking required for the filling, and the shells come together in about 15 minutes. The hardest part is waiting for everything to set properly – but trust me, it’s worth the patience.
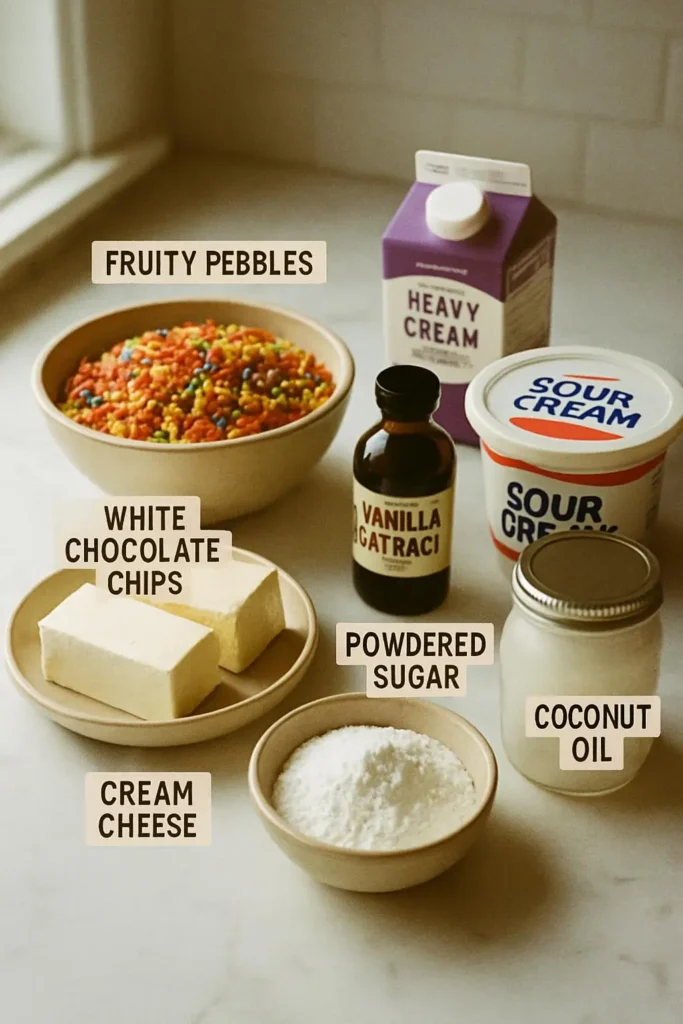
What You’ll Need
For the Fruity Pebbles Taco Shells:
- 2 cups white chocolate chips – I always use good quality chips here because they melt smoother
- 3 cups Fruity Pebbles cereal – plus extra for topping
- 2 tablespoons coconut oil – helps the chocolate stay smooth and shiny
For the No-Bake Cheesecake Filling:
- 16 oz cream cheese, softened – this is crucial; cold cream cheese will give you lumps
- 1 cup powdered sugar – sifted to avoid any grittiness
- 1 teaspoon vanilla extract – the real stuff makes a difference
- 1 cup heavy whipping cream – cold from the fridge
- 1/4 cup sour cream – adds that perfect tangy balance
For Assembly:
- Extra Fruity Pebbles – for sprinkling on top
- Whipped cream – optional but highly recommended
- Rainbow sprinkles – because why not go all out?
Let’s Make It
Step 1: Prepare Your Workspace
First things first – clear some space in your fridge because you’re going to need it. I learned this the hard way when I had nowhere to put my first batch of shells to set. Also, line a baking sheet with parchment paper and have a muffin tin ready. You’ll use the muffin tin to shape your taco shells.
Step 2: Make the Taco Shells
Here’s where things get fun. Melt your white chocolate chips with the coconut oil in a microwave-safe bowl, heating in 30-second intervals and stirring between each one. Don’t rush this part – burnt chocolate is not salvageable, and I’ve definitely been there.
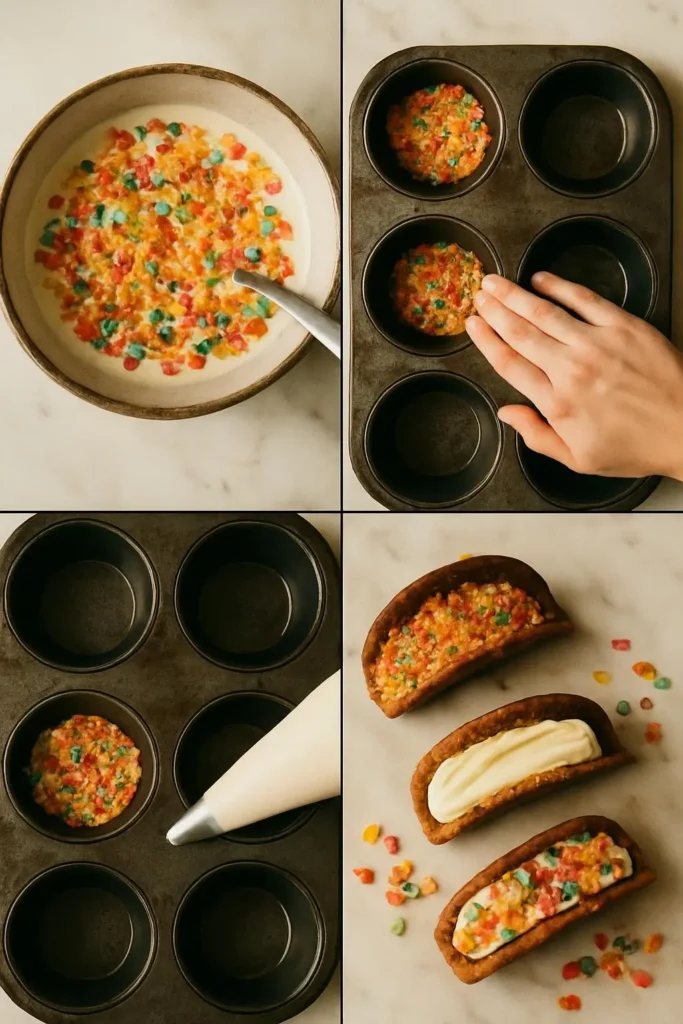
Once your chocolate is perfectly smooth, let it cool for about 2 minutes, then fold in 2 cups of the Fruity Pebbles. You want to coat every piece of cereal, but don’t crush them too much. The crunch is what makes these special.
Now comes the tricky part that took me a few tries to master. Working quickly (the chocolate sets fast), spoon the mixture into your muffin tin cups, pressing it up the sides to form taco shell shapes. I use the back of a small spoon to really pack it in there. Don’t worry if they’re not perfect – rustic is charming.
Pop these into the fridge for at least 30 minutes. I usually make them first thing and let them chill while I prepare the filling.
Step 3: Whip Up the Cheesecake Filling
This is where the magic happens. In a large bowl, beat that softened cream cheese until it’s completely smooth. I cannot stress this enough – lumpy cream cheese will ruin your whole day. Add the powdered sugar and vanilla, beating until combined.
In a separate bowl, whip your heavy cream until soft peaks form. Here’s a tip I learned from my mom: cold bowl, cold beaters, cold cream. It whips faster and holds better.
Gently fold the whipped cream into the cream cheese mixture along with the sour cream. The key word here is “fold” – don’t beat it or you’ll deflate all that lovely airiness you just created.
Step 4: Assembly Time
Carefully remove your taco shells from the muffin tin. They should pop out easily, but if they’re being stubborn, let them sit at room temperature for a few minutes.
Fill each shell with the cheesecake mixture using a piping bag or just a spoon. I like to pile it high because life’s too short for skimpy desserts. Then comes the best part – sprinkle more Fruity Pebbles on top, add a dollop of whipped cream if you’re feeling fancy, and maybe some rainbow sprinkles for extra pizzazz.
Tips from My Kitchen
The Great Shell Disaster of Take One: My first attempt at these shells was a complete mess. I tried to make them too thin, and they cracked when I removed them from the muffin tin. Don’t be afraid to make them thick – about 1/4 inch works perfectly.
Temperature is Everything: If your kitchen is particularly warm, these shells will be softer and harder to work with. I sometimes stick the chocolate mixture in the fridge for 5 minutes to firm up slightly before shaping.
Make-Ahead Magic: You can make the shells up to 3 days ahead and store them in an airtight container. The filling is best made the day you’re serving, but it’ll keep for 2 days in the fridge.
Cereal Substitutions: While Fruity Pebbles are my go-to, I’ve also tried this with Cocoa Pebbles (amazing with chocolate shells) and even Lucky Charms (though you’ll want to pick out the marshmallows first).
Serving Suggestions
These are perfect for kids’ birthday parties, but honestly, they’re equally at home at a grown-up dinner party. I like to serve them on colorful plates with extra napkins – they can get a little messy, but that’s part of the charm.
For a fun presentation, set up a little taco bar with different toppings. Think mini chocolate chips, crushed cookies, fresh berries, or even a drizzle of chocolate sauce. Let people customize their own – it’s interactive and everyone loves being involved.
How to Store & Reheat
Store any leftover shells in an airtight container at room temperature for up to a week. The filling needs to stay refrigerated and should be used within 3 days. Don’t assemble these too far in advance – the shells can get soft from the moisture in the filling.
If your shells do get a bit soft, you can actually crisp them up by popping them in the fridge for 15 minutes. The chocolate will firm back up nicely.
The Verdict
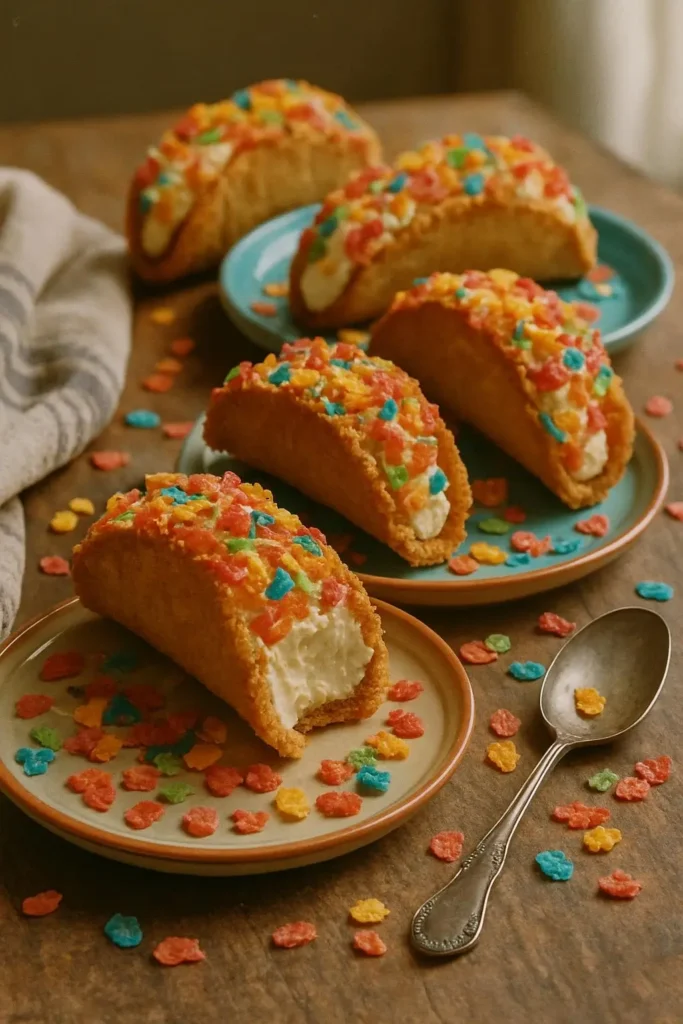
These Fruity Pebbles cheesecake tacos have become legendary in our house. They’re the dessert that makes kids shriek with joy and adults shake their heads in amazement. Sure, they’re a bit over-the-top, but sometimes that’s exactly what you need.
The combination of textures – that satisfying crunch of the cereal shell giving way to smooth, creamy filling – is absolutely perfect. And the flavor? Pure nostalgia mixed with sophisticated cheesecake goodness.
I’m not going to lie and say these are health food. They’re pure indulgence, and that’s exactly the point. Sometimes you need a dessert that makes you feel like a kid again, and these definitely deliver on that promise.
Now excuse me while I go make another batch. My daughter’s already planning her next sleepover, and apparently these tacos are going to be the star of the show. And honestly? I couldn’t be more proud of that.

I’ve always found peace in the kitchen—it’s where I go to unwind, experiment, and reconnect. I started this blog because I wanted to share that feeling with others. My cooking journey started in a tiny apartment kitchen, with a second-hand skillet and a lot of trial and error.
Since then, I’ve learned that the best meals aren’t the most complicated—they’re the ones made with love (and maybe a little butter). Whether you’re a beginner or a kitchen pro, I hope you’ll feel right at home here.