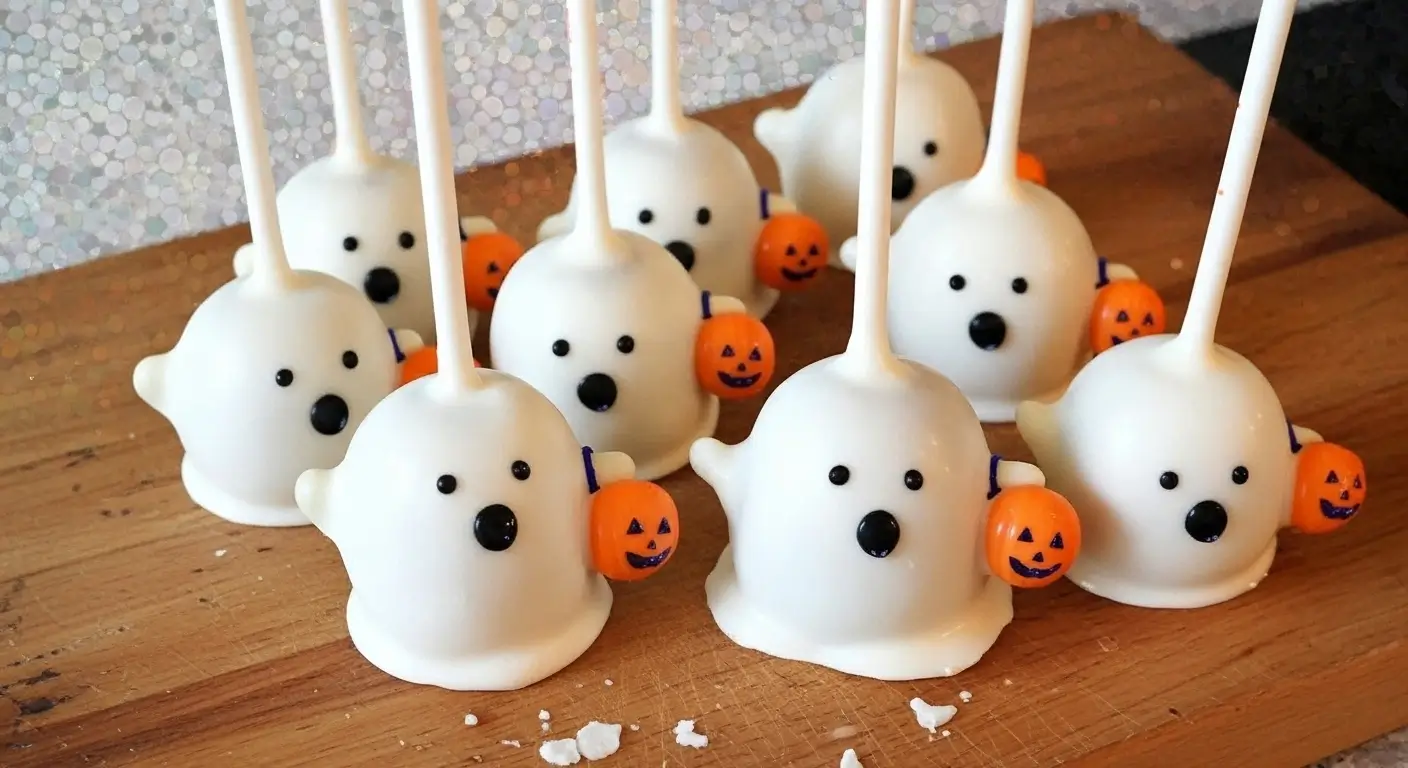
Ghost Heads Halloween Cake Pops
Ghost Heads Halloween Cake Pops: My Kitchen Disaster Turned Success Story
Okay, so I messed this up three times before getting it right. THREE TIMES. My kitchen looked like a candy graveyard, and my husband kept asking why I was mumbling curse words at tiny white spheres. But here’s the thing—when I finally nailed these ghost heads Halloween cake pops, my kids went absolutely bonkers. And honestly? I felt like Martha Stewart for about five minutes.
Look, I’m gonna be honest with you. I saw these adorable ghost cake pops on Pinterest (where else, right?) back in September when everyone was already posting pumpkin everything. My 8-year-old saw them over my shoulder and immediately declared that we HAD to make them for her Halloween party at school. You know how that goes. Once they see something, it’s basically a done deal.
Table of Contents
The Real Story Behind These Ghost Heads
This whole adventure started because I was trying to be the “cool mom.” Last year, I brought store-bought cupcakes to the Halloween party, and let me tell you, I felt the judgment. Not from the kids—they didn’t care one bit. But from the other parents who showed up with homemade everything. So this year, I was determined to step up my game.
The first attempt? Disaster. Complete disaster. I thought I could wing it without looking up a proper recipe. Spoiler alert: you can’t just mash up cake and hope for the best. The “ghosts” looked more like melted snowmen, and the chocolate coating was so thick you needed a chisel to get through it.
Second attempt went better, but I got cocky and tried to make the faces too detailed. Have you ever tried drawing on a tiny sphere with melted chocolate? It’s like trying to write your name with your non-dominant hand while blindfolded. The ghosts ended up looking possessed rather than cute.
But attempt number three? Pure magic. And by magic, I mean I finally followed actual directions and stopped trying to reinvent the wheel.
What You’ll Need (And What Not to Buy)
Here’s where I learned some hard lessons. Don’t buy the cheap cake mix—I tried it, thinking “cake is cake.” Nope. The texture was all wrong, too crumbly. Stick with a decent boxed mix or go full homemade if you’re feeling ambitious.
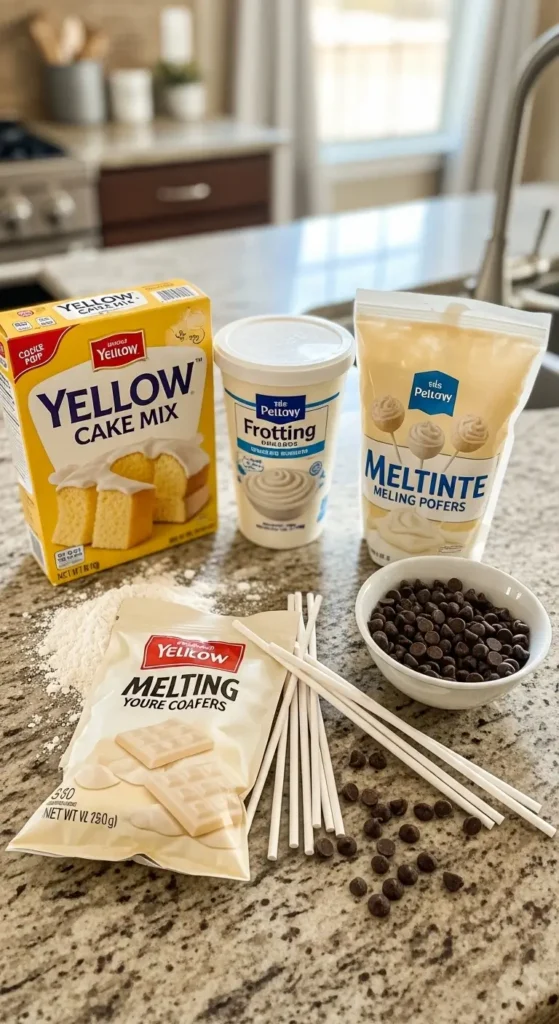
For the Cake:
- 1 box vanilla cake mix (Duncan Hines works great)
- Ingredients called for on the cake mix box (usually eggs, oil, water)
- 1 container (16 oz) vanilla frosting (cream cheese frosting works too, but vanilla’s easier)
For the Ghost Assembly:
- 2-3 lbs white chocolate melting wafers (Ghirardelli or Wilton—don’t go generic here)
- 48 cake pop sticks (buy extras, trust me)
- Black candy melts or mini chocolate chips for eyes
- Orange candy melts for tiny pumpkins (optional but so worth it)
Tools You Actually Need:
- Large mixing bowl
- Cookie scoop or tablespoon for portions
- Double boiler or microwave-safe bowls
- Styrofoam block or cake pop stand
- Toothpicks (for detail work)
Now, here’s where I made my biggest rookie mistake the first time—I bought pre-made cake from the grocery store bakery thinking I’d save time. The cake was too moist and dense, and the whole thing fell apart. Just make the cake yourself. It’s literally dumping ingredients in a bowl and sticking it in the oven. I promise you can handle it.
The Cake Part (Don’t Overthink This)
Preheat your oven according to the cake mix directions. Usually 350°F, but check the box because apparently not all cake mixes are created equal. Who knew?
Make the cake exactly like the box says. I’m not going to rewrite Duncan Hines’ instructions here because they know what they’re doing, and I learned the hard way that “improvements” usually make things worse.
Bake it, let it cool completely. And I mean COMPLETELY. I got impatient the second time and tried to crumble warm cake. Bad idea. It turned into a gummy mess that looked like I was making cake slime instead of cake pops.
While it’s cooling, this is a good time to clean up your kitchen because trust me, it’s about to get messy again.
The Magic Happens Here (Cake Crumb Mixture)
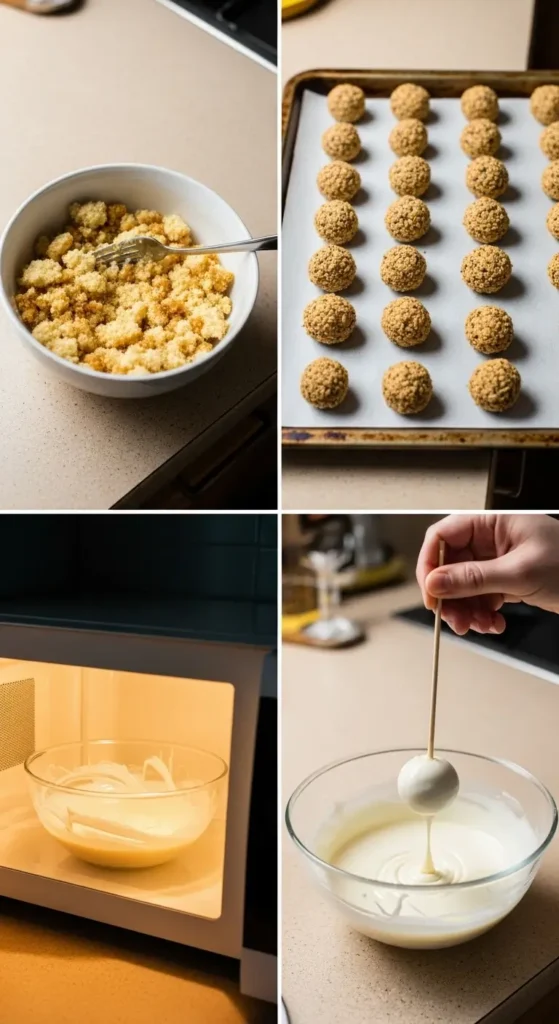
Once your cake is completely cool—and I can’t stress this enough—crumble it up with your hands into fine crumbs. This is actually kind of therapeutic after a long day. My kids love helping with this part, though they eat about half the crumbs in the process.
Add about 3/4 of the frosting container to start. You don’t want it too wet and gooey, but it needs to hold together when you squeeze it. Think Play-Doh consistency. If it’s too dry, add more frosting a spoonful at a time. If you add too much frosting (been there), the pops will be too soft and fall off the sticks.
Mix it all together with your hands. Yeah, it’s messy. Yeah, you’ll question your life choices for a minute. But it works better than any spoon or mixer.
Shaping the Ghost Heads (Where Things Get Real)
Here’s where I think… no, I know this works better when you use a cookie scoop. Those little ice cream scoop looking things? Game changer. They make all your ghost heads the same size, which matters more than you’d think when you’re trying to dip them later.
Scoop out portions and roll them into balls with your hands. They don’t need to be perfect—ghosts aren’t perfectly round anyway. I made about 24 from one cake, but you might get more or fewer depending on how big you make them.
Stick them on a baking sheet lined with parchment paper and pop them in the fridge for at least an hour. This step is crucial. Don’t skip it because you’re impatient (like I did the first time). Cold, firm cake balls are so much easier to work with.
The White Chocolate Coating Drama
Okay, this is where things get tricky, and I’m going to save you from my mistakes. Melting white chocolate is an art form that I definitely hadn’t mastered on attempts one and two.
You can use a double boiler if you’re fancy, but I just use the microwave. Put the white chocolate melts in a microwave-safe bowl and heat in 30-second intervals, stirring between each one. Don’t rush this part. Burned white chocolate tastes awful and looks even worse.
The consistency should be smooth and pour-able, but not too thin. If it’s too thick, add a tiny bit of coconut oil or vegetable oil. If it gets too hot, it’ll be too runny and won’t stick to your cake balls properly.
Now, here’s the part that took me three tries to figure out: you need to dip the cake pop stick about half an inch into the melted chocolate first, then insert it into your cake ball. This creates a seal so the ball doesn’t slide off the stick when you dip it. Revolutionary, right? Why don’t they mention this crucial step in every recipe?
Dipping Day (The Final Boss Battle)
Pull your cake balls out of the fridge. Working quickly (but not frantically), dip each pop into the white chocolate, letting excess drip off. I learned to tap the stick gently against the bowl rim to get rid of extra coating.
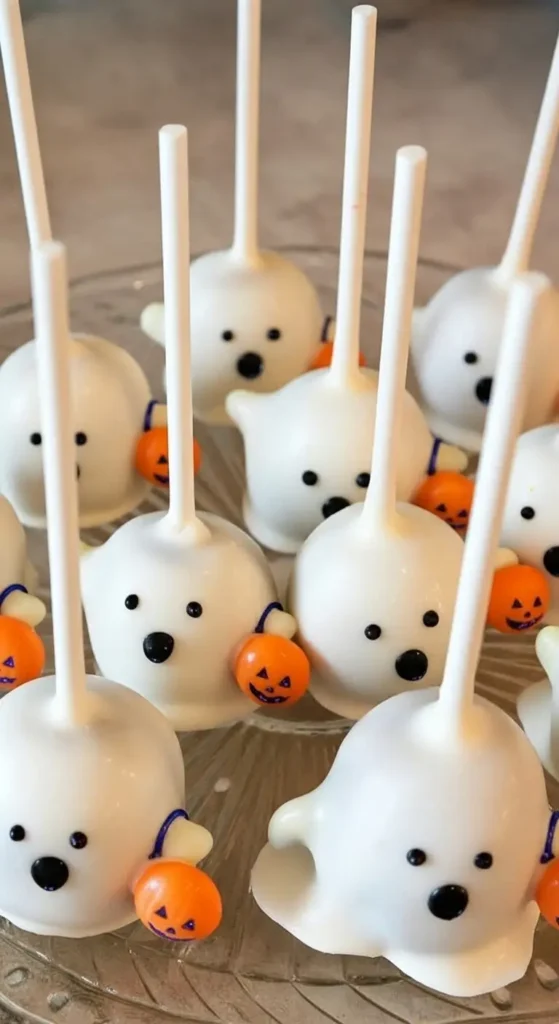
Here’s where I got creative with the ghost shape—while the chocolate is still wet, I used a spoon to create little drip marks that look like a ghost’s flowing edges. Not necessary, but it makes them look more ghost-like and less like white-chocolate-covered balls.
Stick them upright in a styrofoam block or cake pop stand to set. If you don’t have either, a colander works in a pinch. Just make sure they’re not touching each other.
The Face Situation (Less is More)
For the eyes, I used mini chocolate chips pressed gently into the white chocolate while it was still soft. You could also melt black candy melts and use a toothpick to make dots, but honestly? The chocolate chips are easier and look just as good.
Some of mine have little orange pumpkins—I made those by melting orange candy melts, dropping tiny amounts onto parchment paper, and sticking them on while everything was still tacky. Totally optional, but my daughter insisted they needed to be “holding trick-or-treat bags.”
What I Learned the Hard Way
Temperature matters. A lot. If your kitchen is too warm, the chocolate won’t set properly. If it’s too cold, the chocolate will thicken too fast while you’re working.
Don’t try to make these the day of the party. They need time to set completely, and you need time to not stress about whether they’ll work out.
Make extra. I planned for 24 and ended up with 20 successful ones after mishaps. Also, people will want seconds.
The Honest Truth About These Ghost Heads
Are they perfect? Nope. Do they look exactly like the Pinterest photo? Not even close. But you know what? My kids thought they were amazing, their classmates went crazy for them, and I felt pretty proud walking into that Halloween party with my homemade contribution.
The best part? Once you get the hang of it, they’re actually kind of fun to make. Put on some Halloween music, get a little messy, and embrace the imperfection. Some of my ghosts look a little wonky, and that just makes them more charming.
These ghost heads Halloween cake pops have become our new October tradition. My daughter is already planning next year’s version (she wants to try making them look like they’re wearing tiny hats). And honestly, I’m looking forward to it.
The whole batch disappears fast—probably because they taste as good as they look. The cake is moist, the frosting adds the perfect sweetness, and that white chocolate coating gives it a nice crunch. Plus, they’re the perfect size for little hands.
Storage and Survival Tips
These keep for about a week in an airtight container at room temperature. Don’t put them in the fridge unless your kitchen is super warm—the chocolate can get condensation on it and look weird.
If you’re transporting them (like to a school party), arrange them in a shallow box with parchment paper. Don’t stack them because the faces will get messed up.
Pro tip I learned from my neighbor: if you’re making them for a party, write your name on the container. Trust me on this one. Everyone’s going to want to know who made them.
Final Thoughts (And Why You Should Try This)
Look, I’m not saying this is the easiest recipe in the world. There’s definitely a learning curve, and you might mess up your first batch like I did. But there’s something really satisfying about creating something that makes people smile, especially kids.
These ghost heads cake pops ended up being one of those recipes that looks way more complicated than it actually is. Once you get the technique down, you could probably make them with your eyes closed. Well, maybe not the face part.
The kids at the Halloween party are still talking about them, and I’ve gotten texts from other parents asking for the “recipe for those amazing ghost things.” Makes all those failed attempts worth it.
If I can make these without burning down my kitchen (and trust me, my cooking track record is… questionable), anyone can. Just don’t skip the chilling steps, be patient with the chocolate, and remember that wobbly ghosts are still cute ghosts.
Now excuse me while I go make another batch because apparently I’m “the ghost cake pop mom” now, and I have a reputation to maintain.
Happy Halloween baking! 🎃👻
P.S. – Seriously, let me know how yours turn out. I’m always curious if other people run into the same disasters I did, or if I’m just uniquely talented at finding new ways to mess up simple recipes.
If this dessert brought a little joy to your day, why stop here? I’ve got a whole collection of indulgent treats and easy bakes waiting for you to try. Take a peek at more of my favorite desserts Here