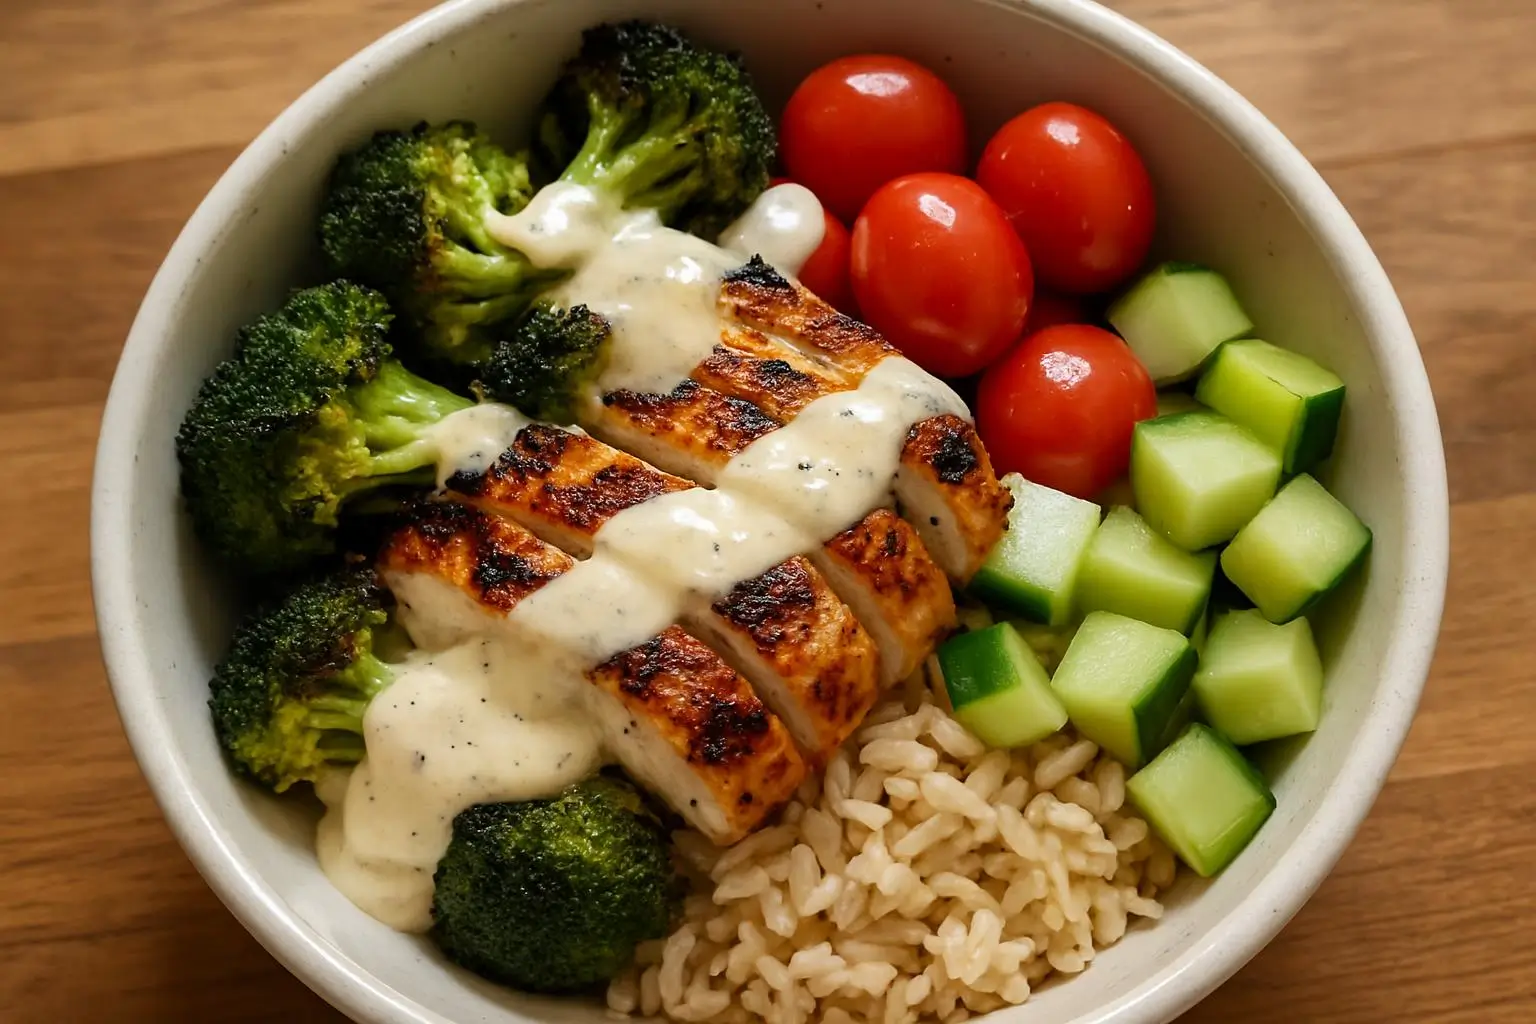
Grilled Chicken & Broccoli Bowl with Creamy Garlic Sauce
Okay, so I’ve been making this grilled chicken and broccoli bowl for about six months now, and I’m finally ready to share the recipe. Why? Because my neighbor Karen keeps asking for it every single time she smells it cooking through our paper-thin apartment walls.
Look, I’m gonna be honest with you – this wasn’t love at first bite. My first attempt was… well, let’s just say even my dog wouldn’t touch it. The chicken was drier than cardboard, and don’t even get me started on what I thought was “creamy garlic sauce” but turned out to be more like garlic-flavored glue.
But here’s the thing – I’m stubborn. And hungry. So I kept tweaking it until it actually became something I’d serve to people I like.
Table of Contents
How This Whole Thing Started
I think this idea came from one of those meal prep Instagram accounts… or maybe it was Pinterest? Honestly can’t remember anymore. What I do know is that I was desperate for something healthy that didn’t taste like punishment food. You know what I mean – those sad desk salads that make you question your life choices.
My 8-year-old nephew was staying with us for a week last summer, and this kid refuses to eat anything green. Like, seriously refuses. Will literally pick out individual herbs from pasta sauce. But somehow – and I still don’t understand this – he demolished this bowl. Asked for seconds. I nearly cried with joy.
The Ingredients (And My Shopping Disasters)
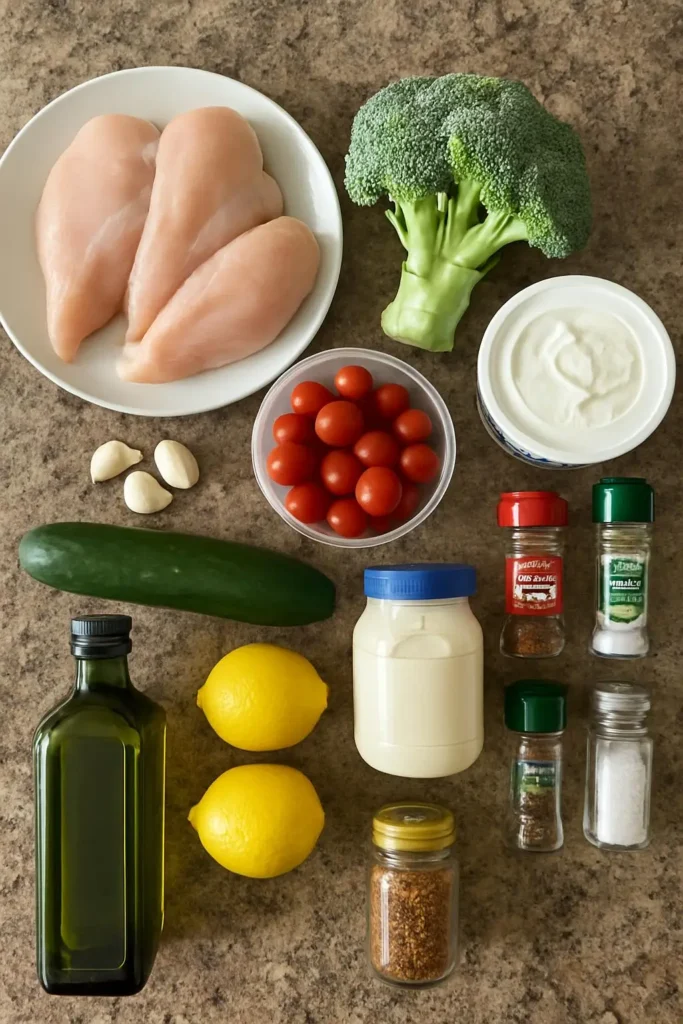
Here’s what you’ll need, and trust me, I learned some of these lessons the hard way:
For the Grilled Chicken:
- 4 boneless, skinless chicken breasts (about 1.5 lbs)
- 2 tablespoons olive oil
- 1 teaspoon garlic powder (not garlic salt – learned that one the hard way)
- 1 teaspoon paprika
- 1 teaspoon dried oregano
- Salt and black pepper to taste
- Juice of 1 lemon (fresh, not that fake stuff in the plastic lemon)
For the Broccoli:
- 2 large heads of fresh broccoli, cut into bite-sized florets
- 2 tablespoons olive oil
- Salt and pepper
- Optional: red pepper flakes if you like a little kick
For the Creamy Garlic Sauce:
- 1/2 cup mayonnaise (I use Hellmann’s, fight me)
- 1/4 cup sour cream
- 3-4 cloves garlic, minced (or 5 if you’re like me and obsessed with garlic)
- 2 tablespoons fresh lemon juice
- 1 tablespoon Dijon mustard
- 1 teaspoon honey
- 2 tablespoons fresh parsley, chopped
- Salt and pepper to taste
For Serving:
- 2 cups cooked brown rice (or quinoa if you’re feeling fancy)
- Cherry tomatoes, halved
- Cucumber, diced
- Red onion, thinly sliced (optional – makes your breath terrible but tastes amazing)
Now, about shopping for this stuff. Good luck finding decent broccoli this time of year – I swear grocery stores think we want yellowing, sad little trees. And please, PLEASE don’t buy pre-minced garlic from a jar. Just don’t. It tastes like disappointment.
The Great Chicken Grilling Adventure
First things first – and I cannot stress this enough – pound your chicken breasts to even thickness. I used to skip this step because it seemed unnecessary. Spoiler alert: it’s not unnecessary. Unless you enjoy eating chicken that’s simultaneously raw in the middle and jerky-dry on the edges.
Here’s what I do now:
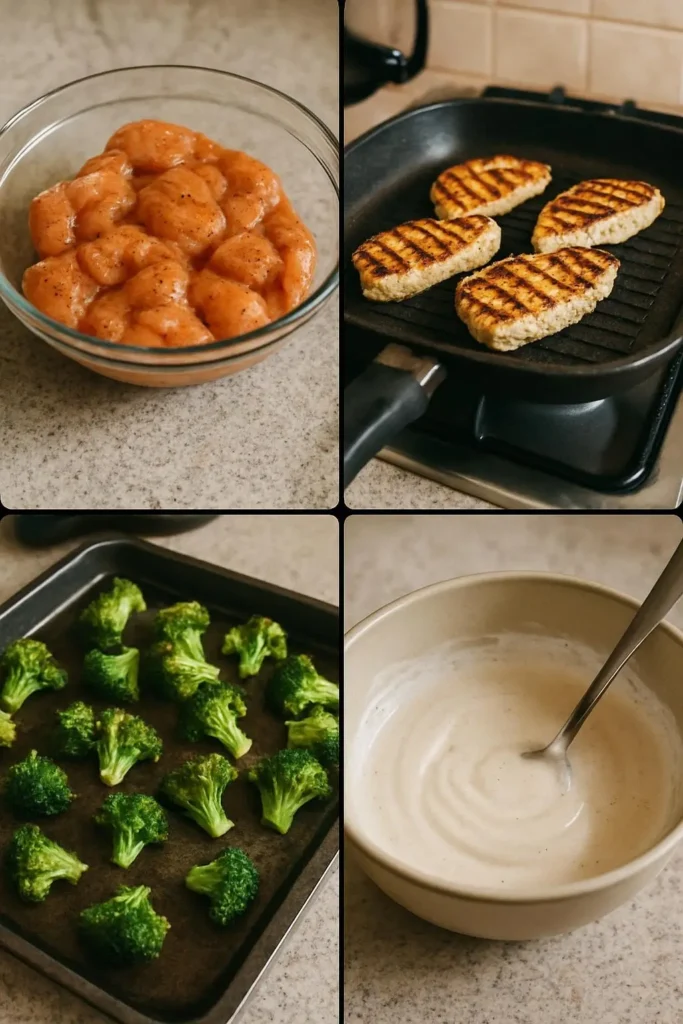
- Prep the chicken (15 minutes): Place chicken between plastic wrap or parchment paper and gently pound to about 3/4-inch thickness. I use a meat mallet, but honestly, a rolling pin works fine too. Just don’t go crazy with it – you’re tenderizing, not making chicken pancakes.
- Make the marinade: In a bowl, whisk together olive oil, garlic powder, paprika, oregano, salt, pepper, and lemon juice. It’ll look kinda orange and smell incredible.
- Marinate: Put chicken in a zip-lock bag with the marinade. I usually do this for at least 30 minutes, but if you’re meal prepping, overnight works great too. Just don’t go longer than 24 hours or the acid from the lemon will make the texture weird.
Actually, you know what? Let me tell you about my biggest chicken disaster. Last Tuesday, I had the chicken marinating and my neighbor knocked on the door to borrow sugar (who borrows sugar anymore?). We ended up chatting for 20 minutes about her cat’s weird habits, and I completely forgot about the chicken on the grill.
Disaster. Complete disaster.
The smoke alarm went off, the chicken looked like charcoal, and I had to order pizza. But hey, that’s how I learned that setting a timer is non-negotiable.
Grilling the Chicken (Without Setting Off Smoke Alarms)
- Preheat your grill: Medium-high heat. If you don’t have a grill, a grill pan or even a regular pan works fine. I’ve made this on all three.
- Grill the chicken: Remove from marinade and grill for 6-7 minutes per side. Don’t move it around! I know it’s tempting to flip it every 30 seconds, but resist. You want those beautiful grill marks.
The key is—oh wait, I forgot to mention—you need to let the chicken rest for 5 minutes after cooking. This isn’t optional. I used to slice right into it and watch all the juices run out onto the cutting board. Such a waste.
- Check doneness: Internal temp should hit 165°F. If you don’t have a meat thermometer, get one. Seriously. It’s like $10 and will save you from food poisoning and dry chicken.
- Rest and slice: Let it rest (I usually cover it with foil), then slice against the grain. Game changer for tenderness.
The Broccoli Situation
Now, here’s where people usually mess up. They either steam the broccoli until it’s mushy baby food, or they try to eat it raw because they think that’s healthier. Both approaches are wrong.
Here’s my method:
- Preheat oven to 425°F: Yeah, we’re roasting this broccoli. Trust me.
- Prep the broccoli: Cut into bite-sized pieces. Try to keep them roughly the same size so they cook evenly. Toss with olive oil, salt, pepper, and red pepper flakes if you’re using them.
- Roast: Spread on a baking sheet in a single layer. Don’t overcrowd or it’ll steam instead of roast. 15-20 minutes until the edges are slightly crispy and golden.
This method gives you broccoli that’s tender but still has some bite. Plus, those crispy edges? Chef’s kiss
The Creamy Garlic Sauce (The Real MVP)
Okay, this sauce is what makes the whole bowl. I’ve tried probably six different versions, and this one is the winner.
- Mince the garlic: And I mean really mince it. Big chunks of raw garlic will ruin your day. I learned this when I got lazy and used my garlic press poorly. Ouch.
- Mix everything: In a medium bowl, whisk together mayo, sour cream, minced garlic, lemon juice, Dijon mustard, and honey. The honey might seem weird, but it balances out the tanginess perfectly.
- Season: Add salt, pepper, and fresh parsley. Taste and adjust. Sometimes I add more lemon juice, sometimes more garlic (usually more garlic, let’s be real).
- Let it sit: This is important – let the sauce sit for at least 15 minutes before serving. The flavors need time to get acquainted.
Pro tip: This sauce is amazing on literally everything. I’ve put it on roasted vegetables, used it as a sandwich spread, and my boyfriend caught me eating it with crackers last week. No shame.
Putting It All Together
This is the fun part. And by fun, I mean the part where you realize you should have started the rice 45 minutes ago and now everything is ready except your carbs.
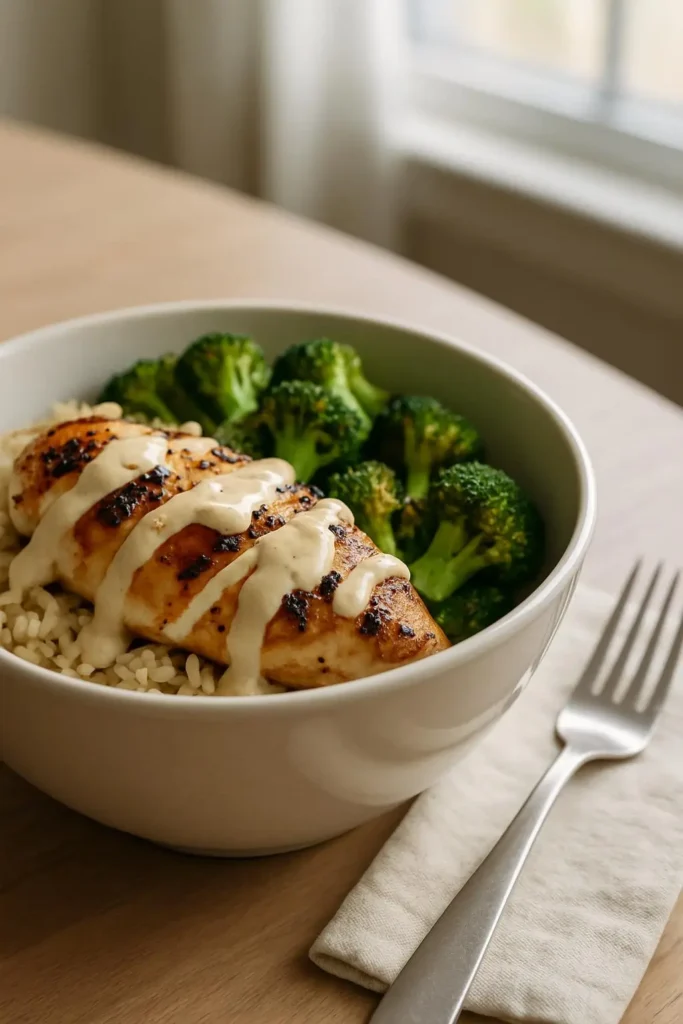
- Prepare your base: Divide cooked rice or quinoa between 4 bowls. I usually make extra rice because leftover rice is life.
- Add the goods: Top with sliced grilled chicken, roasted broccoli, cherry tomatoes, cucumber, and red onion if you’re using it.
- Sauce it up: Drizzle that beautiful creamy garlic sauce over everything. Don’t be shy – this isn’t the time for portion control.
- Final touches: Sometimes I add a sprinkle of everything bagel seasoning because I’m basic like that. Sue me.
What I’ve Learned Along the Way
After making this probably 50+ times, here are my random discoveries:
- Meal prep friendly: This keeps well in the fridge for 3-4 days. Just store the sauce separately and add it when you’re ready to eat.
- Leftover magic: The chicken is amazing in salads, wraps, or just eaten cold straight from the container at 2 AM (don’t judge me).
- Vegetable swaps: I’ve tried this with asparagus, Brussels sprouts, and green beans. All winners. Even tried it with cauliflower when I was going through my “everything must be cauliflower” phase.
- Sauce variations: Sometimes I add fresh dill instead of parsley. Sometimes I throw in some grated Parmesan. Once I added sriracha and it was… interesting.
Now, here’s the thing I wish someone had told me: this recipe is forgiving. Chicken a little overcooked? The sauce will help. Broccoli got too crispy? Still delicious. Forgot the honey in the sauce? It’ll survive.
The Real Talk Section
Is this the fanciest meal ever? No. Will it make you feel like you have your life together? Absolutely. There’s something satisfying about having a fridge full of these bowls, knowing you won’t be tempted by whatever sad sandwich the office cafeteria is pushing.
My coworkers keep asking what my secret is for eating healthy, and honestly, it’s just having food that doesn’t taste like punishment. This grilled chicken and broccoli bowl actually tastes good. Revolutionary concept, I know.
Also, can we talk about how Instagram-worthy this looks? I’m not usually one for food photos, but this bowl is pretty enough that even my terrible phone camera makes it look decent.
Final Thoughts and Random Tips
- Double the sauce recipe: You’ll thank me later. It keeps for a week in the fridge and makes everything better.
- Invest in good containers: If you’re meal prepping, decent glass containers are worth it. The plastic ones get gross and smelly.
- Don’t skip the lemon: Fresh lemon juice in both the marinade and the sauce makes everything brighter. It’s the difference between “meh” and “wow.”
- Timing is everything: I usually start the rice first, then get the chicken marinating while I prep the vegetables. Multi-tasking is your friend here.
Look, I’m not going to pretend this changed my life or anything dramatic like that. But it did make weeknight dinners a lot less stressful, and my grocery bill a lot more reasonable. Plus, there’s something deeply satisfying about eating something healthy that actually tastes good.
If you try this recipe, let me know how it goes! Seriously, I love hearing about other people’s cooking adventures and disasters. We’re all just figuring it out as we go, right?
And if you’re one of those people who thinks healthy food can’t taste good, well… you might want to reconsider after trying this creamy garlic sauce. Just saying.
Happy cooking! (And may your chicken always be juicy and your smoke alarms stay quiet) 😊

I’ve always found peace in the kitchen—it’s where I go to unwind, experiment, and reconnect. I started this blog because I wanted to share that feeling with others. My cooking journey started in a tiny apartment kitchen, with a second-hand skillet and a lot of trial and error.
Since then, I’ve learned that the best meals aren’t the most complicated—they’re the ones made with love (and maybe a little butter). Whether you’re a beginner or a kitchen pro, I hope you’ll feel right at home here.

