
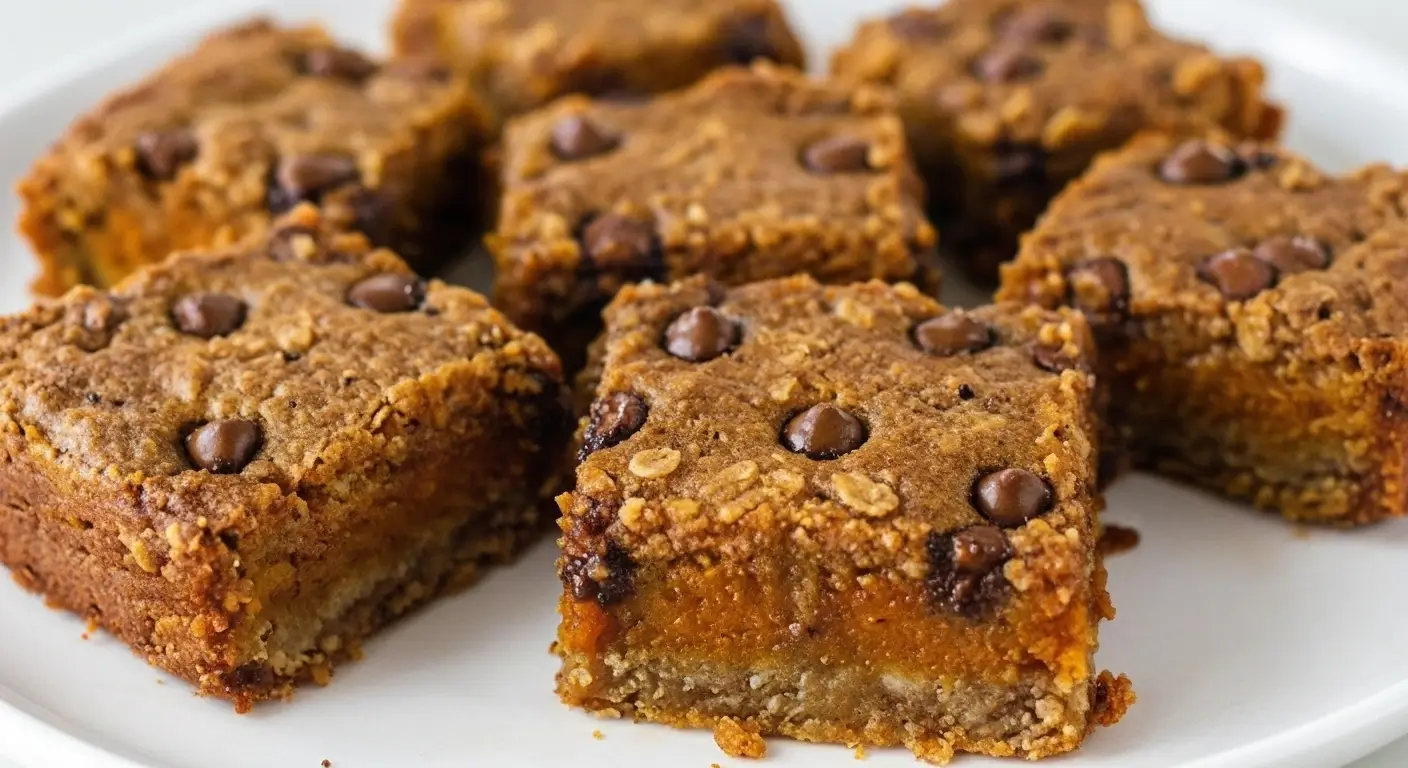
The Healthy Pumpkin Oatmeal Bars That Actually Don’t Suck
Okay, so I messed this recipe up like four times before getting it right. And I’m gonna be honest with you—I was getting pretty frustrated because every “healthy” pumpkin recipe I found online tasted like cardboard mixed with disappointment.
But here’s the thing… my neighbor Carol kept bringing over these amazing pumpkin oatmeal bars from some fancy bakery, and I was like, “There’s gotta be a way to make these at home without selling my kidney to afford organic everything.”
So after burning two batches (thanks to my cat deciding that 3 PM was the perfect time for a dramatic hairball situation), I finally cracked the code. These bars actually taste good. Like, my 12-year-old asked for seconds good. And trust me, that kid thinks vegetables are the enemy.
Table of Contents
My Pumpkin Oatmeal Bar Origin Story (It’s Messy)
Look, I’m not gonna pretend this was some Pinterest-perfect journey. Last October, I was going through my usual fall baking phase—you know the one, where you suddenly think you’re gonna make everything pumpkin-spiced and Instagram-worthy.
I found this recipe that claimed to be “the best healthy pumpkin bars ever” and… disaster. Complete disaster. They came out dense, flavorless, and somehow both dry AND soggy at the same time. How is that even possible?
Then I tried another one that had like 47 ingredients including something called “coconut nectar” that costs more than my monthly Netflix subscription. Hard pass.
But I’m stubborn. My husband will tell you that’s both my best and worst quality. So I kept tweaking, kept testing, kept annoying my family with “just try this version, I swear it’s better.”
And you know what? Version 2.0 was basically pumpkin-flavored rubber. Version 3.0 fell apart when you looked at it wrong. But version 4.0? That’s when magic happened.
Actually, let me back up. The real breakthrough came when I stopped trying to make them “perfectly healthy” and started making them “healthy enough.” Because here’s what I learned—you can’t replace every single ingredient with a superfood substitute and expect it to taste like anything other than expensive dirt.
What Makes These Pumpkin Oatmeal Bars Actually Work
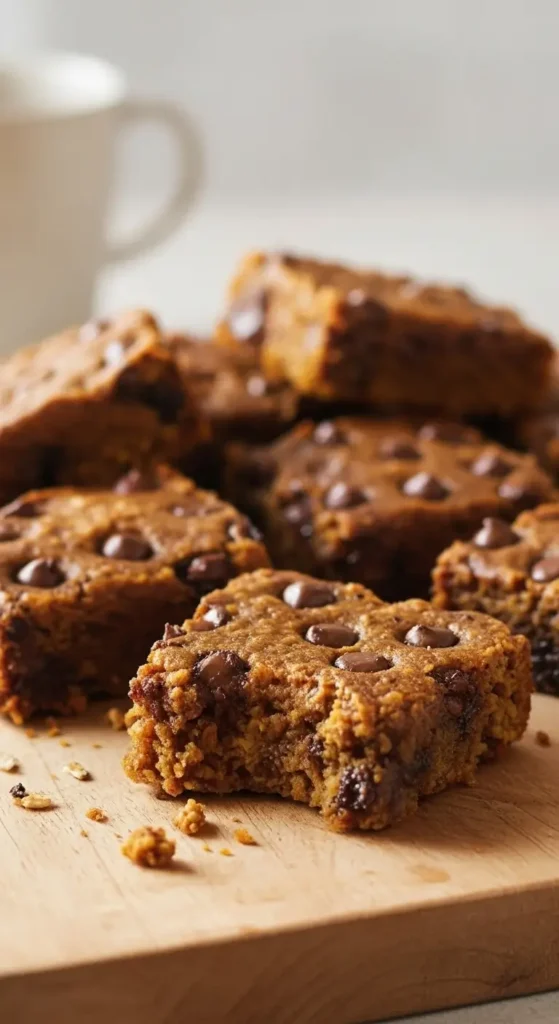
First off, they’re chewy. Not cake-y, not crumbly, but that perfect chewy texture that makes you reach for another piece before you’ve finished the first one. My mother-in-law (who is NOT easy to please, trust me) said they reminded her of the oatmeal bars her grandmother used to make, except with pumpkin.
Second, they actually taste like pumpkin. Not pumpkin spice candle. Not artificial pumpkin flavoring. Real, honest-to-goodness pumpkin flavor that doesn’t need to hide behind a mountain of cinnamon and nutmeg.
And third—this is important—they don’t make you feel guilty. They’ve got oats for fiber, pumpkin for vitamins, and yeah, there’s some sugar, but not enough to send you into a diabetic coma.
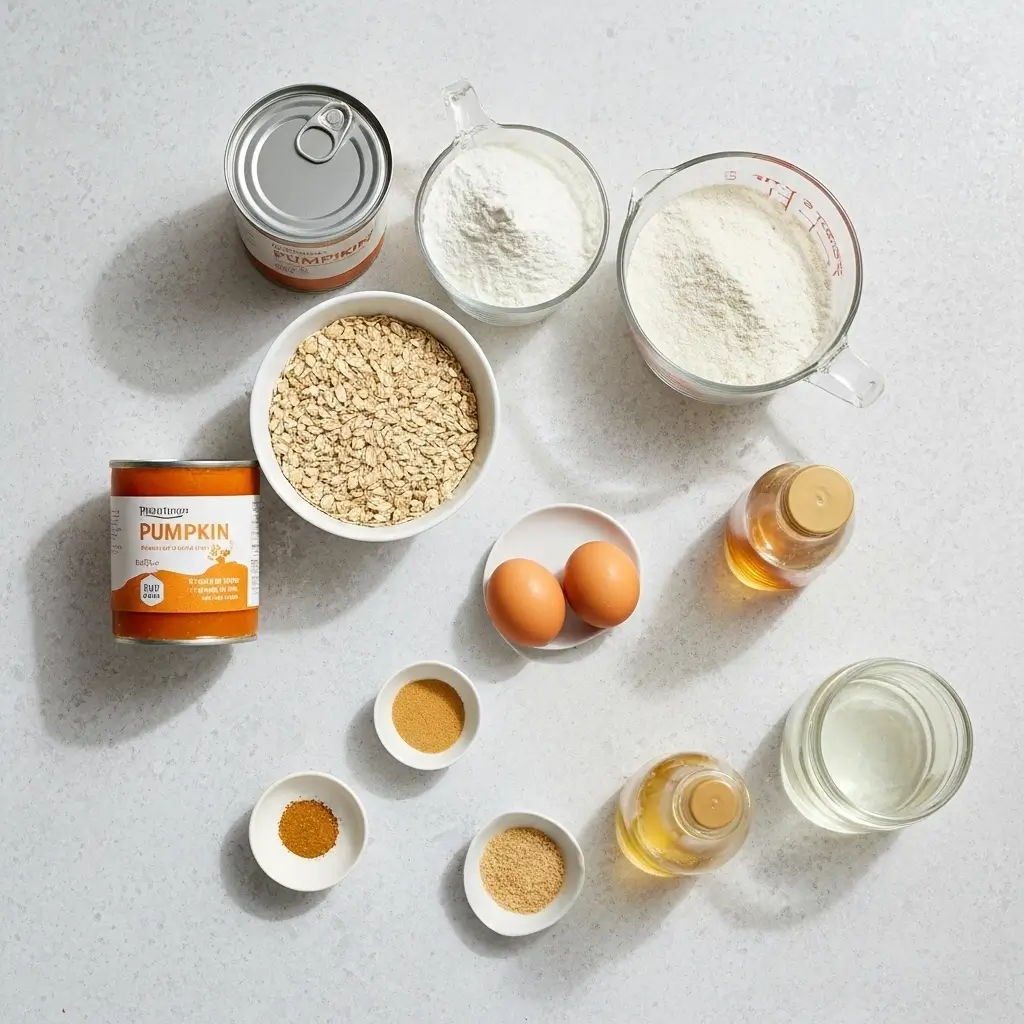
The Ingredients (And My Honest Opinions About Each)
Now, here’s where I’m gonna save you some trial and error. Don’t get fancy with weird substitutions unless I specifically mention them. I learned this the hard way.
For the base:
- 2 cups old-fashioned oats (not the quick-cooking kind—learned that lesson the hard way)
- 1 cup whole wheat flour (all-purpose works too, but whole wheat gives it more texture)
- 1/2 cup brown sugar, packed (I use the dark kind because I’m extra like that)
- 1/2 teaspoon salt (don’t skip this, seriously)
- 1 teaspoon cinnamon
- 1/2 teaspoon nutmeg (fresh if you’ve got it, but the old container from your spice rack is fine)
- 1/4 teaspoon ginger
- 1/4 teaspoon cloves
For the pumpkin filling:
- 1 can (15 oz) pumpkin puree (NOT pumpkin pie filling—different thing entirely)
- 2 large eggs
- 1/3 cup honey (or maple syrup if you’re team maple)
- 1/4 cup coconut oil, melted (or butter, I won’t judge)
- 1 teaspoon vanilla extract
For the top layer:
- 1/2 cup of the oat mixture (you’ll save this from the base)
- 2 tablespoons butter, cold and cubed
- 2 tablespoons chopped walnuts (optional, but recommended)
Okay, let me tell you about the pumpkin puree situation. I once grabbed pumpkin pie filling by mistake and wondered why my bars tasted like someone dumped a spice rack into orange mush. Read the labels, people. Pure pumpkin puree. That’s it.
And about the coconut oil—I know some of you are gonna want to substitute this with applesauce or something. Don’t. Just… don’t. I tried it. It doesn’t work. The bars need some fat to hold together and taste good. Life’s too short for fat-free baking disasters.
The Process (Where Things Can Go Wrong, But Won’t If You Listen)
Step 1: Prep your kitchen Preheat your oven to 350°F. Line an 8×8 inch baking pan with parchment paper. And here’s a pro tip I wish someone had told me earlier—let the parchment hang over the edges like little handles. Makes getting the bars out so much easier.
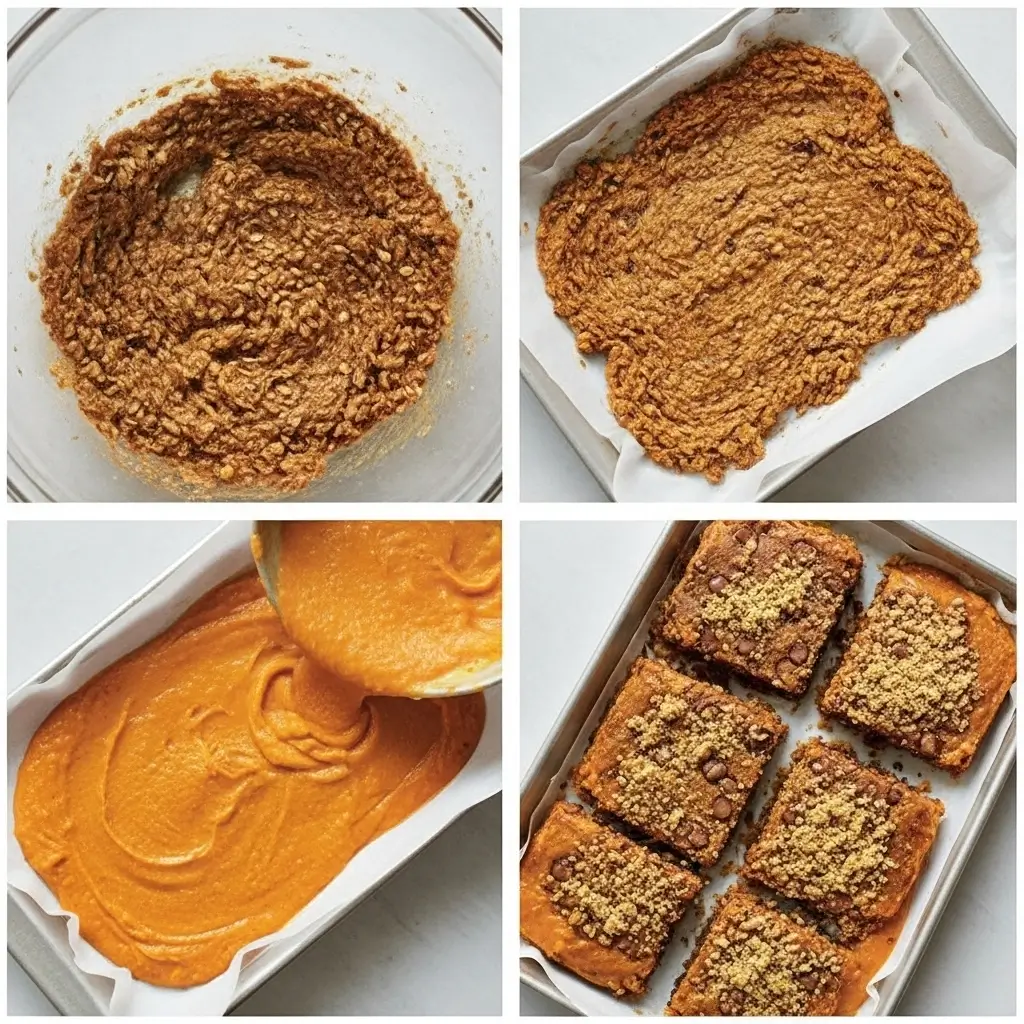
Step 2: Make the oat base In a big bowl, mix together your oats, flour, brown sugar, salt, and all those spices. Use your hands if you want—I always do. There’s something therapeutic about squishing brown sugar clumps with your fingers.
Take out 1/2 cup of this mixture and set it aside. That’s your topping layer.
Step 3: Press the base Add 1/4 cup melted coconut oil (or butter) to the remaining oat mixture. It’ll look crumbly and weird. That’s normal. Press this into your prepared pan. Really press it—use the bottom of a measuring cup if your hands aren’t doing the job.
Step 4: Make the pumpkin layer In another bowl, whisk together the pumpkin, eggs, honey, the remaining 1/4 cup melted coconut oil, and vanilla. This should look smooth and orange and smell like fall in a bowl.
Step 5: Assembly time Pour the pumpkin mixture over your pressed oat base. Spread it evenly—I use an offset spatula, but a regular spoon works fine.
Now take that reserved 1/2 cup of oat mixture and add those cold butter cubes. Use your fingers to work the butter in until you get little clumps. Add the walnuts if you’re using them. Sprinkle this all over the pumpkin layer.
Step 6: Bake and pray Bake for 35-40 minutes. You’ll know they’re done when the top is golden brown and the center doesn’t jiggle when you shake the pan. Don’t overbake them—dry pumpkin bars are sad pumpkin bars.
Here’s where patience becomes important (and where I usually fail). Let them cool COMPLETELY before cutting. I know it’s torture. I know they smell amazing and you want to dive in immediately. But if you cut them too early, they’ll fall apart and you’ll be eating pumpkin oatmeal crumbles with a spoon. Which, honestly, isn’t the worst thing, but it’s not what we’re going for here.
My Hard-Learned Tips (AKA My Mistakes So You Don’t Have To)
The Pumpkin Situation: I once tried using fresh pumpkin instead of canned. Spent three hours roasting and pureeing, and you know what? The canned stuff actually works better. It’s more consistent. Sometimes convenience wins, and that’s okay.
The Egg Drama: Room temperature eggs mix better. I usually forget to take them out ahead of time, so I just put them in a bowl of warm water for 10 minutes. Works every time.
The Coconut Oil Thing: If your coconut oil is solid, just microwave it for like 20 seconds. But let it cool a bit before adding it to the eggs, or you’ll accidentally scramble them. Been there, done that, threw away the entire batch.
Storage Secrets: These actually get better after a day. Something about the flavors melding together. Store them covered at room temperature for up to 5 days, or in the fridge if your kitchen is hot and humid like mine always seems to be.
Freezer Friendly: Cut them into squares and freeze them individually wrapped. They thaw perfectly and taste like you just made them. Great for when you want to look like you have your life together but actually just planned ahead for once.
The Variations I’ve Actually Tried (And My Honest Reviews)
Chocolate Chip Version: Added 1/2 cup mini chocolate chips to the pumpkin layer. My kids loved this, obviously. Adults thought it was a bit much. Your call.
Apple Addition: Diced up one small apple and mixed it into the pumpkin layer. Added a nice texture, but make sure to peel it first. Nobody wants chewy apple skin surprise.
Cream Cheese Swirl: This was ambitious. I tried swirling in some sweetened cream cheese. It looked pretty but didn’t really improve the taste. Sometimes simple is better.
Different Nuts: Tried pecans instead of walnuts. Also good. Tried almonds. Meh. Stick with walnuts or pecans.
Why These Work When Other Recipes Don’t
I think the secret is the ratio. Most healthy pumpkin bar recipes either have way too much pumpkin (resulting in mushy bars) or not enough fat (resulting in cardboard). These hit that sweet spot where they’re healthier than regular dessert bars but still taste like something you’d actually want to eat.
Also, the oat base gives them structure. A lot of recipes just throw oats into a standard bar recipe, but making that pressed oat layer creates a foundation that can handle the moisture from the pumpkin without falling apart.
And honestly? The double oat thing—having oats in both the base and the topping—gives them this rustic, homemade texture that screams “cozy fall kitchen” instead of “I’m trying too hard to be healthy.”
Serving Suggestions (From My Real Life)
These are perfect for:
- School lunches (if your kid’s school allows homemade treats)
- Coffee shop dates (yes, I bring my own snacks, don’t judge)
- Potluck dinners where you want to bring something that’s not complete junk food but also not obviously diet food
- Breakfast (I mean, there’s oats and pumpkin, it’s basically granola in bar form, right?)
My husband likes them warmed up with a little butter. My daughter eats them cold straight from the fridge. I usually grab one with my morning coffee and call it a balanced breakfast because there’s pumpkin (vegetable!) and oats (whole grains!).
The Final Verdict
Look, I’m not gonna lie and tell you these taste exactly like your favorite bakery pumpkin bars. They don’t. But they taste really, really good, and you can eat them without feeling like you need to hit the gym immediately after.
They’re the kind of recipe that makes people ask, “Wait, these are healthy?” And then they ask for the recipe, which is basically the highest compliment a home baker can get.
Plus, they make your kitchen smell like fall in the best possible way. Even if you mess them up somehow (though if you follow my directions, you shouldn’t), your house will smell amazing and people will think you’re some kind of domestic goddess.
So yeah, give these a try. Let me know how yours turn out! And seriously, if you have any tricks for making them even better, I’m all ears. I’m always looking for ways to improve my baking game, especially if it involves less cleanup.
Happy baking! (And may your smoke alarms stay quiet)
P.S. – If you make these, tag me or something. I love seeing other people’s kitchen wins. And disasters. I’m here for both.

I’ve always found peace in the kitchen—it’s where I go to unwind, experiment, and reconnect. I started this blog because I wanted to share that feeling with others. My cooking journey started in a tiny apartment kitchen, with a second-hand skillet and a lot of trial and error.
Since then, I’ve learned that the best meals aren’t the most complicated—they’re the ones made with love (and maybe a little butter). Whether you’re a beginner or a kitchen pro, I hope you’ll feel right at home here.