
The Only Pumpkin Pie Recipe You’ll Ever Need (Thanks, Libby’s!)
Okay, so I’ve been making this pie for like… wow, probably eight years now? And I’m gonna be honest with you – I’ve tried at least a dozen different pumpkin pie recipes, including some fancy ones from those cooking magazines my mom subscribes to. But you know what? I always come back to this one. The classic Libby’s recipe that’s literally printed on the back of their pumpkin puree can.
Yeah, I know. Super original of me, right?
But here’s the thing – sometimes the most obvious choice is obvious for a reason. This recipe just WORKS. And after years of tweaking and testing (and honestly, a few spectacular failures), I can tell you exactly why this one’s a keeper.
Table of Contents
Why I Swear By This Recipe
Look, I’m not trying to reinvent the wheel here. Libby’s has been perfecting this recipe since like… forever. I think my grandma used this same recipe back in the day, except she probably had to actually cook and mash her own pumpkins. Can you imagine? I can barely handle opening a can some mornings.
The first time I made this, I was terrified. It was Thanksgiving 2016, and I’d volunteered to bring dessert to my boyfriend’s family dinner. Big mistake energy, considering I’d never made a pie from scratch in my life. I remember standing in the grocery store, staring at all these different pumpkin puree brands, and finally just grabbing the Libby’s because it had the recipe right there on the label.
Smart choice, past me.
My Pumpkin Pie Journey (AKA Learning From Disasters)
Version 1.0 was… not great. I got cocky and decided to “improve” the recipe by adding extra spices. The result tasted like someone had dumped a entire bottle of cinnamon into perfectly good pie filling. My boyfriend’s little sister took one bite and made this face like she’d eaten dirt. Brutal but fair.
Version 2.0, I followed the recipe exactly but somehow managed to crack the top. Apparently, I baked it too long because I didn’t trust that it was actually done. It looked all sad and wrinkled, like a deflated balloon.
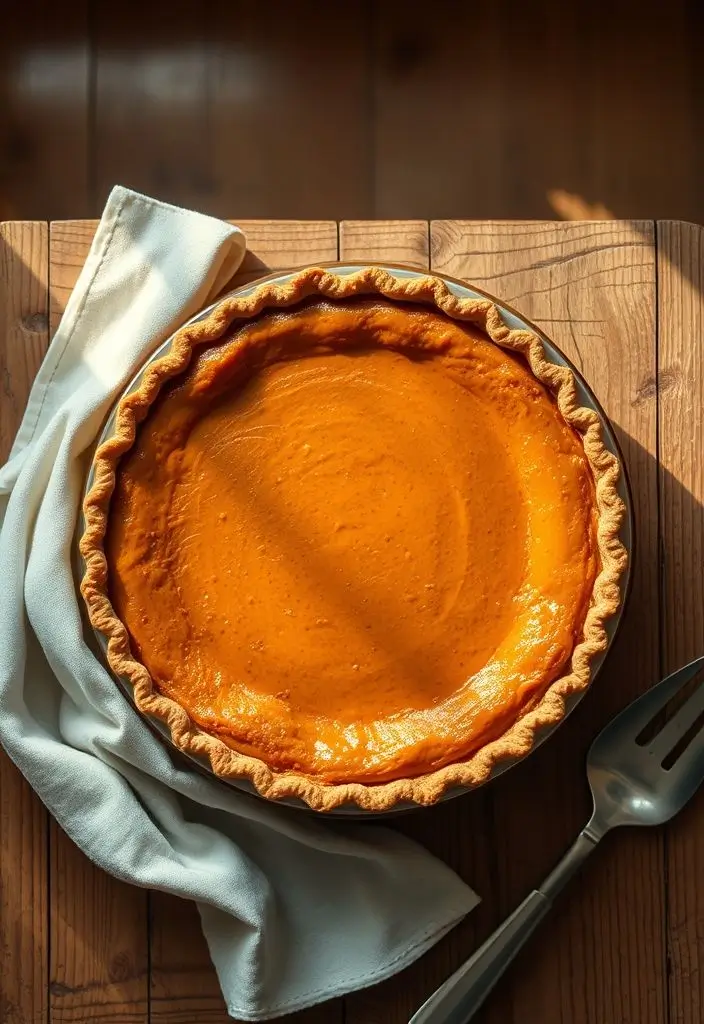
But Version 3.0? Perfect. Golden brown, smooth as silk, and everyone asked for the recipe. Which was awkward because I literally just followed the instructions on a can.
What You’ll Need (And My Shopping Tips)
Here’s what the recipe calls for, plus my real-world shopping advice:
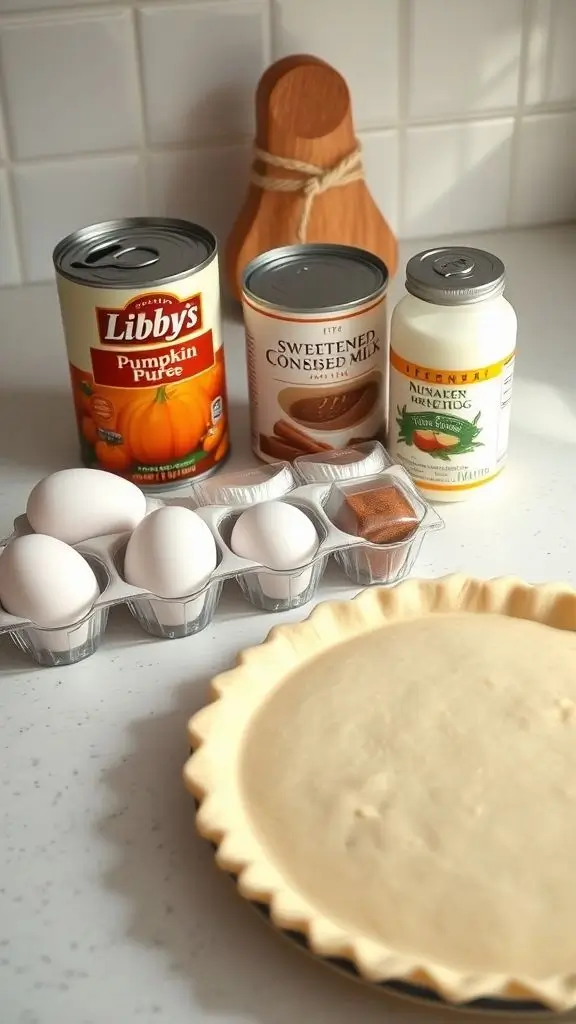
For the filling:
- 1 can (15 oz) Libby’s 100% Pure Pumpkin (NOT pumpkin pie filling – learned this the hard way)
- 1 can (14 oz) sweetened condensed milk (I always buy an extra can because I inevitably spill some)
- 2 large eggs (buy a dozen, you’ll use them for other stuff anyway)
- 1 teaspoon ground cinnamon
- 1/2 teaspoon ground ginger
- 1/2 teaspoon ground nutmeg (fresh grated is amazing but pre-ground works fine)
- 1/2 teaspoon salt
For the crust:
- 1 unbaked 9-inch pie crust (I use store-bought and I’m not ashamed)
Let me tell you about the Great Pumpkin Filling Mix-Up of 2018. I grabbed what I thought was plain pumpkin puree but it was actually pumpkin pie filling that already had spices in it. Then I added MORE spices according to the recipe. The result was basically a spice bomb that could’ve stripped paint. Always check the label. Always.
Also, about that pie crust – look, I know some people are all about making everything from scratch, but life’s too short and store-bought crusts are actually really good now. I like the Pillsbury ones that come in the red box. Fight me.
The Actual Making Part (Step by Step)
Step 1: Preheat your oven to 425°F
Do this first. I cannot stress this enough. I’ve stood there with a perfectly mixed filling, ready to pour it into the crust, only to realize my oven was still cold. Then you’re standing there for 15 minutes feeling like an idiot.
Step 2: Mix the filling
Crack your eggs into a medium bowl and whisk them up. Not super fancy – just break up the yolks. Then add the pumpkin puree, sweetened condensed milk, and all the spices.
Here’s where I add my own tiny twist – I like to whisk the spices into the pumpkin first, then add the milk and eggs. I think it distributes the spices better, but honestly, it probably doesn’t matter. I’m just particular like that.
Mix everything until it’s smooth. It’ll be this gorgeous orange color that just screams fall. Sometimes I stick my finger in for a taste (don’t judge me) and it’s like autumn in liquid form.
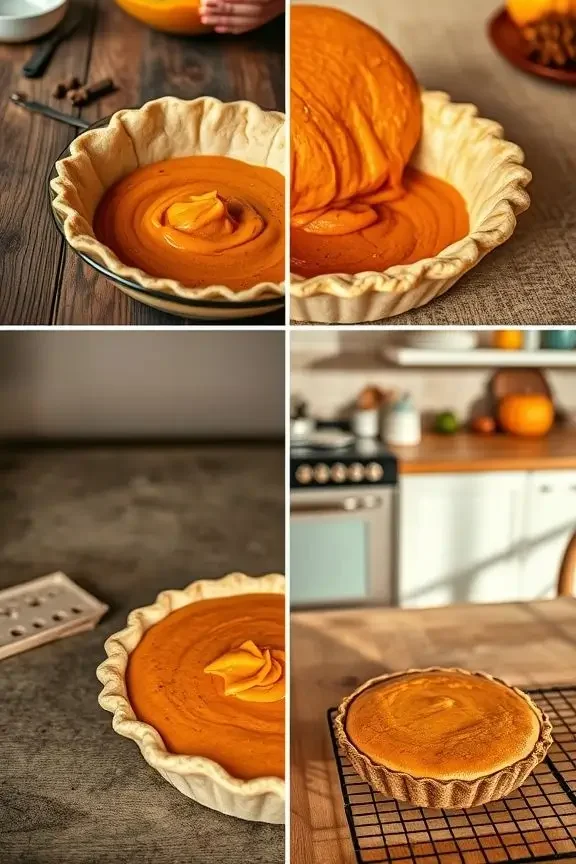
Step 3: Pour and bake
Pour the filling into your unbaked pie crust. The recipe says to bake at 425°F for 15 minutes, then reduce to 350°F and bake for 40-50 minutes more.
But here’s the thing – every oven is different. Mine runs hot, so I usually check it around the 35-minute mark after reducing the temperature. You’ll know it’s done when a knife inserted near the center comes out clean. The center might still jiggle slightly, but it shouldn’t be sloshy.
Step 4: The cooling part (AKA torture)
This is the hardest part. You have to let it cool completely before cutting. I’m talking like 3-4 hours. I know. I KNOW. It smells incredible and you just want to dive in, but if you cut it too early, you’ll have pumpkin soup instead of pie slices.
I usually make mine the day before I need it. Less temptation that way.
Things I’ve Learned Along the Way
About the crust: Sometimes the edges get too brown before the filling is done. I keep strips of aluminum foil handy to cover the edges if needed. Or you can buy those pie crust shield things, but honestly, foil works just fine.
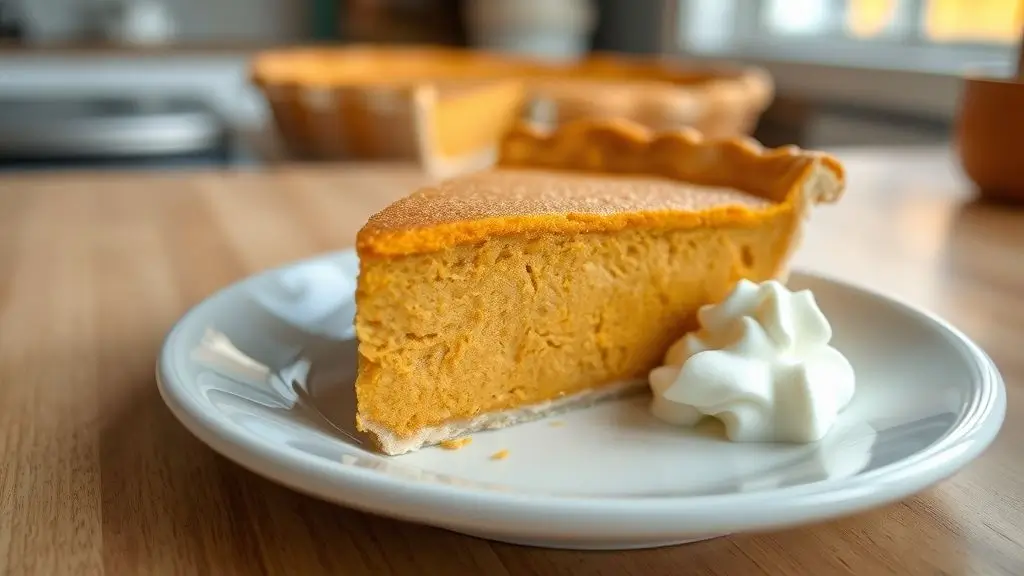
About serving: This pie is amazing with whipped cream, but it’s also fantastic plain. My dad refuses to eat it with anything on top because he says it’s “perfect as is.” He’s not wrong.
About storage: It keeps in the fridge for several days, covered. Though in my house, it never lasts that long. My neighbor’s kids have been known to show up at my door asking if I’ve made “the good pie” lately.
About leftovers: Leftover pumpkin pie for breakfast is totally acceptable. I will not be taking questions on this position.
Why This Recipe Actually Works
I think the magic is in the simplicity. The spice blend is perfectly balanced – not too much cinnamon (my early mistake), just enough ginger for warmth, and that tiny bit of nutmeg that makes everything smell like a fancy bakery.
The sweetened condensed milk gives it this rich, creamy texture that regular milk and sugar just can’t match. I tried substituting it once with regular milk and extra sugar. Big mistake. The texture was all wrong – kind of grainy and not as smooth.
And honestly? Following the exact measurements matters with baking. I’m usually a “little bit of this, little bit of that” cook, but pie filling is basically chemistry. The ratios need to be right for it to set properly.
My Current Obsession
Lately, I’ve been making mini versions in those little tart pans. Same recipe, just divided up into individual servings. They’re adorable and bake faster – about 20-25 minutes total. Perfect for when you want pumpkin pie but don’t want to commit to a whole pie sitting around tempting you.
Also discovered that this filling works amazing in a graham cracker crust too. Gives it almost a cheesecake vibe. My sister-in-law is obsessed with this variation.
The Real Talk
This isn’t the fanciest pumpkin pie recipe out there. It’s not going to win any awards for originality. But you know what? Sometimes you don’t need fancy. Sometimes you need reliable, delicious, and foolproof.
This recipe has never let me down. Not once. And I’ve made it probably 50+ times at this point. Thanksgiving, random Tuesday nights when I was craving fall flavors, birthday parties for people who don’t like cake – this pie shows up and people are happy.
My 8-year-old nephew, who refuses to eat anything remotely healthy, devours this pie. My food-snob cousin who usually turns her nose up at “simple” recipes asks for seconds. My coworker who claims she doesn’t like pumpkin anything has asked me to make this for the office party three years running.
Final Thoughts
If you’ve never made pumpkin pie before, start here. If you’ve made a million pumpkin pies but they never turn out quite right, try this one. If you’re looking for something complicated and impressive… maybe look elsewhere? But if you want a pie that tastes like childhood and makes your house smell like a Yankee Candle store had a baby with a bakery, this is your recipe.
And hey, if anyone asks for your secret, you can tell them it’s an old family recipe. I won’t tell if you don’t. 😉
Now I’m craving this again and it’s not even October yet. Thanks a lot, brain.
Happy baking! (And may your pie slices come out clean and your crusts stay golden!)
Libby's Classic Pumpkin Pie
The classic Libby's pumpkin pie recipe that never fails. This foolproof homemade pumpkin pie is creamy, perfectly spiced, and has been a family favorite for generations. Simple ingredients create the ultimate fall dessert.
Ingredients
- 1 can (15 oz) Libby's 100% Pure Pumpkin
- 1 can (14 oz) sweetened condensed milk
- 2 large eggs
- 1 teaspoon ground cinnamon
- 1/2 teaspoon ground ginger
- 1/2 teaspoon ground nutmeg
- 1/2 teaspoon salt
- 1 unbaked 9-inch pie crust
Instructions
-
Step 1Preheat oven to 425°F (220°C).
-
Step 2Whisk eggs in a medium bowl until broken up.
-
Step 3Add pumpkin puree, sweetened condensed milk, cinnamon, ginger, nutmeg, and salt to the eggs.
-
Step 4Mix all ingredients until smooth and well combined.
-
Step 5Pour filling into unbaked 9-inch pie crust.
-
Step 6Bake at 425°F for 15 minutes.
-
Step 7Reduce temperature to 350°F (175°C) and bake for 40-50 minutes more.
-
Step 8Test doneness by inserting a knife near center - it should come out clean.
-
Step 9Cool completely on wire rack for 3-4 hours before serving.
-
Step 10Serve with whipped cream if desired. Store covered in refrigerator.

I’ve always found peace in the kitchen—it’s where I go to unwind, experiment, and reconnect. I started this blog because I wanted to share that feeling with others. My cooking journey started in a tiny apartment kitchen, with a second-hand skillet and a lot of trial and error.
Since then, I’ve learned that the best meals aren’t the most complicated—they’re the ones made with love (and maybe a little butter). Whether you’re a beginner or a kitchen pro, I hope you’ll feel right at home here.