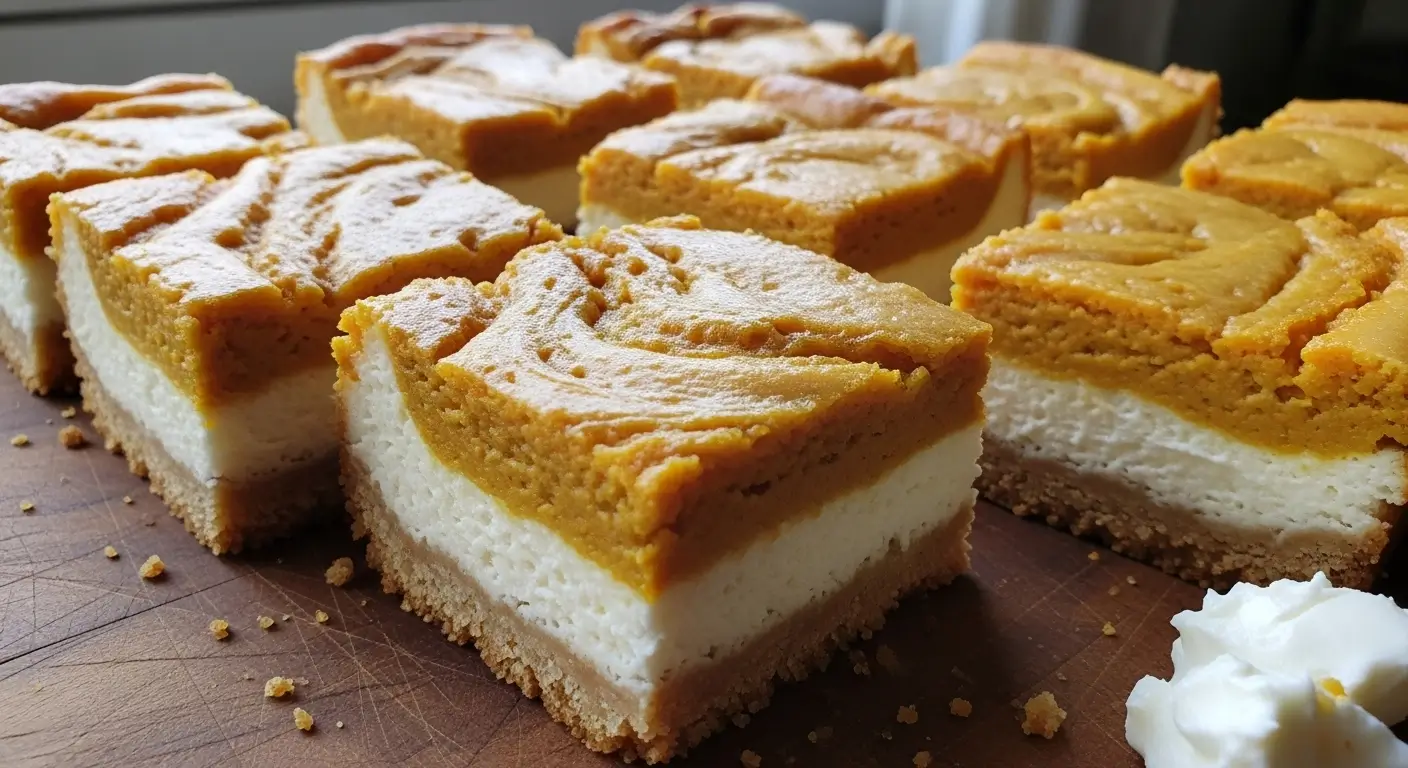
The Pumpkin Cheesecake Bars That Made My Neighbor Cry (Happy Tears!)
Okay, so I totally messed this up the first two times. Like, spectacularly. We’re talking burnt edges, soggy middles, and one batch that somehow turned into pumpkin soup. But here’s the thing—everyone keeps asking for this recipe anyway because when you get it right? It’s absolutely perfect.
Look, I’m gonna be honest with you. I started making these pumpkin cheesecake bars because my sister-in-law brought some knockoff version to Thanksgiving three years ago, and I thought “I can totally make these better.” Spoiler alert: it took me until last fall to actually nail it, but now I make them every October and people literally text me in September asking when I’m starting my baking season.
Table of Contents
How This Whole Pumpkin Cheesecake Thing Started
So this recipe… I think I got it from my coworker Janet? Or maybe it was Pinterest during one of those 2 AM scrolling sessions when I couldn’t sleep. Honestly can’t remember anymore. What I DO remember is the first time I attempted these bars, I used some random pumpkin puree that had been sitting in my pantry since who knows when.
Big mistake. Huge.
The whole thing tasted like cardboard with a hint of depression. My husband took one bite, gave me that look (you know the one), and very diplomatically said, “Maybe we could try a different recipe next time?” Which is husband-speak for “this is terrible but I love you.”
But I’m stubborn. Really stubborn. So I kept trying different versions until I figured out what actually works. And let me tell you—these pumpkin cheesecake bars are now the thing people expect at every gathering. My neighbor Sarah actually teared up when she tasted them last week. Happy tears, thankfully, not the “oh god what did you feed me” kind.
What Makes These Bars Actually Good
The secret is in the layers, and I learned this the hard way. You can’t just throw everything together and hope for the best (tried that—disaster). You need a solid crust that won’t get soggy, a creamy cheesecake layer that doesn’t crack, and just enough pumpkin flavor without it tasting like candle wax.
Also, and this is important—don’t use those pre-made graham cracker crusts from the store. Just don’t. I tried it once because I was being lazy, and it was like eating sweet cardboard. Make the crust from scratch. It takes like five extra minutes and makes ALL the difference.
The Shopping List (And My Opinions About Each Item)
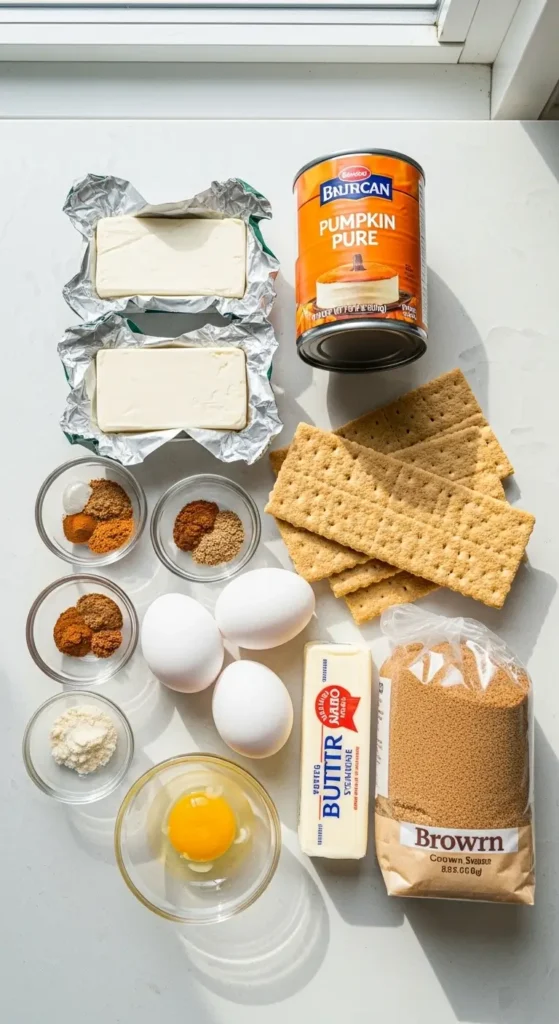
For the crust:
- 1½ cups graham cracker crumbs (buy the actual crackers and crush them yourself—trust me)
- ⅓ cup melted butter (don’t use margarine, please, I’m begging you)
- ¼ cup granulated sugar
- Pinch of salt (because everything needs salt)
For the cheesecake layer:
- 16 oz cream cheese, softened (and I mean REALLY softened—leave it out overnight)
- ½ cup granulated sugar
- 2 large eggs (room temperature, or they won’t mix properly)
- 1 teaspoon vanilla extract (real vanilla, not the fake stuff)
For the pumpkin layer:
- 1 cup pumpkin puree (Libby’s is my go-to, fight me)
- ⅓ cup brown sugar (packed—don’t be shy)
- 1 large egg
- ½ teaspoon cinnamon
- ¼ teaspoon nutmeg (fresh if you have it)
- ⅛ teaspoon ground cloves
- ¼ teaspoon salt
Word of advice: check your spice cabinet before you start. I once got halfway through making these and realized my cinnamon was older than my marriage. Had to send my husband to the store at 9 PM because I refused to use prehistoric spices.
The Step-by-Step Process (With All My Kitchen Disasters Included)
Step 1: Prep Your Pan and Oven
Preheat your oven to 350°F and line an 8×8 inch pan with parchment paper. Leave some overhang so you can actually get these bars out later without destroying them. I learned this lesson when I had to serve “pumpkin cheesecake crumble” because I couldn’t get a single intact bar out of the pan.
Step 2: Make the Crust
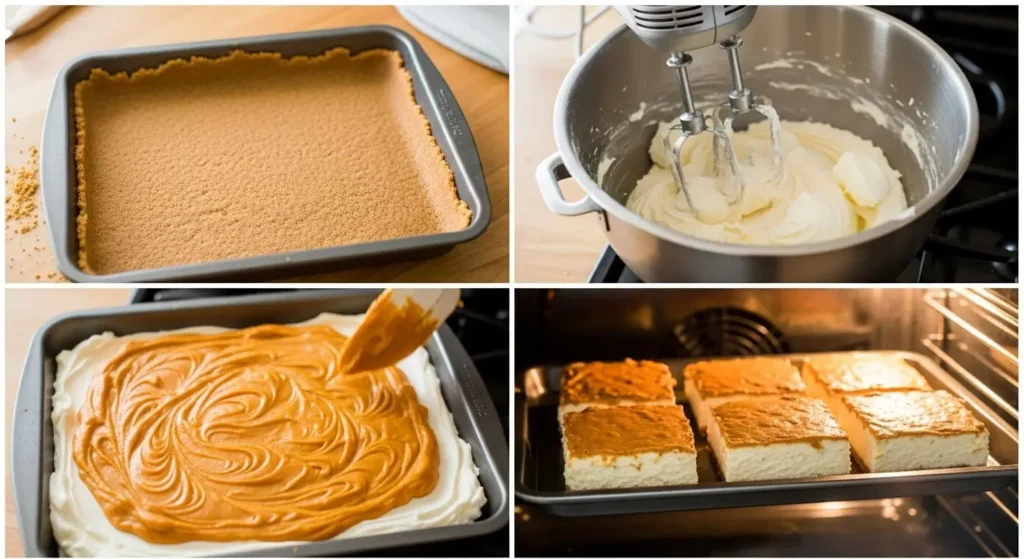
Mix the graham cracker crumbs, melted butter, sugar, and salt in a bowl until it looks like wet sand. Press this mixture firmly into the bottom of your prepared pan. And I mean FIRMLY. Use the bottom of a measuring cup to really pack it down.
Bake for 10 minutes while you work on the next layers. Don’t skip this step—I tried once and ended up with soggy bottom syndrome.
Step 3: The Cheesecake Layer (This Is Where Things Get Tricky)
Beat the softened cream cheese until it’s completely smooth. This takes longer than you think it will. Like, way longer. I’m talking 3-4 minutes of constant beating. If you try to rush this, you’ll have lumps, and lumpy cheesecake is just sad.
Add the sugar and beat until combined. Then add the eggs one at a time—don’t dump them both in at once like I did the first time. Finally, mix in the vanilla.
Pour this over your baked crust and smooth it out. Set this aside while you make the pumpkin layer.
Step 4: The Pumpkin Magic
In another bowl (yes, you need multiple bowls for this—sorry), whisk together the pumpkin puree, brown sugar, egg, and all those spices. It should be smooth and smell like fall threw up in your kitchen (but in a good way).
Here’s where I was an idiot for way too long: I used to just dump this on top of the cheesecake layer and call it done. Wrong. You need to carefully spoon it over the cheesecake and then use a knife to create swirls. Not aggressive swirls—gentle, pretty swirls that make it look like you actually know what you’re doing.
Step 5: The Baking Drama
Bake for 25-30 minutes until the center is almost set but still slightly jiggly. This is where I panicked the first few times. You want it to look ALMOST done, not completely solid. It’ll keep cooking as it cools.
The hardest part? Don’t open the oven door for the first 20 minutes. Just don’t. I know you want to check on it, but resist the urge. Opening the door too early causes cracks, and nobody wants cracked cheesecake bars.
Step 6: The Cooling Process (AKA Test Your Patience)
Let these cool completely at room temperature, then refrigerate for at least 4 hours. Preferably overnight. I know it’s torture, but warm cheesecake bars are just messy and won’t cut cleanly.
The Things I Wish Someone Had Told Me
About the cream cheese: Seriously, make sure it’s completely soft. I once tried to shortcut this by microwaving cold cream cheese, and it turned into a lumpy mess that looked like cottage cheese having a bad day.
About the pumpkin: Don’t use pumpkin pie filling instead of plain pumpkin puree. It’s already spiced and sweetened, and you’ll end up with cloyingly sweet bars that taste like artificial everything.
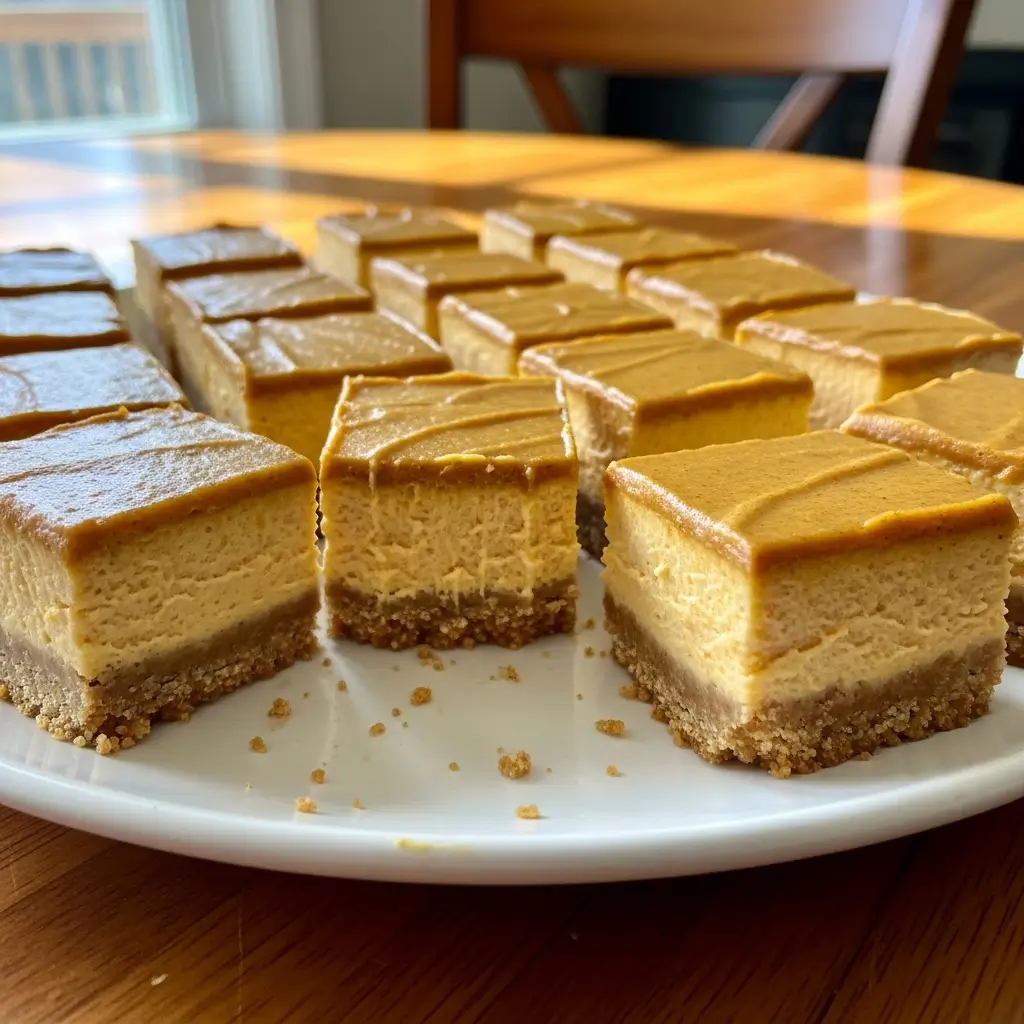
About cutting them: Use a sharp knife and clean it between cuts. These are rich and creamy, so they stick to everything. Also, cut them into smaller squares than you think you need—they’re richer than they look.
About storage: They keep in the fridge for about a week, but they never last that long in my house. You can also freeze them individually wrapped for up to three months, which is great for when you need a dessert emergency stash.
The Variations I’ve Tried (Some Successfully)
Gingersnap crust: Replace the graham crackers with gingersnap cookies. Adds a nice spicy kick that goes perfectly with the pumpkin.
Maple version: Replace half the brown sugar in the pumpkin layer with maple syrup. Just reduce the liquid slightly or they’ll be too wet.
Chocolate swirl: Add melted chocolate chips to create a marbled effect. My teenage nephew loves this version.
Mini versions: Make them in a mini muffin tin for parties. Reduce the baking time to about 15-18 minutes.
When These Bars Go Wrong (And How to Fix It)
Cracked top: Usually from overbaking or temperature shock. They still taste fine—just serve them with whipped cream and call it “rustic.”
Soggy crust: Your graham crackers weren’t crushed fine enough, or you didn’t pre-bake the crust long enough. Next time, be more patient.
Too sweet: Cut back on the sugar in both layers next time, or serve with unsweetened whipped cream to balance it out.
Not setting properly: You probably didn’t bake them long enough, or your cream cheese wasn’t properly incorporated. They might be messier to serve, but they’ll still taste good eaten with a spoon.
The Real Talk About These Pumpkin Cheesecake Bars
These aren’t diet food. They’re not health food. They’re pure indulgence, and that’s exactly what they should be. One small square is plenty for most people, though my brother-in-law regularly eats three at a time and claims they’re “basically vegetables because pumpkin.”
They’re perfect for Thanksgiving, but honestly, I make them throughout the fall because they make the house smell incredible and they freeze well. Plus, they’re impressive enough for company but easy enough that I don’t stress about making them.
The best part? Everyone assumes they’re way harder to make than they actually are. I’ve been asked multiple times if I went to culinary school (nope, just YouTube University and a lot of trial and error).
Final Thoughts on This Whole Pumpkin Cheesecake Adventure
Look, I could have just given you a basic recipe and called it a day. But here’s the thing—cooking isn’t just about following directions. It’s about understanding why things work, what can go wrong, and how to make something truly good instead of just edible.
These pumpkin cheesecake bars have become my fall signature dessert, and every time I make them, I remember that first terrible batch and how far I’ve come. Sometimes the best recipes aren’t the ones that work perfectly on the first try—they’re the ones you have to earn through a few disasters and a lot of stubbornness.
So give these a try, and don’t get discouraged if your first batch isn’t perfect. Mine definitely wasn’t, and now I make them so often that my family starts dropping hints in early September.
And seriously, let me know how yours turn out! I’m genuinely curious if anyone else had to make these multiple times to get them right, or if I’m just that special kind of stubborn cook who has to learn everything the hard way.
Happy baking! (And may your cheesecake layers be lump-free and your patience be strong during the cooling process.)
P.S. – If you make these and they turn out amazing on your first try, I don’t want to hear about it. Some of us need our baking ego preserved. 😉
Pumpkin Cheesecake Bars
Rich, creamy pumpkin cheesecake bars with a graham cracker crust and beautiful swirled layers. Perfect for fall gatherings and tested through multiple kitchen disasters to ensure foolproof results.
Ingredients
- 1½ cups graham cracker crumbs
- ⅓ cup melted butter
- ¼ cup granulated sugar
- Pinch of salt
- 16 oz cream cheese, softened
- ½ cup granulated sugar
- 2 large eggs (room temperature)
- 1 teaspoon vanilla extract
- 1 cup pumpkin puree
- ⅓ cup brown sugar, packed
- 1 large egg
- ½ teaspoon cinnamon
- ¼ teaspoon nutmeg
- ⅛ teaspoon ground cloves
- ¼ teaspoon salt
Instructions
-
Step 1Preheat oven to 350°F and line an 8x8 inch pan with parchment paper, leaving overhang for easy removal.
-
Step 2Mix graham cracker crumbs, melted butter, granulated sugar, and pinch of salt until mixture resembles wet sand.
-
Step 3Press crust mixture firmly into prepared pan using bottom of measuring cup. Bake for 10 minutes.
-
Step 4Beat softened cream cheese for 3-4 minutes until completely smooth and lump-free.
-
Step 5Add ½ cup granulated sugar to cream cheese and beat until combined.
-
Step 6Add eggs one at a time, then vanilla extract, beating just until incorporated.
-
Step 7Pour cheesecake mixture over baked crust and smooth surface.
-
Step 8In separate bowl, whisk together pumpkin puree, brown sugar, remaining egg, cinnamon, nutmeg, cloves, and salt until smooth.
-
Step 9Carefully spoon pumpkin mixture over cheesecake layer and create gentle swirls with knife.
-
Step 10Bake for 25-30 minutes until center is almost set but slightly jiggly. Don't open oven door for first 20 minutes.
-
Step 11Cool completely at room temperature, then refrigerate for at least 4 hours or overnight before cutting.
I’ve always found peace in the kitchen—it’s where I go to unwind, experiment, and reconnect. I started this blog because I wanted to share that feeling with others. My cooking journey started in a tiny apartment kitchen, with a second-hand skillet and a lot of trial and error.
Since then, I’ve learned that the best meals aren’t the most complicated—they’re the ones made with love (and maybe a little butter). Whether you’re a beginner or a kitchen pro, I hope you’ll feel right at home here.
Pumpkin Cheesecake Bars - EL RECIPE
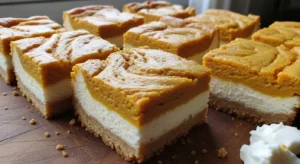
Learn how to make perfect pumpkin cheesecake bars with this honest, tested recipe. Includes troubleshooting tips, variations, and real kitchen disasters to help you avoid common mistakes. Rich, creamy, and foolproof!
Recipe Ingredients:

