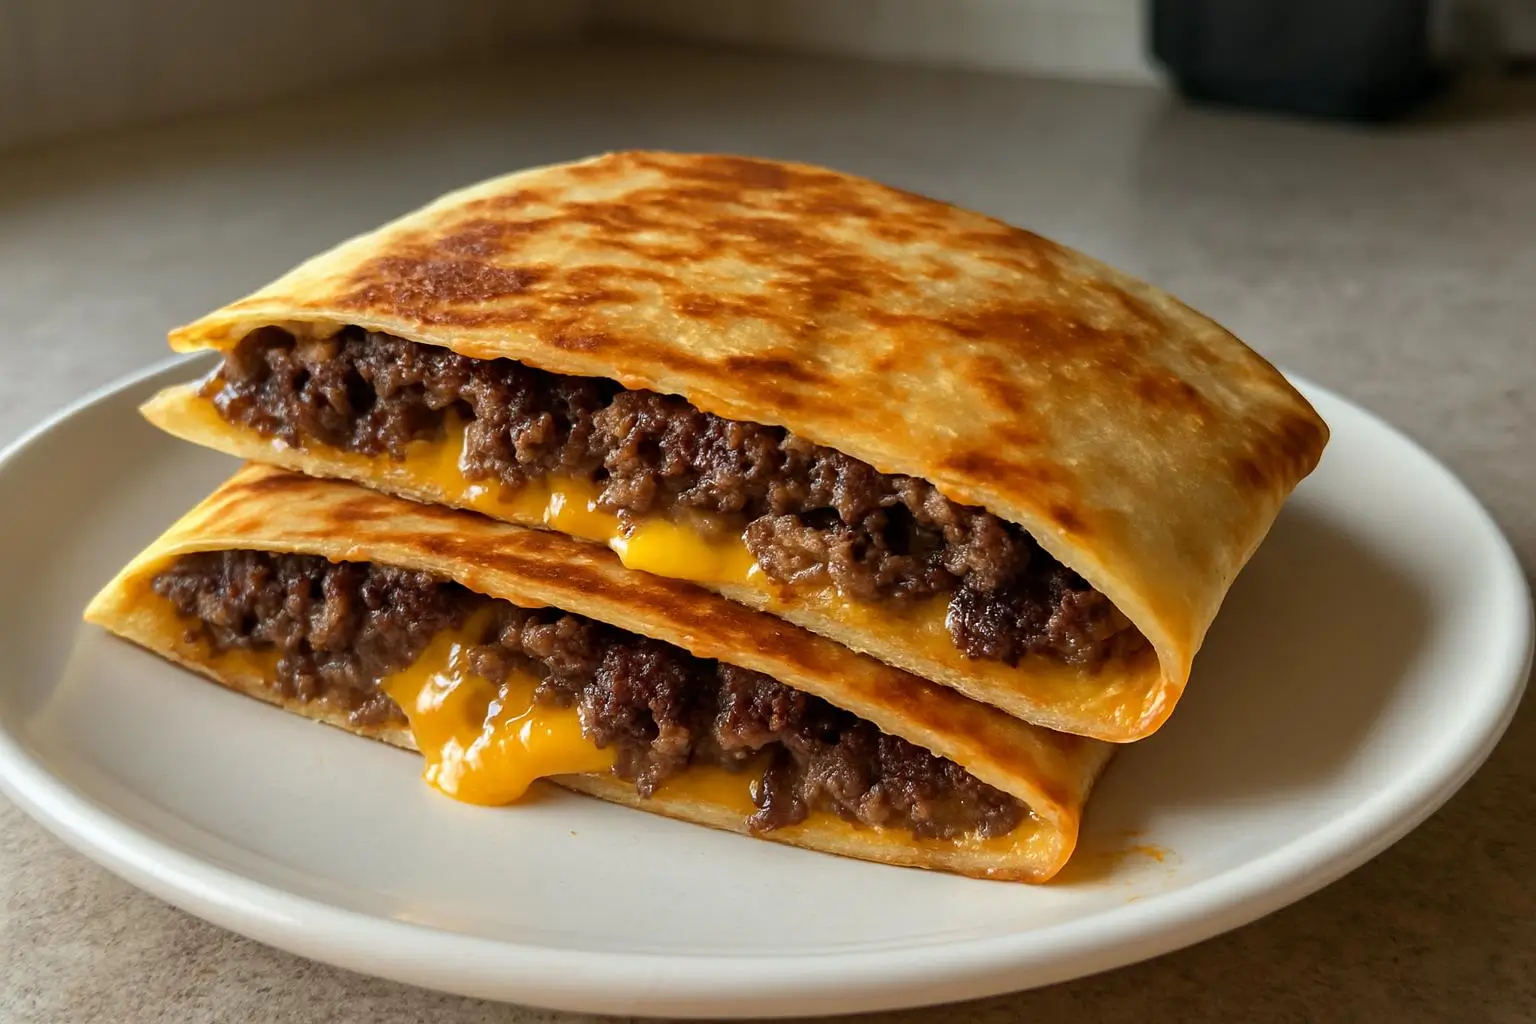
The Smashburger Quesadilla That Changed My Tuesday Nights (And Probably My Life)
Okay, so everyone keeps asking for this recipe after I posted that messy kitchen photo on Instagram last week. You know, the one with cheese literally everywhere and my cat judging me from the corner? Yeah, that disaster actually turned out to be the best thing I’ve cooked in months.
Look, I’m gonna be honest with you. I wasn’t trying to reinvent anything here. I was just really tired of making the same boring quesadillas for my kids, and I had leftover ground beef that needed to get used before it went bad. But somehow—I think it was pure desperation mixed with Wednesday night chaos—I stumbled onto something pretty incredible.
Table of Contents
How This Whole Thing Started (AKA My Kitchen Breakdown)
Picture this: It’s 6 PM, my 8-year-old is asking for the millionth time when dinner will be ready, and I’m staring into my fridge like it’s going to magically produce a meal. I had ground beef, some tortillas that were getting kinda stiff around the edges, and a block of cheese. That’s it. Oh, and my neighbor Sarah was texting me about some fancy smashburger technique she saw on TikTok.
Now, here’s the thing about me and TikTok cooking videos—I watch them, get inspired, then completely forget half the steps. But the smashburger concept stuck with me. You basically smash the beef super thin to get those crispy edges, right? So I thought… why not smash the beef IN a quesadilla?
First attempt? Disaster. Complete disaster. The beef was too thick, the cheese didn’t melt properly, and I somehow managed to burn the bottom while keeping the top completely raw. My kids took one look and ordered pizza. Can’t blame them.
But I’m stubborn. Ask anyone who knows me. So I tried again the next night. And again. By attempt number four, I had something that made my teenager actually look up from their phone and say “This is actually good, Mom.” That’s when I knew I’d cracked the code.
What Makes These Smashburger Quesadillas Different
The secret—and I’m telling you this because we’re friends now—is all about the technique. You don’t just throw ground beef into a quesadilla and hope for the best. You create these incredibly thin, crispy beef patties right inside the tortilla. It’s like having a burger and quesadilla at the same time, but somehow better than both.
The beef gets these amazing crispy bits (we call them the “flavor nuggets” in our house), and the cheese melts into every little crevice. Plus, you get that perfect tortilla crispiness without any soggy spots. Trust me on this one.
Ingredients (AKA What You Probably Already Have)
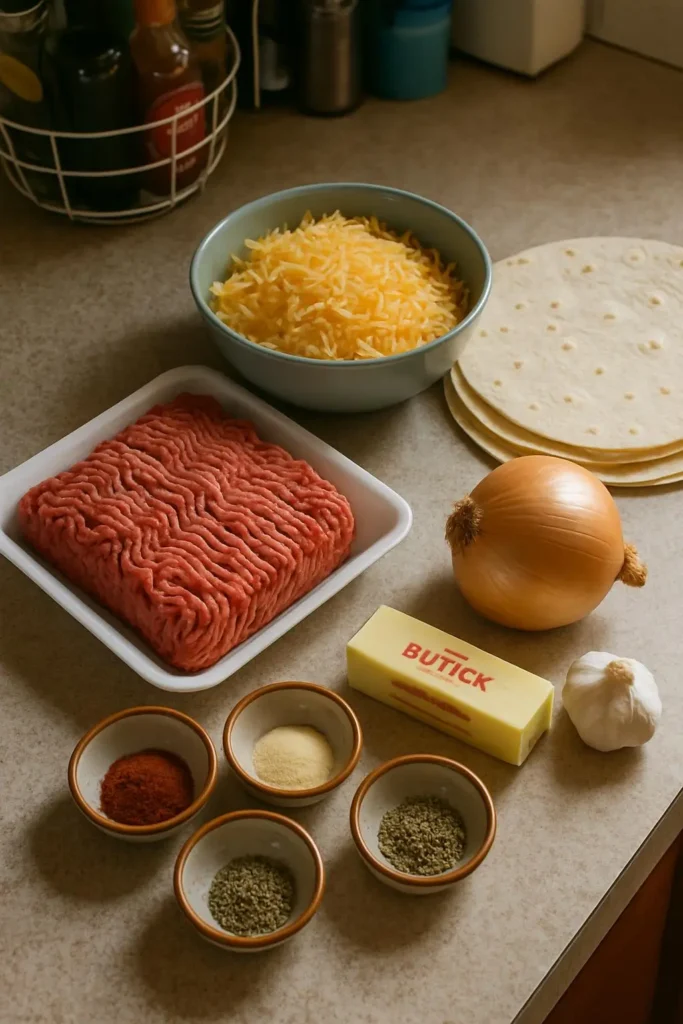
Here’s what you’ll need, and honestly, you can mess around with most of these:
For the beef:
- 1 pound ground beef (80/20 works best – don’t go too lean or you’ll regret it)
- 1 small onion, diced super fine (or onion powder if you’re lazy like me sometimes)
- 2 cloves garlic, minced (I use way more because I’m obsessed with garlic)
- 1 teaspoon salt
- 1/2 teaspoon black pepper
- 1/2 teaspoon paprika (gives it that slight smoky thing)
- 1/4 teaspoon cumin (optional, but why would you skip it?)
For assembly:
- 8 large flour tortillas (don’t use the tiny ones, learned that the hard way)
- 2 cups shredded cheese – I mix cheddar and Monterey Jack, but use whatever you have
- 1/4 cup butter, softened (or just keep it at room temp like I always forget to do)
Optional stuff that makes it even better:
- Pickled jalapeños (my kids hate them, I add them anyway)
- Diced tomatoes (drain them or you’ll get soggy quesadillas)
- Sour cream for serving
- Hot sauce (I’m a Cholula girl, but you do you)
Shopping tip: Don’t buy pre-shredded cheese. Just don’t. It’s got all that anti-caking stuff that makes it weird when it melts. Shred your own – takes two minutes and tastes a million times better.
The Step-by-Step Process (With All My Mistakes Included)
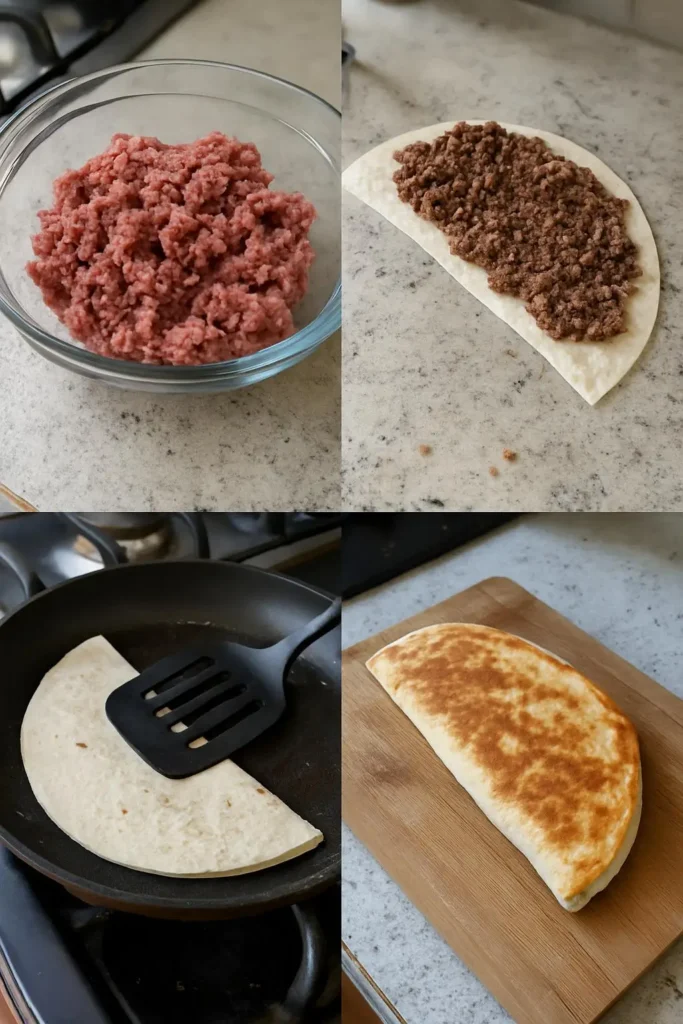
Step 1: Prep Your Beef Mixture Mix the ground beef with all your seasonings in a bowl. Don’t overmix it—just get everything combined. I learned this from my mom, who learned it from her mom. Sometimes family wisdom actually works.
Here’s something I discovered by accident: let this mixture sit for like 10-15 minutes before cooking. The salt draws out some moisture, and somehow the flavors get friendlier with each other. Science? Magic? I don’t know, but it works.
Step 2: Get Your Assembly Station Ready This is where organization actually matters. Trust me, once you start cooking these, everything happens fast. Lay out your tortillas, have your cheese shredded and ready, butter softened. I like to set up everything on my kitchen island so I can just grab and go.
Pro tip I learned after making a huge mess: put down some parchment paper or paper towels. These get a little… enthusiastic… with the cheese spillage.
Step 3: The Magic Happens (AKA The Smashing Part) Heat a large skillet or griddle over medium-high heat. Take about 1/4 of your seasoned beef mixture and place it on one half of a tortilla. Now here’s the key—spread it out really thin, like you’re trying to make the thinnest burger patty ever. Don’t worry if it looks messy. Messy is good here.
Sprinkle your cheese over the beef, then fold the tortilla over. Now comes the fun part—you’re going to press this thing down and cook it like a grilled cheese.
Step 4: Cook Like Your Life Depends On It Brush the outside of your tortilla with some of that softened butter. Place it in your hot skillet and immediately press down with a spatula. I mean really press. You want that beef to make contact with the tortilla and get crispy.
Cook for 3-4 minutes until the bottom is golden brown and you can hear that satisfying sizzle. Flip it carefully (this is where I’ve lost a few to the floor), brush the other side with butter, and press down again. Another 3-4 minutes until the second side is crispy and the cheese is completely melted.
The first time I made these, I was so worried about burning them that I kept flipping every 30 seconds. Don’t be me. Let them sit and get crispy. The beef needs time to do its thing.
Step 5: Rest and Repeat Let each quesadilla rest for about 2 minutes before cutting. I know it’s tempting to dive right in, but hot cheese will burn your tongue, and more importantly, resting helps everything set up so it doesn’t fall apart when you cut it.
Repeat with the remaining beef mixture and tortillas. You should get 4 good-sized quesadillas from this recipe.
The Things I’ve Learned (Some the Hard Way)
About the beef: Don’t use ground turkey or lean beef. You need that fat content for flavor and moisture. I tried 93/7 ground beef once thinking I was being healthy. It was like eating cardboard.
About the heat: Medium-high is your friend. Too hot and you’ll burn the tortilla before the beef cooks. Too low and everything gets soggy and sad.
About the pressing: You really do need to press these down. I have this old spatula that’s perfectly flat—it’s become my quesadilla spatula. If you don’t have one, a small plate works too.
About the cheese: More cheese is not always better. I know, I know, it goes against everything we believe. But too much cheese and it all melts out the sides and makes a mess. Plus, you want to actually taste the beef.
Serving Suggestions That Actually Work
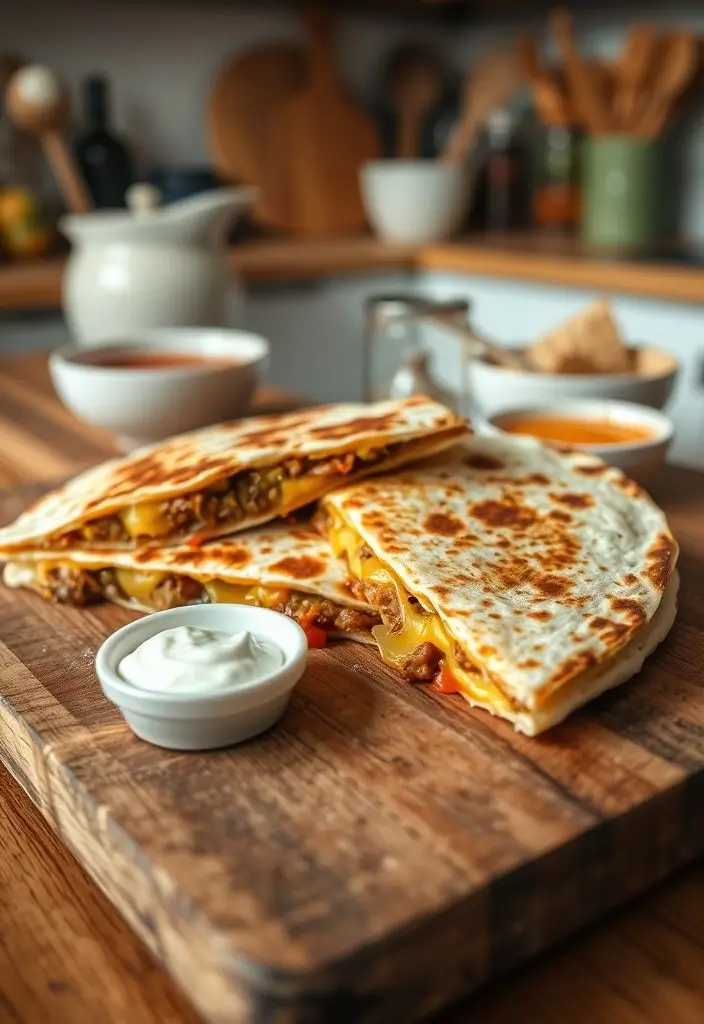
I serve these cut into triangles with sour cream and whatever hot sauce is currently living on our counter. My kids like them with ketchup, which makes me die a little inside, but whatever makes them happy.
They’re amazing with a simple side salad—just lettuce, tomatoes, and whatever dressing you have. Or corn chips if you’re feeling fancy. Sometimes I’ll make some quick guacamole, but honestly, they’re perfect on their own.
For adults, these are incredible with a cold beer. Don’t judge me, but I’ve been known to eat one for breakfast with coffee. It’s basically a breakfast sandwich, right?
The Variations I’ve Tried (Some Better Than Others)
The Texas Version: Added some chopped jalapeños to the beef mixture and used pepper jack cheese. My husband loved it. My kids complained for days.
The Mushroom Disaster: Tried adding sautéed mushrooms. The moisture made everything soggy. Would not recommend.
The Bacon Addition: Crumbled some cooked bacon into the beef mixture. This was… dangerous. Too good. My family finished all four quesadillas in about ten minutes.
The Veggie Attempt: Used black beans instead of beef for my vegetarian neighbor. Actually worked really well, though it’s obviously a completely different dish at that point.
Storage and Reheating (Because Leftovers Are Life)
These actually keep pretty well in the fridge for 2-3 days. To reheat, I just throw them back in a skillet for a minute or two on each side. The microwave makes them soggy—don’t do it.
You can also freeze them after cooking. Wrap individually in foil and they’ll keep for a month. Reheat from frozen in a 350°F oven for about 10 minutes.
Actually, you know what? I’ve never had leftovers. These disappear too fast. But theoretically, that’s how you’d store them.
Why These Work (My Totally Unscientific Theory)
I think it’s the combination of textures. You get the crispy beef edges, the melted cheese, and that perfect tortilla crunch all in one bite. Plus, there’s something about cooking the beef inside the quesadilla that makes the flavors meld together in this really satisfying way.
My neighbor Sarah (the TikTok one) says it’s because the beef fat soaks into the tortilla and creates this amazing flavor base. She might be right. She’s usually right about food stuff, which is annoying but useful.
The Final Verdict
Look, I’m not saying these are going to change your life. But they might change your Tuesday nights. They’re easy enough for a weeknight dinner, but special enough that you’ll feel like you accomplished something. Plus, they freeze well, reheat beautifully, and make your kitchen smell amazing.
My kids ask for these at least twice a week now. My teenager has actually learned to make them, which means I don’t always have to cook dinner. That alone makes this recipe worth sharing.
And honestly? After three months of making these regularly, I still get excited when I hear that sizzle as the beef hits the hot tortilla. Some things never get old.
One Last Thing
If you make these, please let me know how they turn out! Seriously, try this and tell me what you think. I’m always looking for ways to make them even better, and I’ve learned some of my best tricks from people who’ve tried my recipes and added their own twist.
Also, if you figure out how to make them without getting cheese all over your stovetop, please share that secret. I’m still working on that part.
Happy cooking! (And may your smoke alarms stay quiet) 😊
Now I’m craving these again. Thanks a lot, brain.
Smashburger Quesadillas
Crispy smashburger quesadillas with perfectly seasoned ground beef cooked thin and crispy inside flour tortillas with melted cheese. A fusion of burger and quesadilla that's perfect for weeknight dinners.
Ingredients
- 1 pound ground beef (80/20)
- 1 small onion, diced fine
- 2 cloves garlic, minced
- 1 teaspoon salt
- 1/2 teaspoon black pepper
- 1/2 teaspoon paprika
- 1/4 teaspoon cumin
- 8 large flour tortillas
- 2 cups shredded cheese (cheddar and Monterey Jack mix)
- 1/4 cup butter, softened
- Optional: pickled jalapeños, diced tomatoes, sour cream, hot sauce
Instructions
-
Step 1Mix ground beef with onion, garlic, salt, pepper, paprika, and cumin in a bowl. Let sit for 10-15 minutes to allow flavors to blend.
-
Step 2Set up assembly station with tortillas, shredded cheese, and softened butter ready.
-
Step 3Heat large skillet or griddle over medium-high heat.
-
Step 4Take 1/4 of beef mixture and spread very thin on half of one tortilla. Sprinkle cheese over beef, then fold tortilla over.
-
Step 5Brush outside of tortilla with softened butter. Place in hot skillet and press down firmly with spatula.
-
Step 6Cook 3-4 minutes until bottom is golden brown. Flip carefully, brush other side with butter, and press down again.
-
Step 7Cook another 3-4 minutes until second side is crispy and cheese is melted.
-
Step 8Remove from heat and let rest 2 minutes before cutting.
-
Step 9Repeat with remaining beef mixture and tortillas.
-
Step 10Cut into triangles and serve with sour cream, hot sauce, or preferred toppings.

I’ve always found peace in the kitchen—it’s where I go to unwind, experiment, and reconnect. I started this blog because I wanted to share that feeling with others. My cooking journey started in a tiny apartment kitchen, with a second-hand skillet and a lot of trial and error.
Since then, I’ve learned that the best meals aren’t the most complicated—they’re the ones made with love (and maybe a little butter). Whether you’re a beginner or a kitchen pro, I hope you’ll feel right at home here.

