The Best Buckeye Fudge Candy Recipe (That Actually Works!)
Okay, so I’ve been making this buckeye fudge candy for like three years now, and I’m finally ready to share it. Not because it’s perfect—trust me, I’ve screwed this up more times than I care to admit—but because people keep asking for the recipe every time I bring it to work or family gatherings.
Look, I’m gonna be honest with you. This isn’t some fancy chef recipe. This is what happens when someone who burns toast on a regular basis somehow figures out how to make decent dessert. And before you ask, yes, I’m from Ohio. No, I don’t care about the football team. Yes, I make these buckeyes because they’re delicious and my grandma would haunt me if I didn’t carry on the tradition.
Table of Contents
The Disaster That Started It All
Three Christmases ago, I decided I was going to be that person who makes homemade gifts. You know the type. Pinterest perfect, mason jars everywhere, probably grows their own herbs. Yeah, that lasted about five minutes.
My first batch of buckeye fudge was… well, let’s just say my dog wouldn’t even eat it. And he once ate an entire sock, so that’s saying something. The peanut butter mixture was too runny, the chocolate seized up like it was having some kind of existential crisis, and I’m pretty sure I added salt instead of sugar at some point. Complete disaster.
But here’s the thing about me—I’m stubborn. Really stubborn. So I kept trying.
What Makes This Recipe Actually Work
After countless failed attempts (I’m talking at least twelve batches that went straight to the garbage), I finally figured out the tricks that nobody tells you. And I mean nobody. All those fancy food blogs with their perfect photos? They skip the real stuff.
First off, temperature matters way more than anyone admits. Like, obsessively so. I bought one of those candy thermometers after batch number six turned into what I can only describe as “peanut butter soup.” Worth every penny.
Second thing—and this is important—your peanut butter choice makes or breaks this recipe. I use Jif. Not because I’m brand loyal, but because I tried it with natural peanut butter once and it was a complete nightmare. All that oil separation? Yeah, your buckeye fudge doesn’t want any part of that mess.
The Ingredients (And My Shopping Disasters)
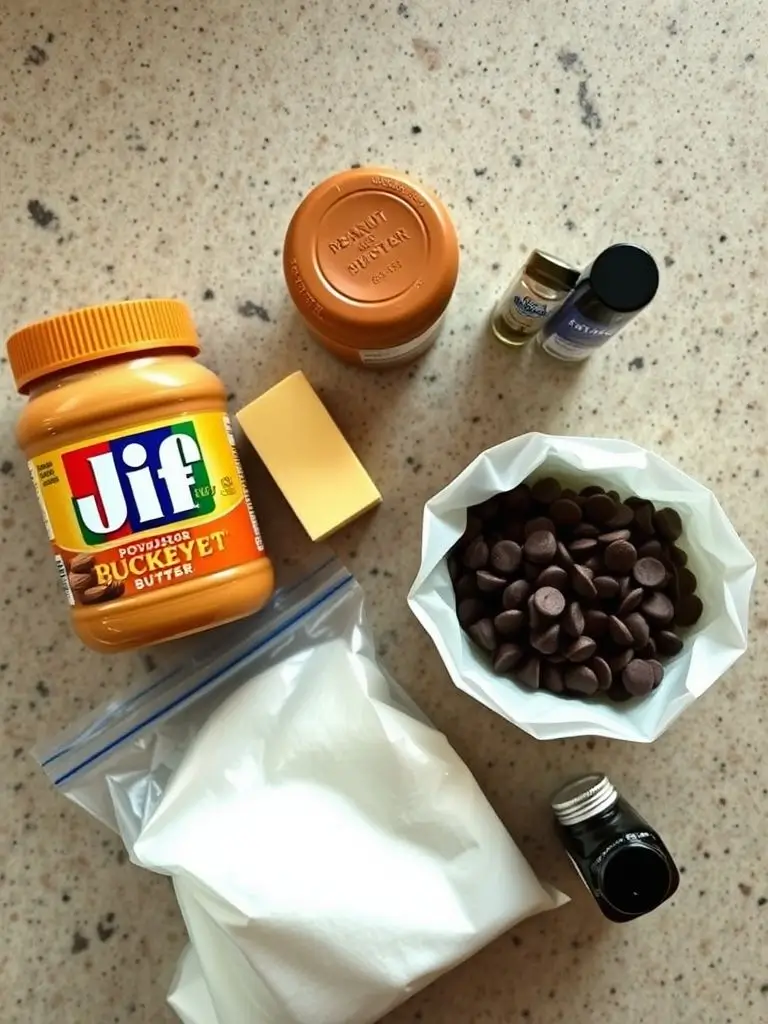
HeHere’s what you need, along with my hard-learned shopping wisdom:
For the Peanut Butter Layer:
- 1 cup creamy peanut butter (Jif, seriously, don’t fight me on this)
- 6 tablespoons butter, softened (not melted—learned this the hard way)
- 1 teaspoon vanilla extract
- 3 cups powdered sugar (buy more than you think you need)
- 1/4 teaspoon salt
For the Chocolate Layer:
- 2 cups semi-sweet chocolate chips (I use Ghirardelli when I’m feeling fancy, Nestle when I’m not)
- 2 tablespoons coconut oil or shortening (trust me on the coconut oil)
Now, about that powdered sugar—buy the big box. I cannot tell you how many times I’ve been halfway through this recipe only to realize I’m short on powdered sugar. It’s like a curse. Last month I had to send my neighbor’s kid to the store because I was covered in peanut butter and couldn’t leave the kitchen.
And speaking of neighbors, mine think I’m slightly insane because I always make this at like 10 PM. Something about the quiet kitchen and no distractions. Plus, if I mess up, nobody’s around to witness the meltdown.
The Process (AKA Where Everything Can Go Wrong)
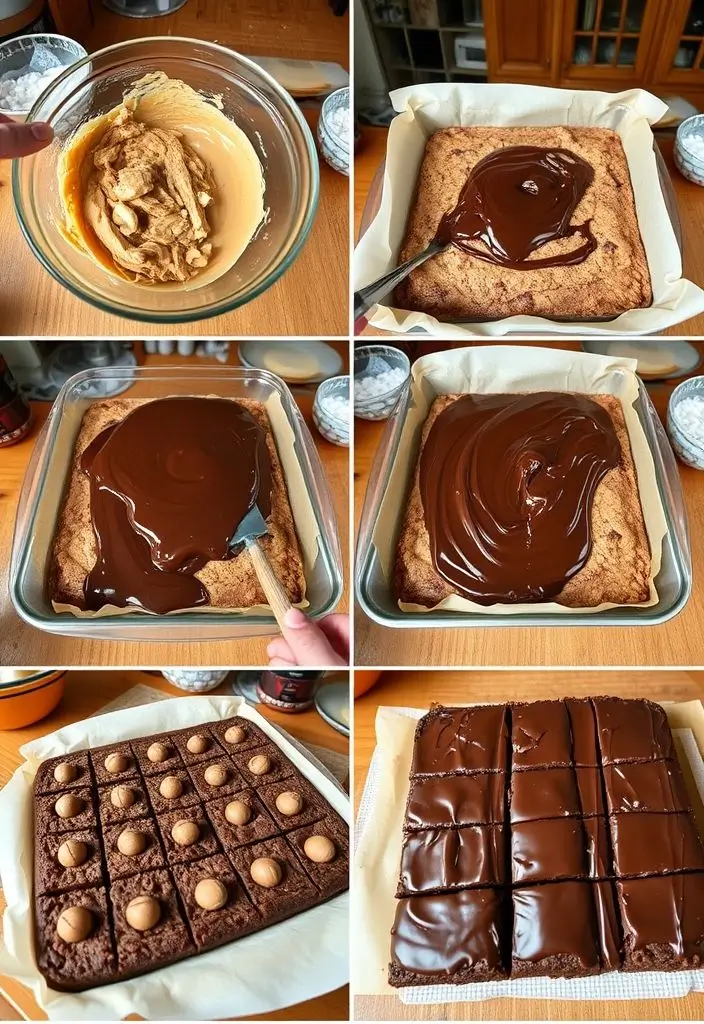
Step 1: Make the Peanut Butter Base
Mix your peanut butter, softened butter, vanilla, and salt in a large bowl. I use my stand mixer for this because hand mixing is for people with way more patience than me. Beat it until it’s smooth and creamy—should take about 2 minutes.
Here’s where people mess up: they add all the powdered sugar at once. Don’t do this. Add it gradually, about a cup at a time, mixing between each addition. Otherwise you’ll have a powdered sugar explosion that looks like it snowed in your kitchen. Ask me how I know.
The mixture should be thick enough to roll into balls but not so thick that you need a jackhammer. If it’s too sticky, add more powdered sugar. Too dry? Add a tiny bit more peanut butter.
Step 2: Shape Into Brownies (Way Easier Than Rolling)
Line an 8×8 inch baking pan with parchment paper, leaving some overhang for easy removal. Seriously, don’t skip the parchment. I tried wax paper once and… just don’t.
Press the peanut butter mixture evenly into the prepared pan. I use the back of a spoon or my hands (slightly damp hands work better) to get it nice and flat. Don’t stress about making it perfectly smooth—this isn’t a fancy bakery.
Pro tip I learned by accident: put another piece of parchment on top and use a measuring cup to press everything down evenly. Discovered this when I was being lazy and it actually worked better than trying to smooth it by hand.
Stick the whole pan in the freezer for at least 30 minutes. I usually do an hour because I forget it’s in there.
Step 3: The Chocolate Coating (Where Dreams Go to Die)
This is where I lost many battles before finally winning the war. Melt your chocolate chips and coconut oil in a microwave-safe bowl. Do this in 30-second intervals, stirring between each one. Don’t get impatient and blast it for two minutes straight. Chocolate holds grudges.
The mixture should be smooth and glossy. If it looks grainy or seized up, you’ve overheated it. Start over. I know it sucks, but there’s no saving seized chocolate. I’ve tried.
Step 4: The Chocolate Topping
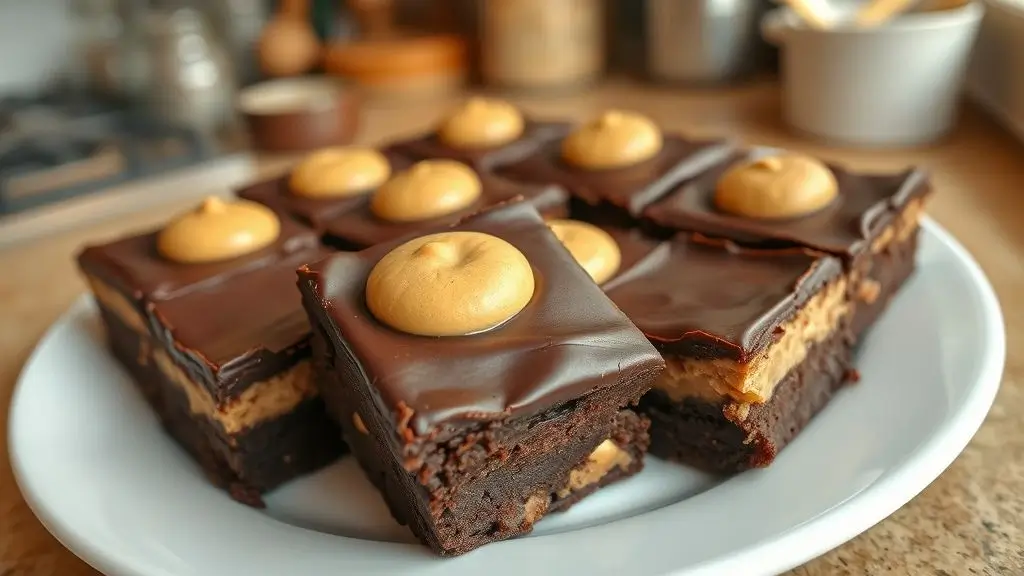
Here’s where I changed the game completely—instead of trying to dip individual pieces (which was honestly a nightmare), I just pour the melted chocolate right over the whole thing. Revolutionary, I know.
Pour the smooth, glossy chocolate over the frozen peanut butter layer and use an offset spatula to spread it evenly. Don’t worry if it’s not perfect—rustic is the goal here.
Let it set at room temperature for about 10 minutes, then pop it back in the fridge for another 20 minutes to make sure the chocolate is completely firm.
Step 5: Cut Into Brownies
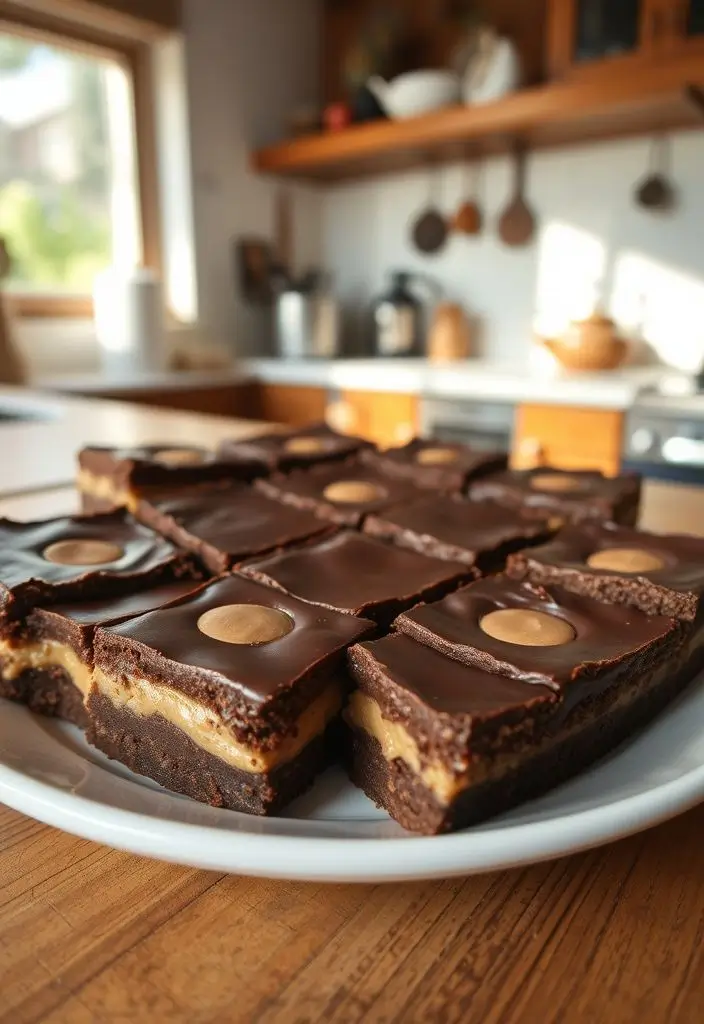
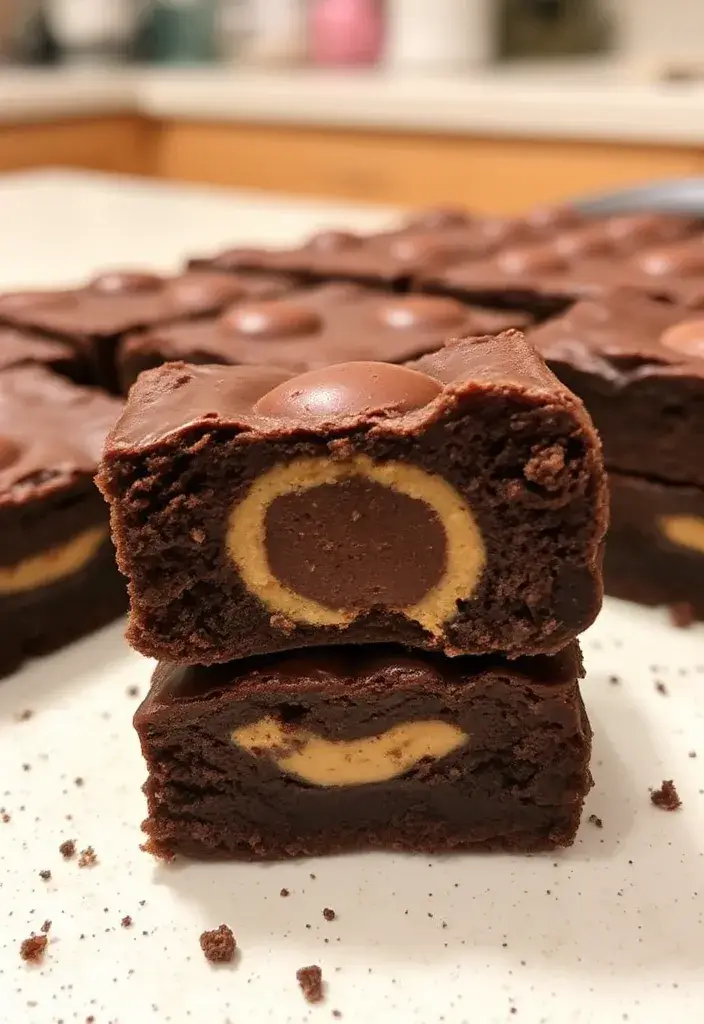
Once everything is set, lift the whole thing out of the pan using the parchment paper overhang (see? told you it was smart). Place it on a cutting board.
Using a sharp knife, cut into squares or rectangles—whatever size you want. I usually do about 36 pieces, but honestly, I’ve cut them bigger when I’m feeling particularly indulgent.
Pro tip: wipe your knife clean between cuts for neater edges. Though let’s be real, I usually forget to do this and they still taste amazing.
My Hard-Learned Tips
Temperature is everything. Room temperature ingredients mix better. Cold chocolate doesn’t coat well. Hot chocolate is too thin. It’s like Goldilocks but with candy.
Don’t rush the freezing step. I tried to shortcut this once and ended up with buckeyes that looked like they’d been through a blender. The peanut butter needs to be firm enough to hold its shape during dipping.
Make extra. These disappear fast. I made a batch for a potluck once and brought home an empty container and three people asking for the recipe.
Store them right. They keep in the fridge for up to two weeks in an airtight container. Layer them between parchment paper if you’re stacking them.
When Things Go Wrong (Because They Will)
Peanut butter mixture too runny? Add more powdered sugar, a little at a time.
Chocolate too thick? Add a tiny bit more coconut oil and gently reheat.
Brownies cracking when cutting? Let them come to room temperature for about 10 minutes before cutting.
Chocolate seized up? Start over with new chocolate. I know it hurts, but trying to fix it usually makes things worse.
Can’t get clean cuts? Run your knife under warm water and dry it between cuts.
Why I Keep Making These
Look, I’m not going to lie and say these are health food. They’re pure indulgence. But there’s something about making them that feels like carrying on a tradition, even though my technique would probably make my grandmother laugh.
My 8-year-old nephew helps me press the peanut butter layer now (he’s way better at making it smooth than I am, which is slightly annoying), and my sister says it’s become one of his favorite memories. That’s worth all the failed batches and chocolate-covered disasters.
Plus, they’re way better than anything you can buy in the store. And when people ask where I got them, I get to say “I made them,” which still feels pretty cool even after all this time.
These buckeye fudge brownies aren’t just treats—they’re little edible hugs. They’re what happens when you take a classic Ohio tradition and make it work in a regular person’s kitchen with regular person skills.
The best part? Once you get the hang of it (and you will, even if it takes a few tries like it did for me), you’ll have people begging you to make them for every holiday, birthday, and random Tuesday.
So go ahead, give it a shot. And when you inevitably text me asking why your chocolate looks weird or your peanut butter layer is uneven, just remember—we’ve all been there. The important thing is that they still taste amazing.
Happy candy making! (And may your chocolate cooperate better than mine did the first dozen times.)
Buckeye Fudge Candy Recipe
This buckeye fudge candy recipe combines creamy peanut butter and rich chocolate coating to create Ohio's beloved treat. Easy homemade version with troubleshooting tips and real kitchen experience.
Ingredients
- 1 cup creamy peanut butter
- 6 tablespoons butter, softened
- 1 teaspoon vanilla extract
- 3 cups powdered sugar
- 1/4 teaspoon salt
- 2 cups semi-sweet chocolate chips
- 2 tablespoons coconut oil or shortening
Instructions
-
Step 1Mix peanut butter, softened butter, vanilla, and salt in a large bowl until smooth and creamy, about 2 minutes.
-
Step 2Gradually add powdered sugar, one cup at a time, mixing between each addition until thick enough to roll into balls.
-
Step 3Line a baking sheet with parchment paper.
-
Step 4Roll mixture into 1-inch balls and place on prepared baking sheet.
-
Step 5Freeze peanut butter balls for at least 30 minutes until firm.
-
Step 6Melt chocolate chips and coconut oil in microwave-safe bowl in 30-second intervals, stirring between each, until smooth.
-
Step 7Using a toothpick, dip each frozen peanut butter ball about 3/4 of the way into melted chocolate, leaving small circle of peanut butter showing at top.
-
Step 8Place dipped candies back on parchment paper and let set at room temperature for 30 minutes until chocolate is firm.
Want to see how yours turned out? Drop a comment below! I love seeing other people’s buckeye adventures, especially the beautiful disasters. We’ve all had them.

I’ve always found peace in the kitchen—it’s where I go to unwind, experiment, and reconnect. I started this blog because I wanted to share that feeling with others. My cooking journey started in a tiny apartment kitchen, with a second-hand skillet and a lot of trial and error.
Since then, I’ve learned that the best meals aren’t the most complicated—they’re the ones made with love (and maybe a little butter). Whether you’re a beginner or a kitchen pro, I hope you’ll feel right at home here.

