
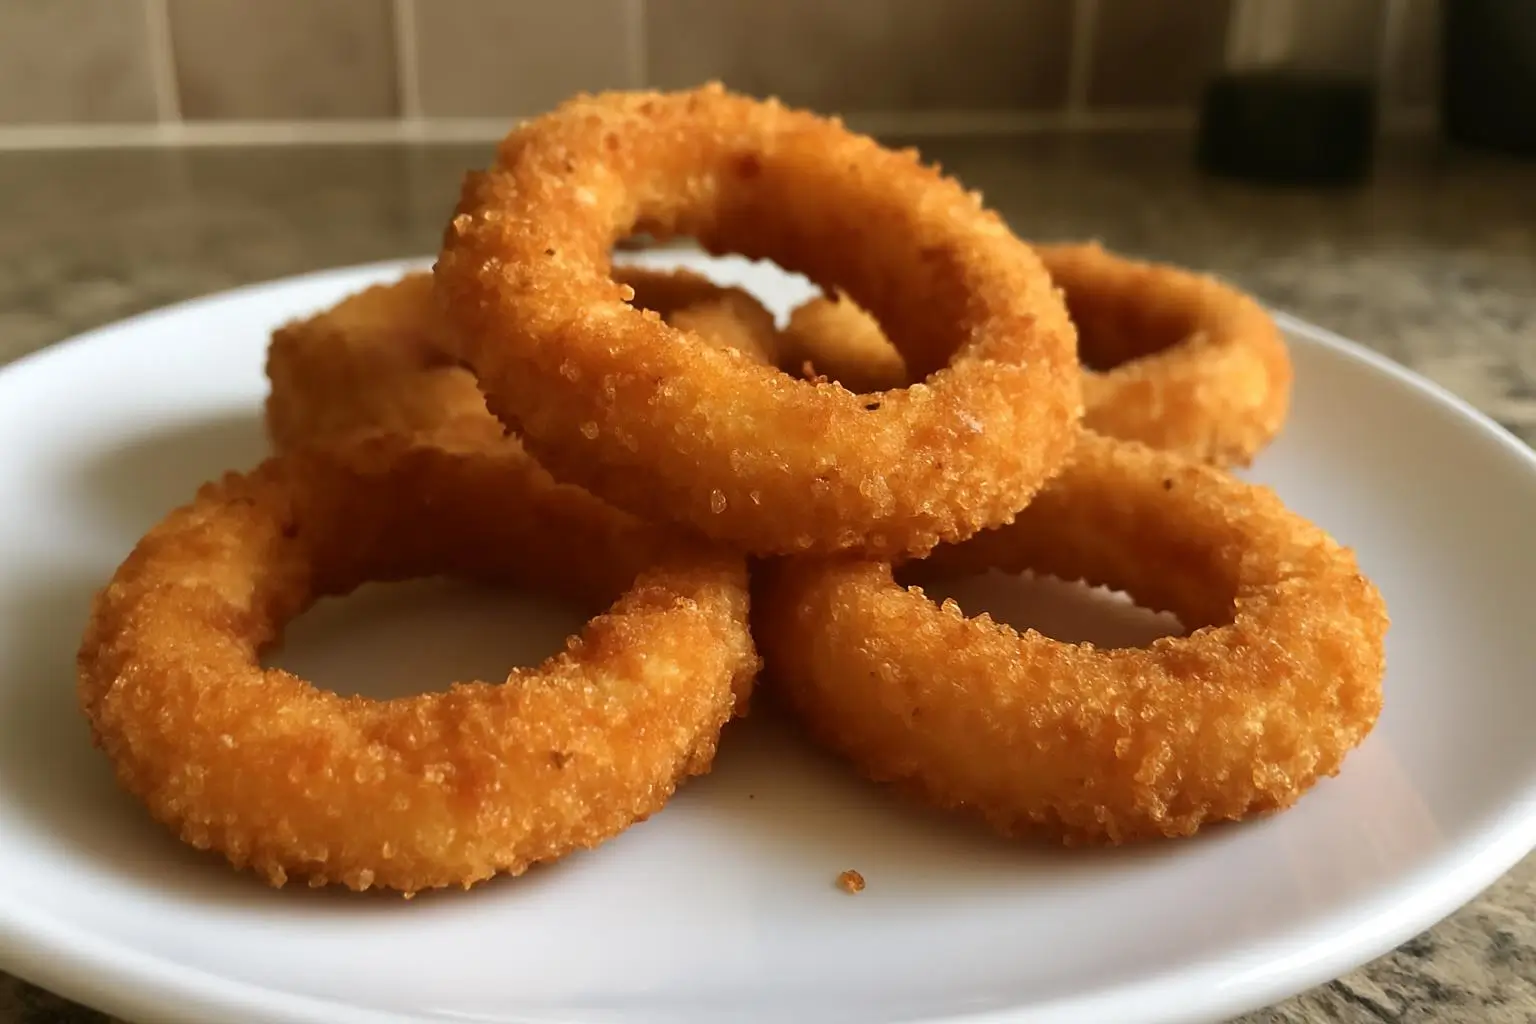
The Best Crispy Homemade Onion Rings (After Three Epic Fails)
Okay, so I messed this up three times before getting it right. And I’m talking spectacular failures here – the kind where you’re scraping charcoal off your baking sheet while the smoke alarm screams at you. But hey, fourth time’s the charm, right?
Look, I’m gonna be honest with you. I started making these onion rings because my local diner closed down (thanks, pandemic), and I was having serious withdrawal symptoms. Their onion rings were crispy, golden, and absolutely the perfect side dish. Mine? Well, let’s just say my first attempt looked like sad, soggy doorstops.
Table of Contents
Why I’m Obsessed With These Things
My neighbor Sarah keeps asking for this recipe every time she smells them cooking. Last week she literally knocked on my door at 7 PM asking if I had extras. I mean, who does that? But honestly, I totally get it now.
The thing about onion rings is they’re supposed to be crispy on the outside and sweet on the inside. Sounds simple, right? Wrong. So wrong. The amount of times I’ve ended up with either rubber bands or grease-soaked mush is embarrassing.
But here’s what I figured out after way too many attempts: it’s all about the double coating and getting your oil temperature just right. Also – and this is crucial – you cannot rush this process. Trust me, I tried.
What You’ll Need (And My Shopping Disasters)
For the Onions:
- 2 large sweet onions (Vidalia if you can find them, but regular yellow works fine)
- I always buy an extra onion because somehow I always mess up cutting the first one
For the Coating:
- 1 cup all-purpose flour
- 1 cup buttermilk (don’t even think about using regular milk – learned this the hard way)
- 2 large eggs
- 1 cup panko breadcrumbs
- 1/2 cup regular breadcrumbs (the combo is key here)
- 1 teaspoon garlic powder
- 1 teaspoon onion powder (I know, onion powder on onions sounds weird, but it works)
- 1/2 teaspoon paprika
- 1/2 teaspoon cayenne pepper (optional, but I’m obsessed with a little heat)
- Salt and black pepper to taste
For Frying:
- Vegetable oil for deep frying (about 6 cups)
- Or you can use peanut oil if you’re feeling fancy
Good luck finding decent onions this time of year, by the way. I swear the grocery store ones are getting smaller and more expensive every week.
The Prep Work (Don’t Skip This!)
First things first – cut your onions into thick rings, about 1/2 inch wide. Here’s where I messed up the first time: I made them too thin thinking they’d cook faster. Disaster. Complete disaster. They basically disintegrated in the oil.
Separate all the rings and discard the tiny inner ones (or save them for something else, I guess). You want rings that are substantial enough to hold up to the coating process.
Now here’s the thing I wish someone had told me earlier – soak these bad boys in buttermilk for at least 30 minutes. I know, I know, it seems like an extra step you don’t need. But seriously, it makes them so much more tender and helps the coating stick better.
The Secret Double-Coating Method
Okay, this is where the magic happens. Set up three stations:
Station 1: Bowl with 1 cup flour mixed with salt, pepper, and half the spices Station 2: Bowl with buttermilk and beaten eggs Station 3: Bowl with panko, regular breadcrumbs, and remaining spices mixed together
The process goes like this: flour, buttermilk mixture, then breadcrumb mixture. But – and this is important – do it twice. I’m serious. Flour, buttermilk, breadcrumbs, then back to buttermilk, then breadcrumbs again.
I thought this was overkill when I first read about it online. Some recipe blogger was going on and on about double coating, and I was like “whatever, that’s just extra work.” But then I tried it, and oh my god. Game changer.
Let them sit on a wire rack for about 15 minutes after coating. This helps everything set up properly. I learned this after coating a whole batch and immediately throwing them in the oil, only to watch all my beautiful coating fall off. So frustrating.
The Frying Part (Where Everything Can Go Wrong)
Heat your oil to 375°F. And I mean actually use a thermometer – don’t just guess. I spent way too many batches guessing temperatures like some kind of oil whisperer. Spoiler alert: I’m not.
Here’s what happens at different temperatures (learned through painful experience):
- Too cold: Greasy, soggy rings that absorb oil like sponges
- Too hot: Burnt outside, raw inside (been there, done that, ordered pizza)
- Just right: Golden, crispy perfection
Fry them in small batches – maybe 4-5 rings at a time. Don’t overcrowd the pot unless you want the temperature to drop and everything to turn gross. Each batch takes about 2-3 minutes until they’re golden brown.
Actually, you know what? Let me tell you about my second attempt. I got impatient and dumped like 15 rings in at once. The oil temperature plummeted, and I ended up with what can only be described as onion-flavored sponges. My husband took one bite and just… walked away. Didn’t even say anything. That’s when you know it’s bad.
The Moment of Truth
When they come out of the oil, put them on paper towels immediately. Season with salt while they’re still hot – the salt sticks better that way. I use more salt than probably necessary, but hey, we’re not exactly going for health food here.
The first bite is always the test. If you hear that satisfying crunch followed by the sweet onion flavor, you’ve nailed it. If it’s soggy or the coating slides off… well, there’s always next time.
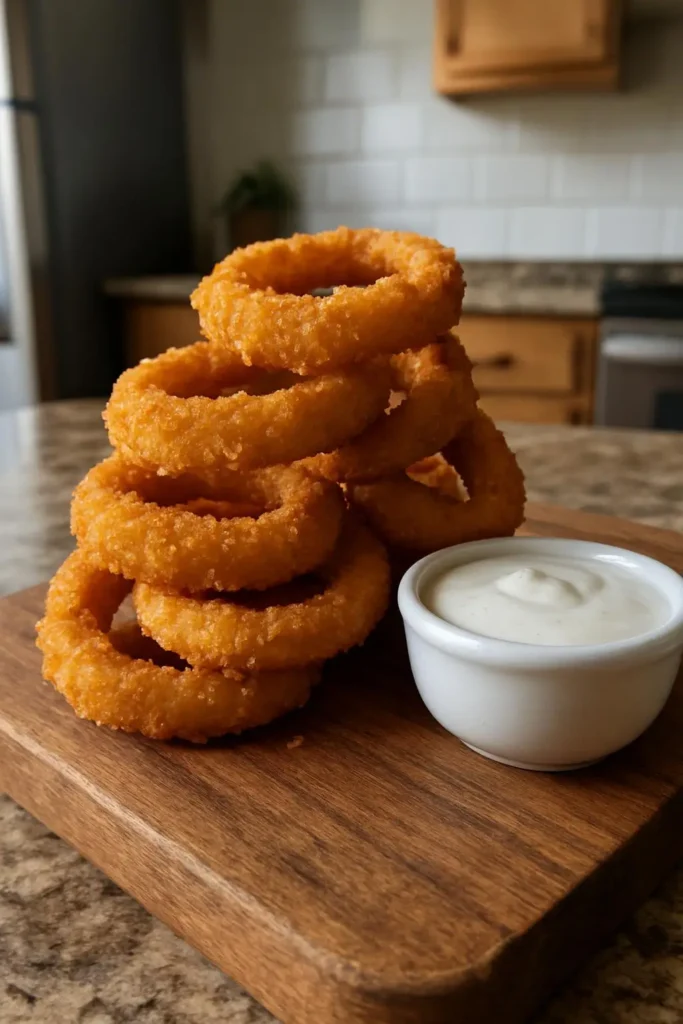
What I Serve These With
Ranch dressing is obvious, but have you tried them with spicy mayo? Mix some mayo with sriracha and a squeeze of lime. My 8-year-old refuses to eat anything green, but somehow demolishes these with spicy mayo. Kids are weird.
Also great with:
- Ketchup (classic for a reason)
- BBQ sauce (surprisingly good)
- Honey mustard (my personal favorite)
- Just plain salt (sometimes simple is best)
Things I Wish I’d Known From the Start
Don’t make these on a humid day. The coating gets weird and doesn’t crisp up properly. Found this out during a particularly sticky summer day when nothing would cooperate.
If you don’t have buttermilk, you can make your own by adding a tablespoon of lemon juice to regular milk. Let it sit for 10 minutes until it gets thick and tangy. Works in a pinch, though real buttermilk is definitely better.
The oil can be reused if you strain it through a fine mesh strainer. I usually get 2-3 uses out of it before it starts tasting funky.
And here’s something random – these are actually pretty good reheated in the oven the next day. Just stick them on a baking sheet at 400°F for about 5 minutes. They won’t be quite as crispy as fresh, but they’re still decent.
My Final Thoughts
Is this the fanciest recipe ever? Nope. Will it impress people at dinner parties? Probably not. But is it exactly what you want when you’re craving crispy, golden onion rings on a random Tuesday night? Absolutely.
The whole process takes about an hour from start to finish, which isn’t too bad considering you’re basically making restaurant-quality food at home. Plus, you know exactly what’s going into them – no weird preservatives or mystery ingredients.
I’ve made these probably 20 times now, and they’re pretty foolproof once you get the hang of it. Even my disaster-prone kitchen adventures can’t mess these up anymore.
Seriously, try this and tell me what you think. Are yours crispier than mine? Did you add any secret ingredients? I’m always looking for ways to make them even better.
Happy cooking! (And may your smoke alarms stay quiet 😊)
Crispy Homemade Onion Rings
Perfect crispy homemade onion rings with a double-coating technique for restaurant-quality results. Golden, crunchy exterior with sweet tender onions inside.
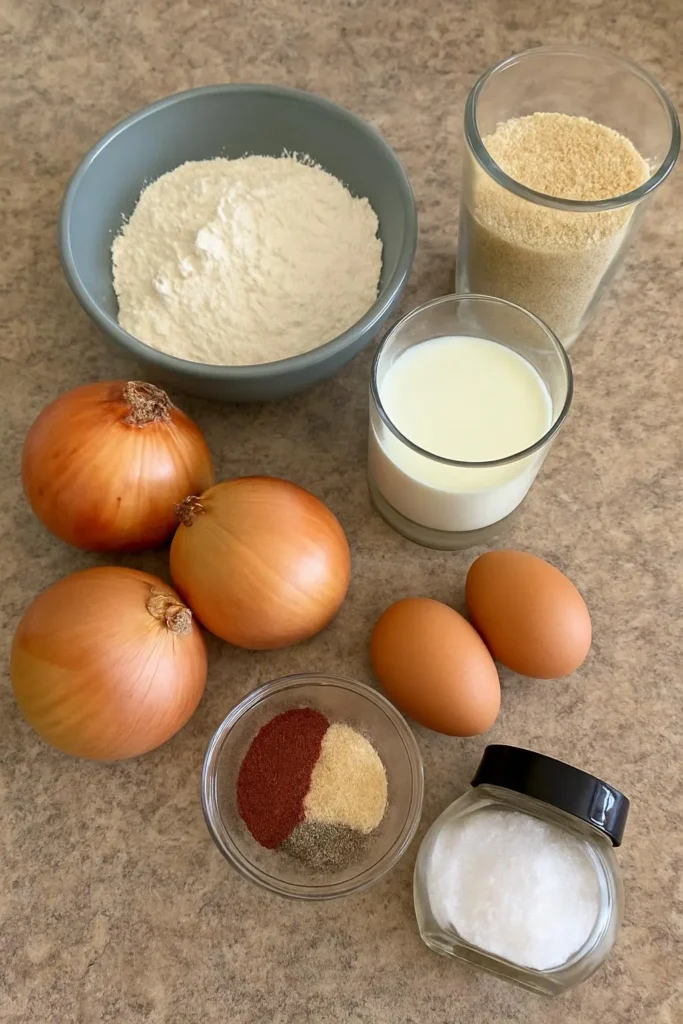
Ingredients
- 2 large sweet onions
- 1 cup all-purpose flour
- 1 cup buttermilk
- 2 large eggs
- 1 cup panko breadcrumbs
- 1/2 cup regular breadcrumbs
- 1 teaspoon garlic powder
- 1 teaspoon onion powder
- 1/2 teaspoon paprika
- 1/2 teaspoon cayenne pepper (optional)
- Salt and black pepper to taste
- 6 cups vegetable oil for frying
Instructions
-
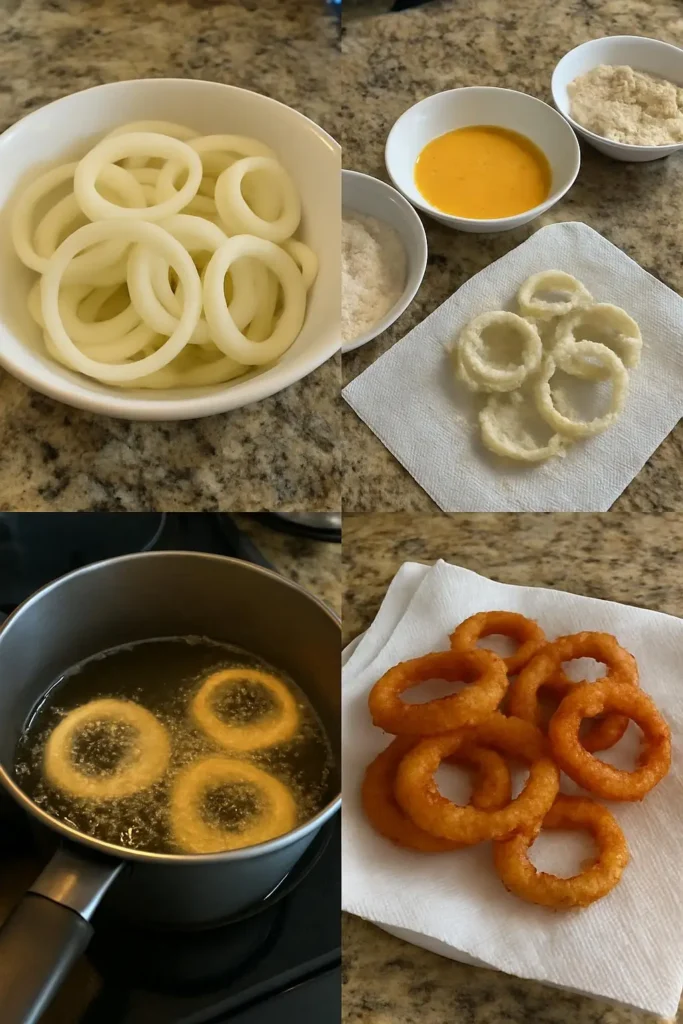
Step 1Cut onions into 1/2 inch thick rings and separate. Soak in buttermilk for 30 minutes.
-
Step 2Set up three coating stations: flour with spices, buttermilk with beaten eggs, and breadcrumb mixture.
-
Step 3Double coat each ring: flour, buttermilk mixture, breadcrumbs, then buttermilk again, then breadcrumbs.
-
Step 4Let coated rings rest on wire rack for 15 minutes to set coating.
-
Step 5Heat oil to 375°F using a thermometer.
-
Step 6Fry rings in small batches of 4-5 for 2-3 minutes until golden brown.
-
Step 7Drain on paper towels and season with salt immediately while hot.
-
Step 8Serve immediately with ranch dressing, ketchup, or preferred dipping sauce.

I’ve always found peace in the kitchen—it’s where I go to unwind, experiment, and reconnect. I started this blog because I wanted to share that feeling with others. My cooking journey started in a tiny apartment kitchen, with a second-hand skillet and a lot of trial and error.
Since then, I’ve learned that the best meals aren’t the most complicated—they’re the ones made with love (and maybe a little butter). Whether you’re a beginner or a kitchen pro, I hope you’ll feel right at home here.